其实代码没有问题,但是我们忽略了一个问题,就是在正常的开发中,肯定是遇到过这样的情况,我们频繁的有客户端链接,断开连接,需要统一的管理这些链接,那么应该如何管理呢。其实可以声明一个类去管理这些链接。接下来我们看下该如何优化。
一、优化测试接口方法
1.定义链接管理类,处理所有链接
"""
websocket 链接管理
"""from typing import List, Dictfrom starlette.websockets import WebSocketclass ConnectionManager:def __init__(self):"""存放链接"""self.active_connections: List[Dict[str, WebSocket]] = []async def connect(self, user: str, ws: WebSocket):"""链接"""self.active_connections.append({"user": user, "ws": ws})async def disconnect(self, user: str, ws: WebSocket):"""断开链接,移除"""self.active_connections.remove({"user": user, "ws": ws})
2.修改应用代码
我们增加了链接,移除链接的操作,那么对应修改下代码
from connection_tool import ConnectionManager
from starlette.websockets import WebSocketDisconnect
ws_manager = ConnectionManager()@app.websocket("/items/ws")
async def websocket_endpoint(websocket: WebSocket,cookie_or_token: str = Depends(get_cookie_or_token),
):await websocket.accept()await ws_manager.connect(cookie_or_token, websocket)try:while True:data = await websocket.receive_text()await websocket.send_text(f"Message is: {data}")except WebSocketDisconnect as e:await ws_manager.disconnect(cookie_or_token, websocket)
3.测试
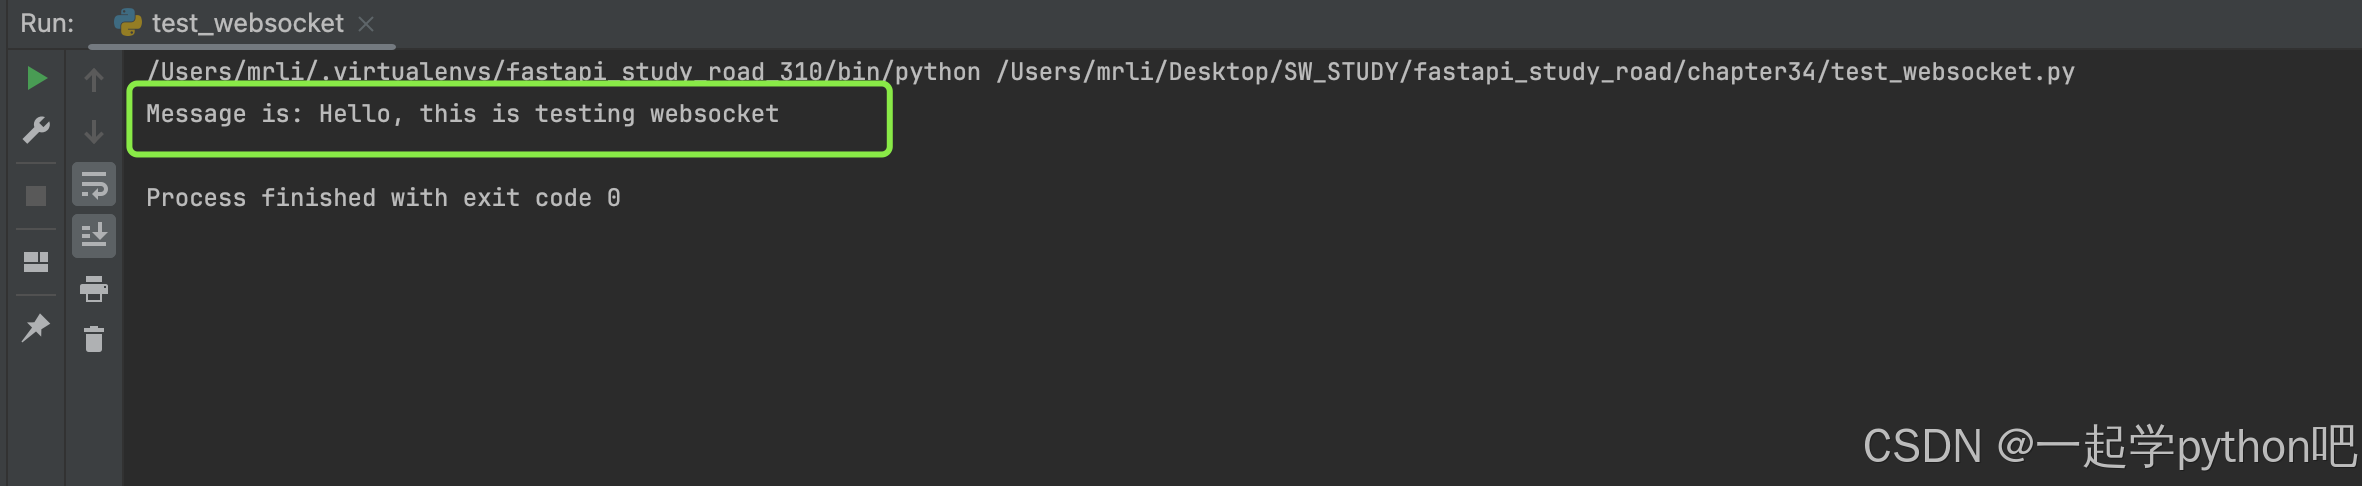
这样我们在链接处理的时候就可以正常处理了。之前报错是因为我们没有正常的关闭链接导致的,那么我们再测试一下
"""
测试websockets
"""from fastapi.testclient import TestClient
from main import appdef test_websocket():client = TestClient(app)with client.websocket_connect("/items/ws?token=fake-token") as websocket:websocket.send_text("Hello, this is testing websocket")data = websocket.receive_text()print(data)assert str(data) == f"Message is: Hello, this is testing websocket"if __name__ == '__main__':test_websocket()
此时,发现代码不会再报错
二、增加测试用例并优化
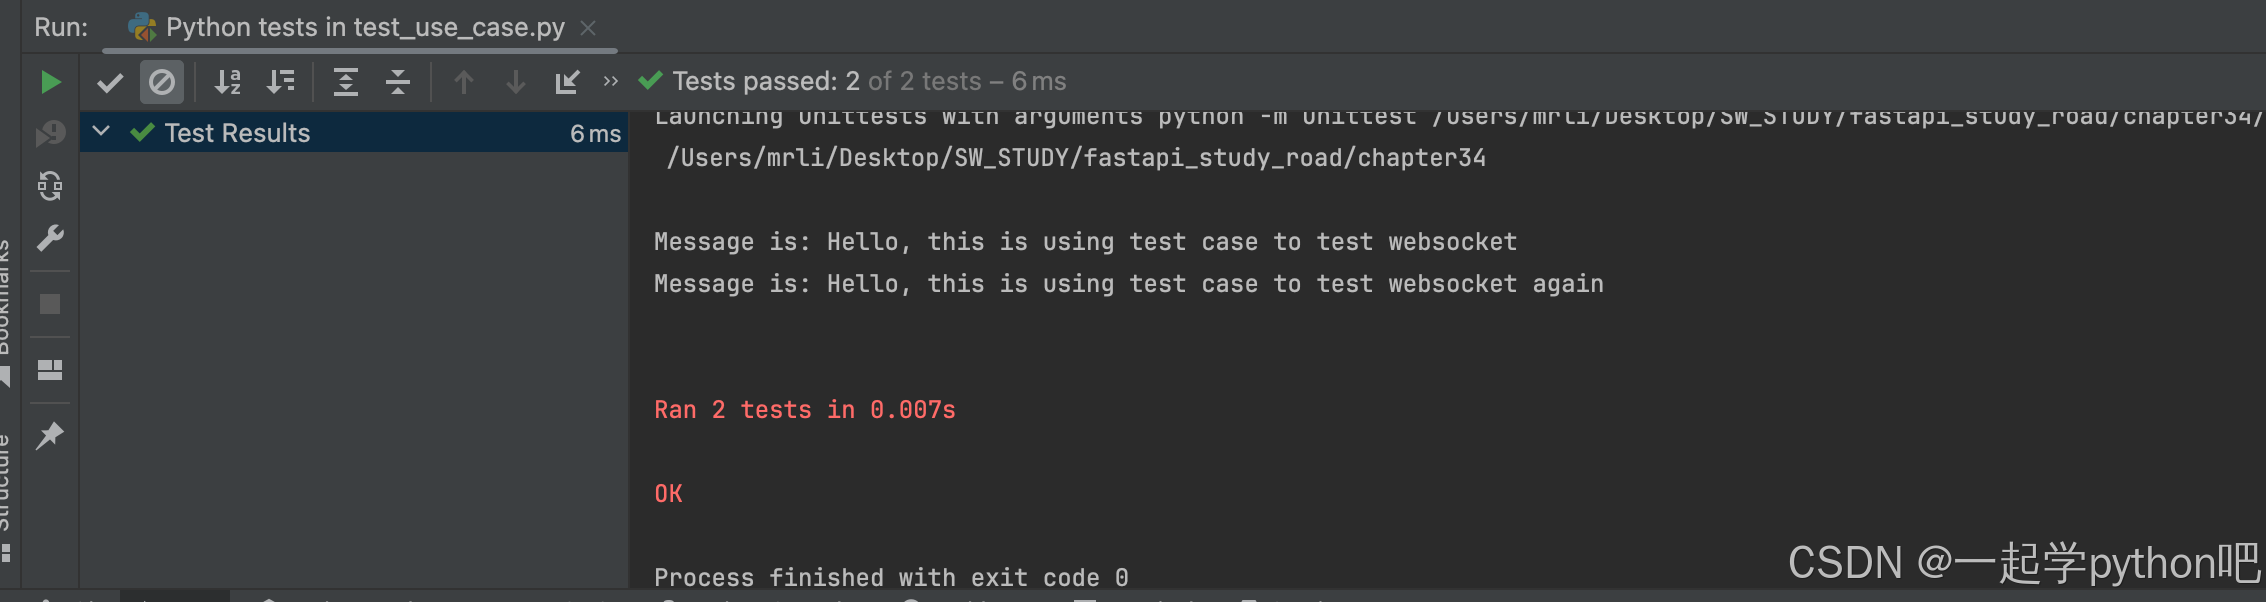
1.增加用例代码
import unittestfrom fastapi.testclient import TestClientfrom main import appclass FastApiTestWeb(unittest.TestCase):def setUp(self) -> None:self.client = TestClient(app)def tearDown(self) -> None:self.client = Nonedef test_websocket(self):with self.client.websocket_connect("/items/ws?token=fake-token") as websocket:websocket.send_text("Hello, this is using test case to test websocket")data = websocket.receive_text()print(data)assert str(data) == "Message is: Hello, this is using test case to test websocket"def test_websocket_again(self):with self.client.websocket_connect("/items/ws?token=fake-token") as websocket:websocket.send_text("Hello, this is using test case to test websocket again")data = websocket.receive_text()print(data)assert str(data) == "Message is: Hello, this is using test case to test websocket again"if __name__ == '__main__':unittest.main()
2.执行用例
这样我们的一个测试用例就更加的完整了。我们执行正常是没有报错的
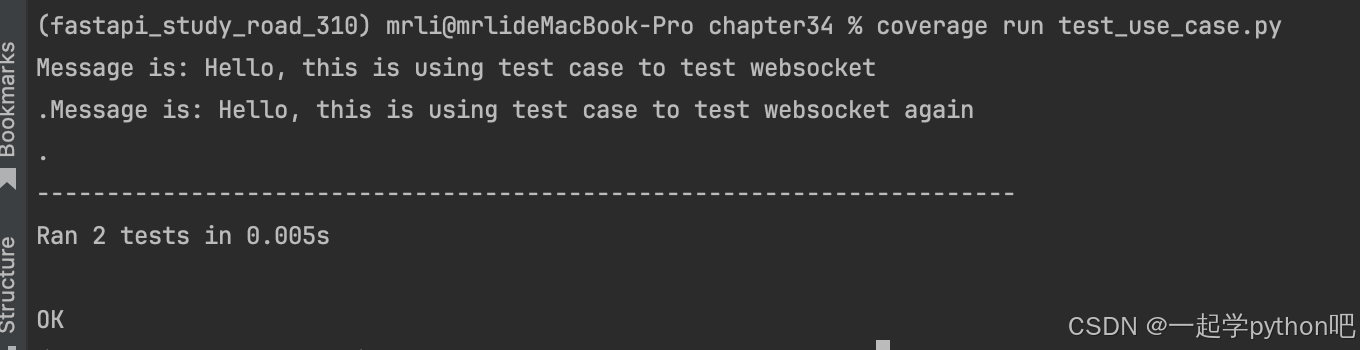
3. 查看代码的覆盖率
pip install coverage
我们想要看下代码的覆盖率,应该如何看呢。我是用的coverage。
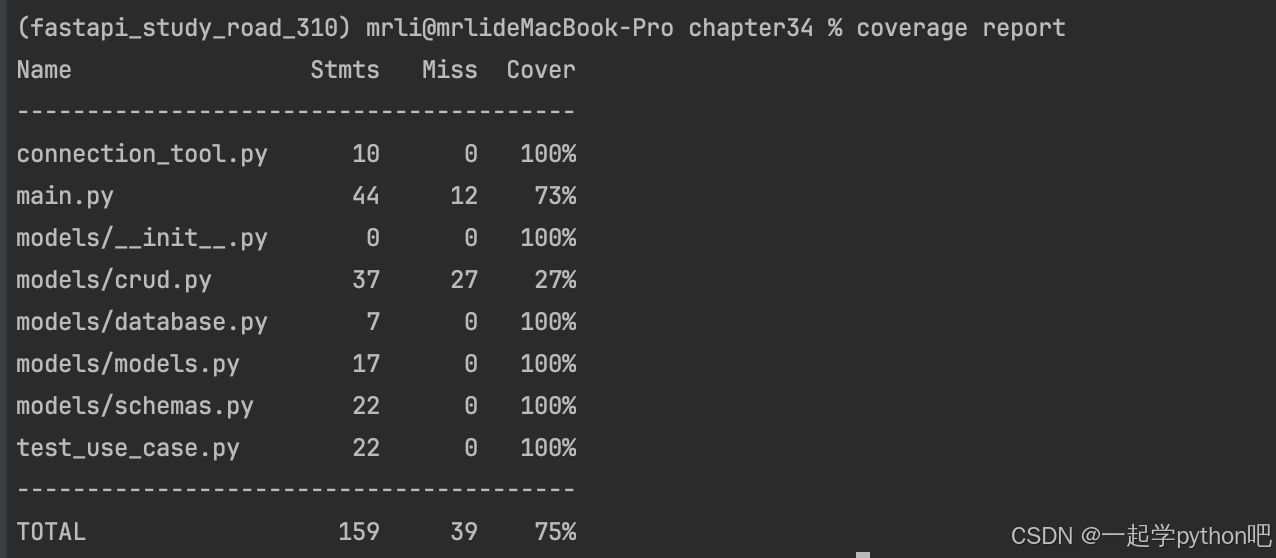
然后再report
我们想看html测试报告,可以运行下 coverage html。

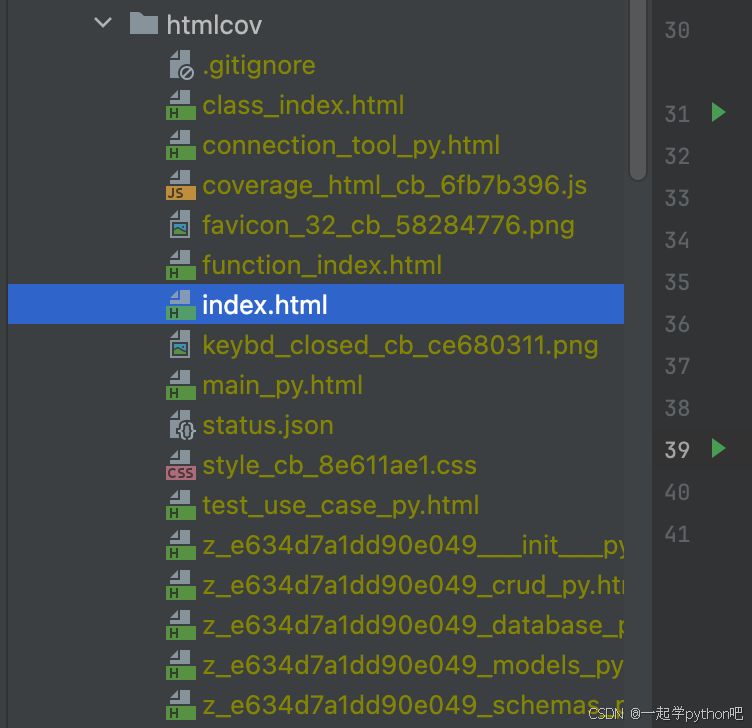
然后打开index.html
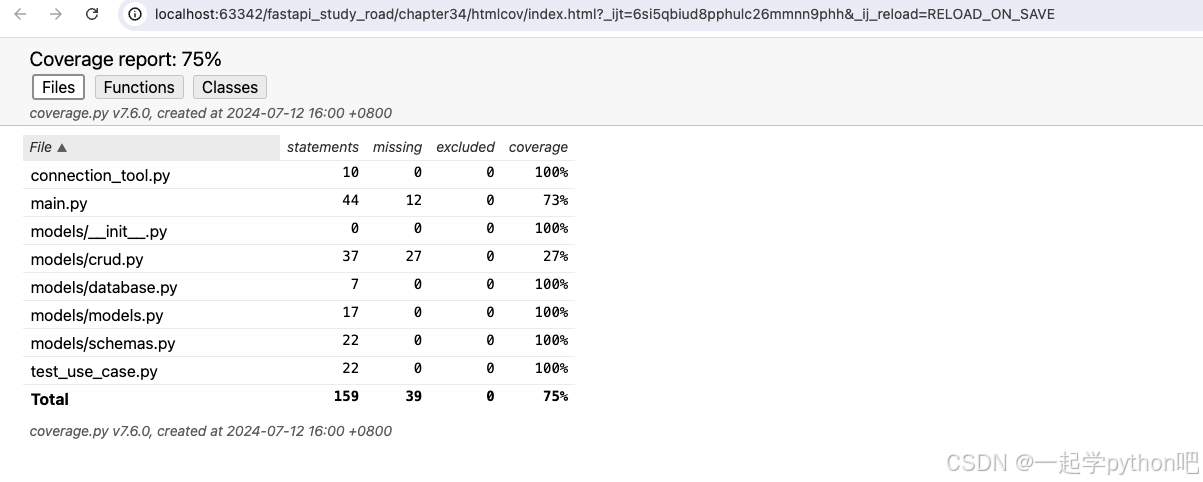
因为我的main.py还有其他的方法,我们还需要点进去看我们对应方法的覆盖率。
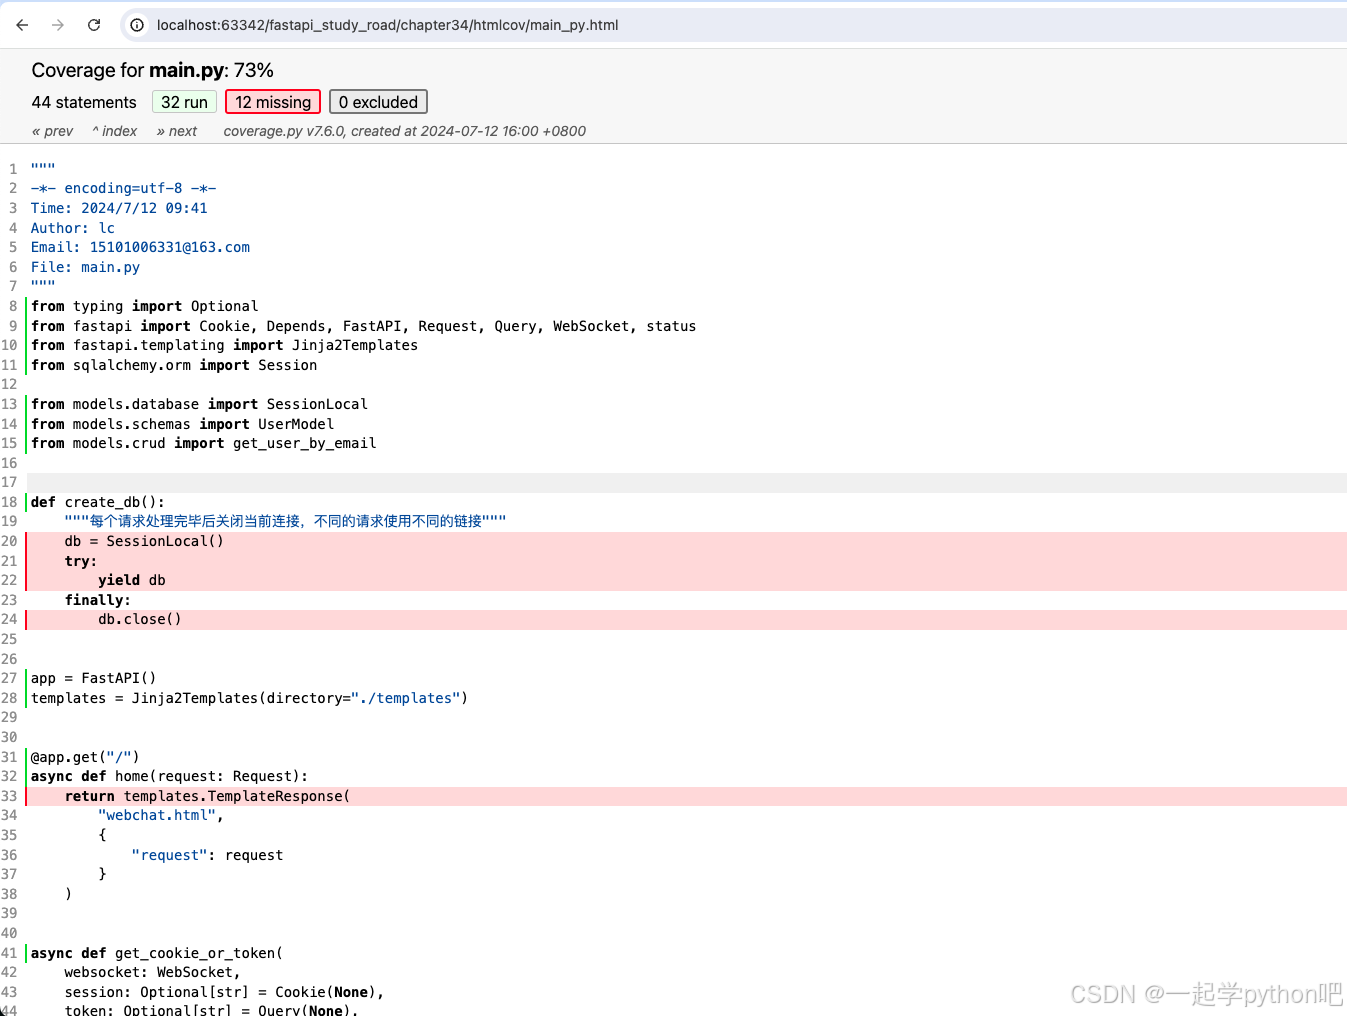
如果想要将覆盖率都达到100%,还需要针对其他方法增加测试用例。
到这里,我们对于WebSockets接口测试完毕,但是如果我们想实现上线通知,下线通知,如何实现呢?见下一节。