6月13日,Stability AI 正式开源20亿参数版本的Stable Diffusion 3 Medium。本文将在本地部署 SD3,GPU配置如下 GPU 2080TI / 22G
安装依赖
修改 WORKSPACE 位置信息,安装ComfyUI
# #@title Environment Setupfrom pathlib import PathOPTIONS = {}
UPDATE_COMFY_UI = True  #@param {type:"boolean"}
INSTALL_COMFYUI_MANAGER = True  #@param {type:"boolean"}
INSTALL_ANIMATEDIFF = True  #@param {type:"boolean"}
INSTALL_CUSTOM_NODES_DEPENDENCIES = True  #@param {type:"boolean"}
OPTIONS['UPDATE_COMFY_UI'] = UPDATE_COMFY_UI
OPTIONS['INSTALL_COMFYUI_MANAGER'] = INSTALL_COMFYUI_MANAGER
OPTIONS['INSTALL_ANIMATEDIFF'] = INSTALL_ANIMATEDIFF
OPTIONS['INSTALL_CUSTOM_NODES_DEPENDENCIES'] = INSTALL_CUSTOM_NODES_DEPENDENCIESWORKSPACE = "/notebook/SD/ComfyUI"%cd /notebook/SD/![ ! -d $WORKSPACE ] && echo -= Initial setup ComfyUI =- && git clone https://github.com/comfyanonymous/ComfyUI%cd $WORKSPACE!echo $WORKSPACEif OPTIONS['UPDATE_COMFY_UI']:!echo "-= Updating ComfyUI =-"!git pull!pip install -r requirements.txt
下载模型权重
#@markdown ###Download standard resources### SDXL
### I recommend these workflow examples: https://comfyanonymous.github.io/ComfyUI_examples/sdxl/OPTIONS = {}#@markdown **Models**!wget -c "https://modelscope.cn/api/v1/models/AI-ModelScope/stable-diffusion-3-medium/repo?Revision=master&FilePath=sd3_medium.safetensors" -P ./models/checkpoints/
下载 Text Encoder
#@markdown **clip**!wget -c "https://modelscope.cn/api/v1/models/AI-ModelScope/stable-diffusion-3-medium/repo?Revision=master&FilePath=text_encoders%2Fclip_g.safetensors" -P ./models/clip/
!wget -c "https://modelscope.cn/api/v1/models/AI-ModelScope/stable-diffusion-3-medium/repo?Revision=master&FilePath=text_encoders%2Fclip_l.safetensors" -P ./models/clip/
!wget -c "https://modelscope.cn/api/v1/models/AI-ModelScope/stable-diffusion-3-medium/repo?Revision=master&FilePath=text_encoders%2Ft5xxl_fp16.safetensors" -P ./models/clip/
!wget -c "https://modelscope.cn/api/v1/models/AI-ModelScope/stable-diffusion-3-medium/repo?Revision=master&FilePath=text_encoders%2Ft5xxl_fp8_e4m3fn.safetensors" -P ./models/clip/
#通过cloudflared启动 ComfyUI ,
!wget "https://modelscope.oss-cn-beijing.aliyuncs.com/resource/cloudflared-linux-amd64.deb"
!dpkg -i cloudflared-linux-amd64.deb
启动 ComfyUI 服务器
%cd /notebook/SD/ComfyUI
import subprocess
import threading
import time
import socket
import urllib.requestdef iframe_thread(port):while True:time.sleep(0.5)sock = socket.socket(socket.AF_INET, socket.SOCK_STREAM)result = sock.connect_ex(('127.0.0.1', port))if result == 0:breaksock.close()print("\nComfyUI finished loading, trying to launch cloudflared (if it gets stuck here cloudflared is having issues)\n")p = subprocess.Popen(["cloudflared", "tunnel", "--url", "http://127.0.0.1:{}".format(port)], stdout=subprocess.PIPE, stderr=subprocess.PIPE)for line in p.stderr:l = line.decode()if "trycloudflare.com " in l:print("This is the URL to access ComfyUI:", l[l.find("http"):], end='')#print(l, end='')threading.Thread(target=iframe_thread, daemon=True, args=(8891,)).start()
!python main.py --dont-print-server  --listen "0.0.0.0"  --port 8891
运行
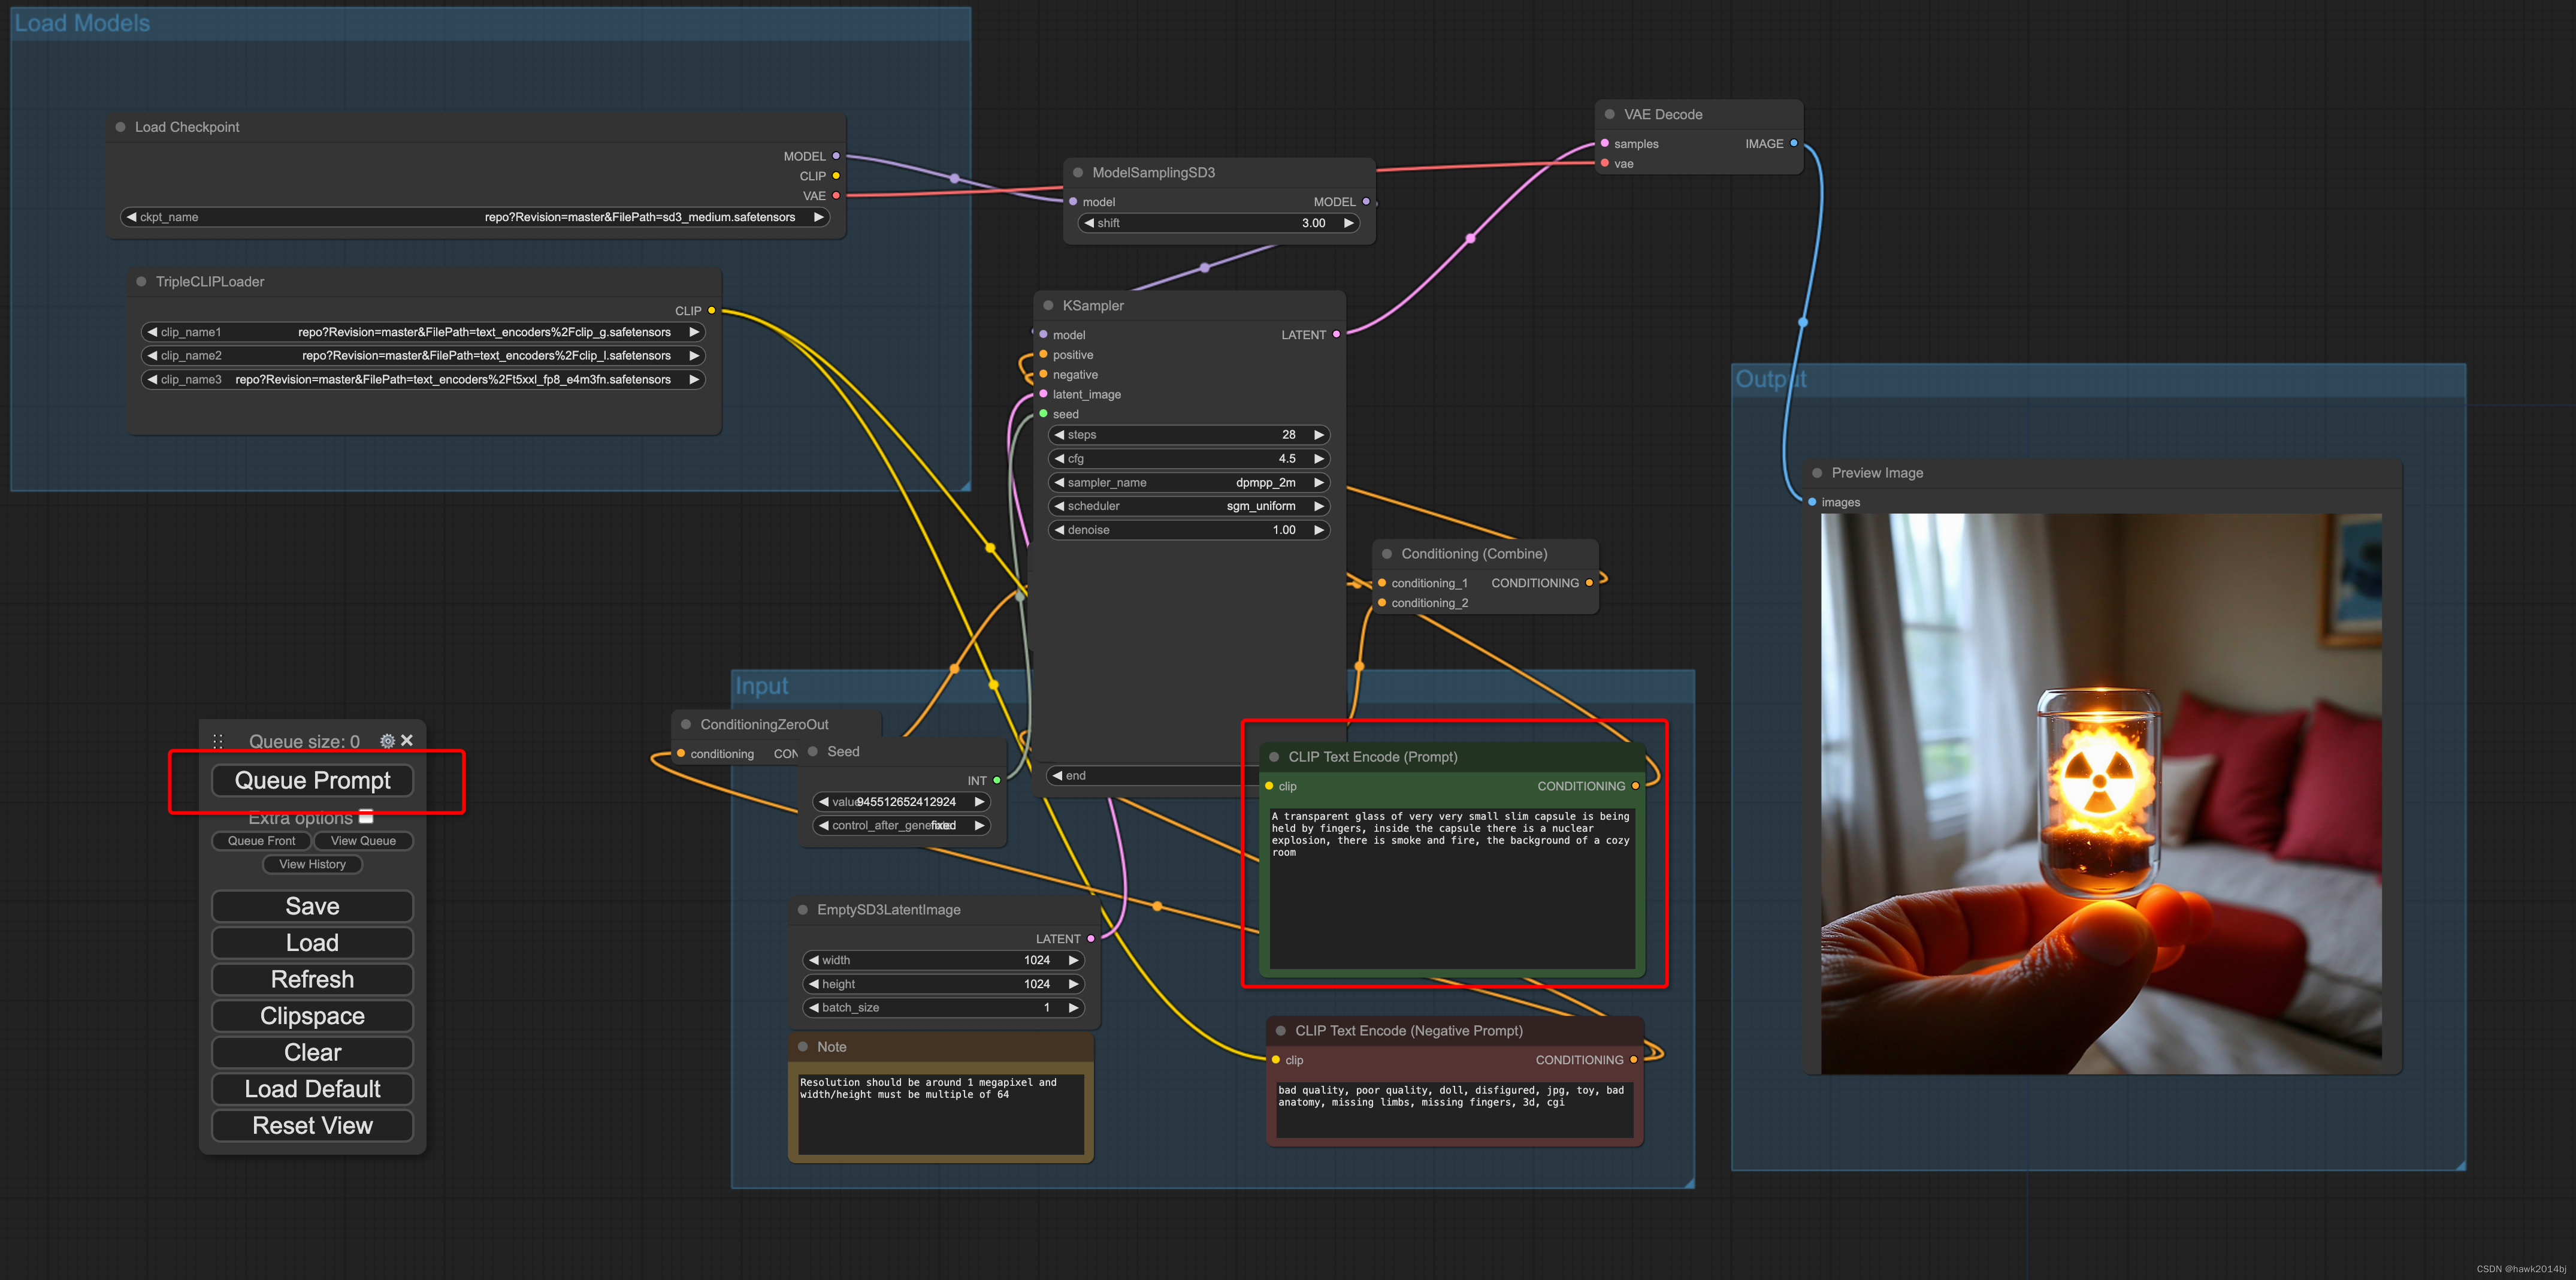
服务器启动之后,导入工作流配置
- 导入配置文件,配置文件位置在 https://www.modelscope.cn/models/AI-ModelScope/stable-diffusion-3-medium/files,comfy_example_workflows/sd3_medium_example_workflow_basic.json
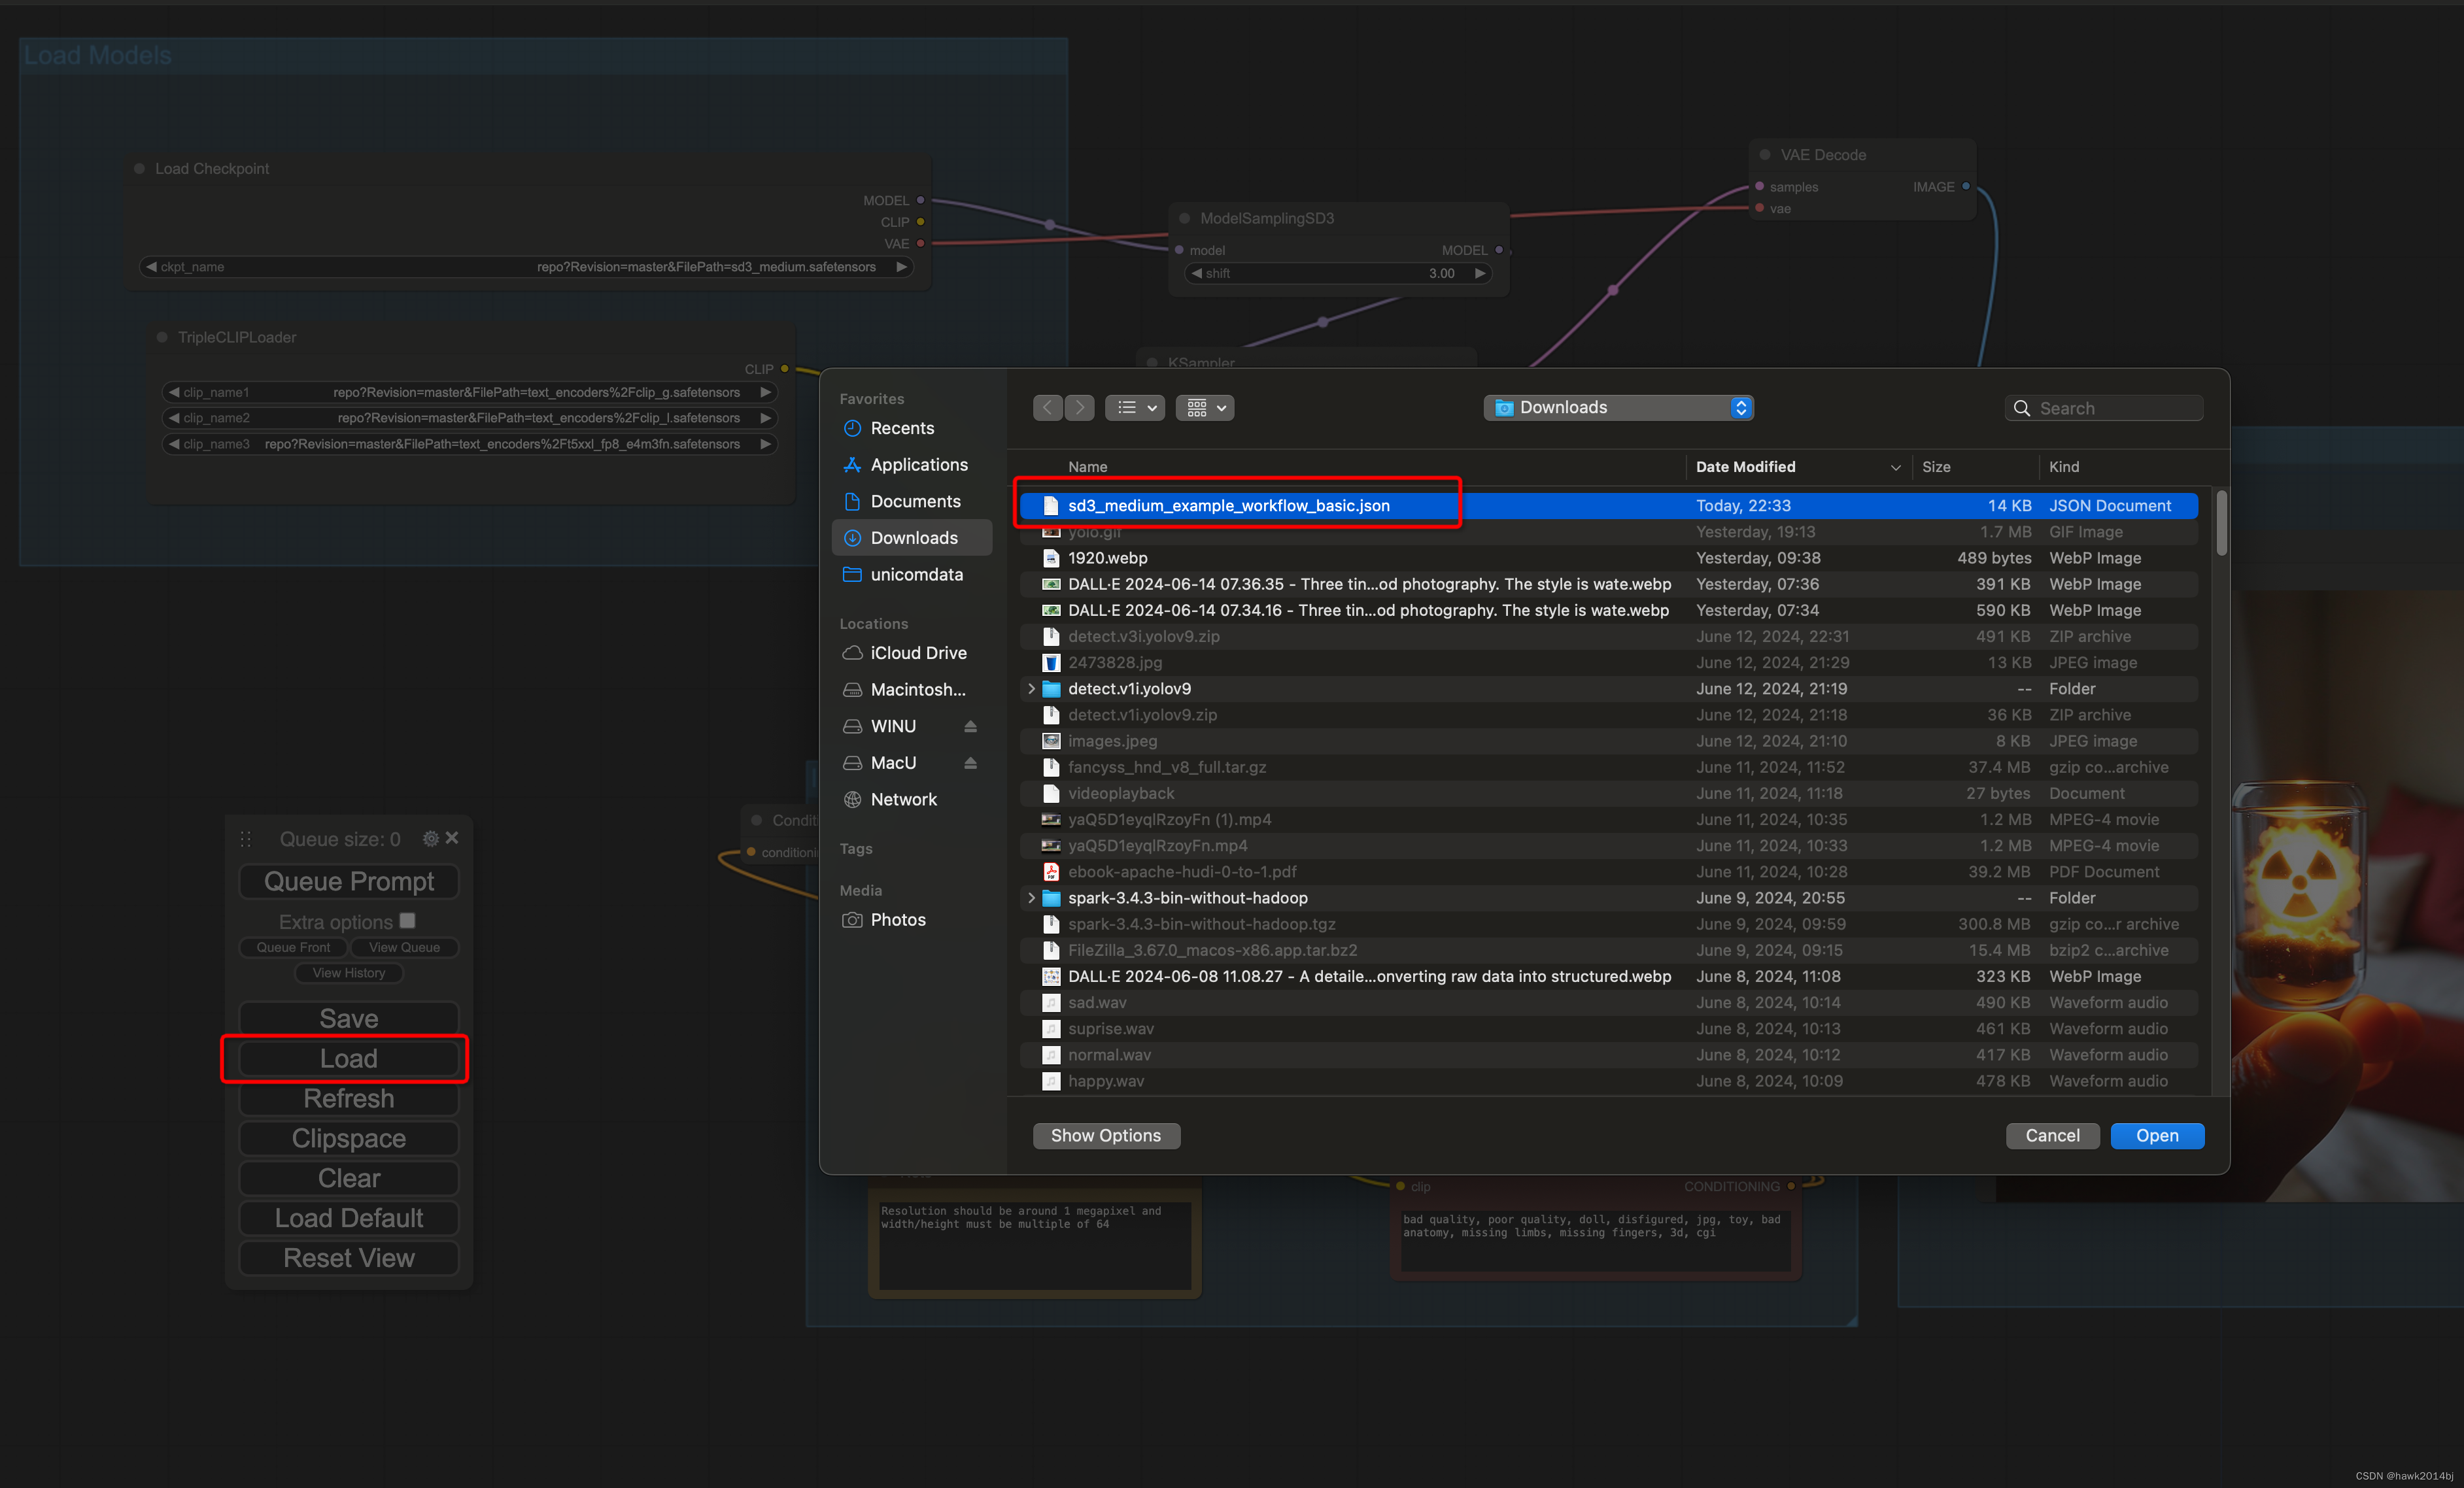
- 输入提示词,点击 Queue Prompt 生成图片。
总结
根据以下提示词,比较ChatGPT、Google 和 SD 的差距。
A transparent glass of very very small slim capsule is being held by fingers, inside the capsule there is a nuclear explosion, there is smoke and fire, the background of a cozy room
ChatGPT

Google Gemini

SD3
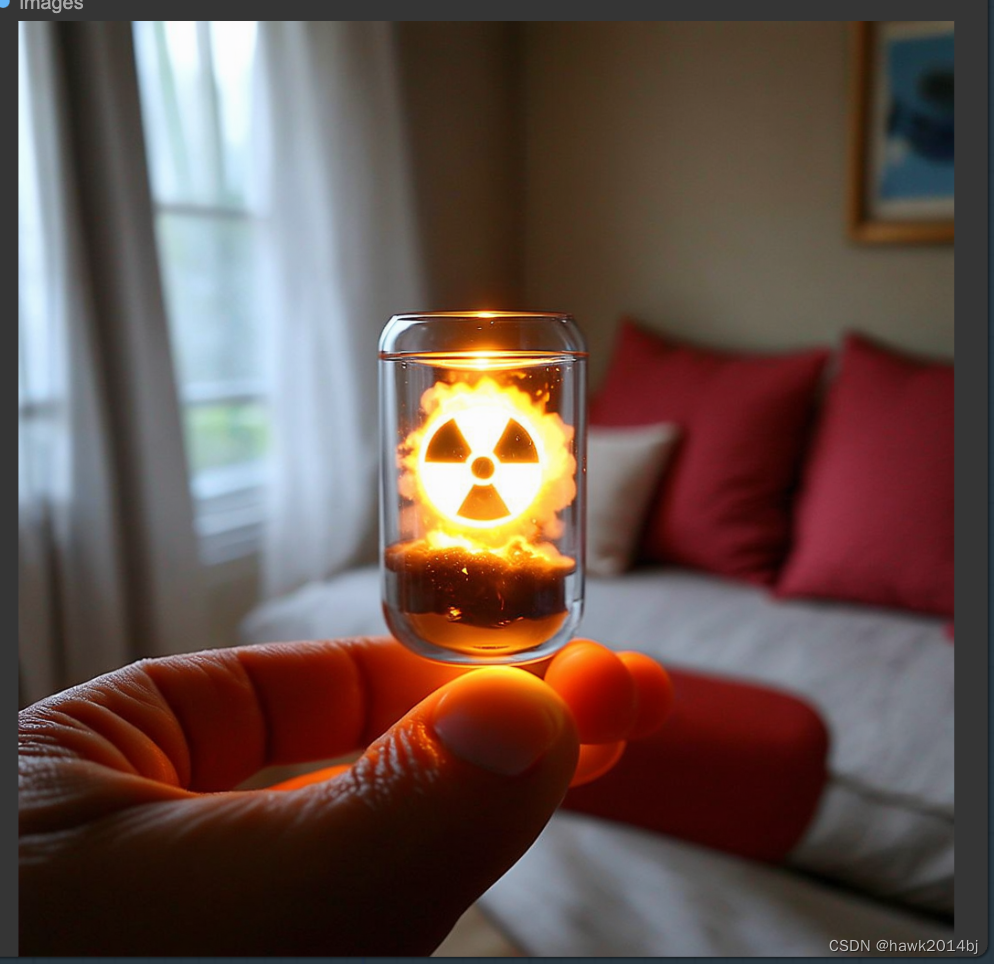
ChatGPT最好,比较细腻,其次是Gemini ,SD 稍微差一些,SD的好处是可以私有化部署,可以根据需要进行私有数据训练,SD 生成速度 2.1 it/s。