读取图片和网络摄像头
1.1 图片读取
import cv2
img = cv2.imread("Resources/jty.jpg")
cv2.namedWindow("Output", cv2.WINDOW_NORMAL)
cv2.resizeWindow("Output", 600, 840)
cv2.imshow("Output",img)
cv2.waitKey(0)

1.2 视频读取
1.2.1 读取视频文件
import cv2
cap = cv2.VideoCapture("Resources/test_video.mp4")
while True:success,img = cap.read()cv2.imshow("Video",img)if cv2.waitKey(1) & 0xFF == ord('q'):break

1.2.2 读取网络摄像头
import cv2
cap = cv2.VideoCapture(0)
cap.set(3,640)
cap.set(4,480)
cap.set(10,100)while True:success,img = cap.read()cv2.imshow("Video",img)if cv2.waitKey(1) & 0xFF == ord('q'):break
OpenCV基础功能
import cv2
import numpy as np
img = cv2.imread("Resources/jty.jpg")
kernel = np.ones((5, 5), np.uint8)
imgGray = cv2.cvtColor(img, cv2.COLOR_BGR2GRAY)
imgGray = cv2.resize(imgGray,(350,300))
imgBlur = cv2.GaussianBlur(imgGray, (7, 7), 0)
imgCanny = cv2.Canny(img, 100, 100)
imgCanny = cv2.resize(imgCanny,(350,300))
imgDialation = cv2.dilate(imgCanny, kernel, iterations=1)
imgEroded = cv2.erode(imgDialation, kernel, iterations=1)
cv2.imshow("Gray Image", imgGray)
cv2.imshow("Blur Image", imgBlur)
cv2.imshow("Canny Image", imgCanny)
cv2.imshow("Dialation Image", imgDialation)
cv2.imshow("Eroded Image", imgEroded)cv2.waitKey(0)

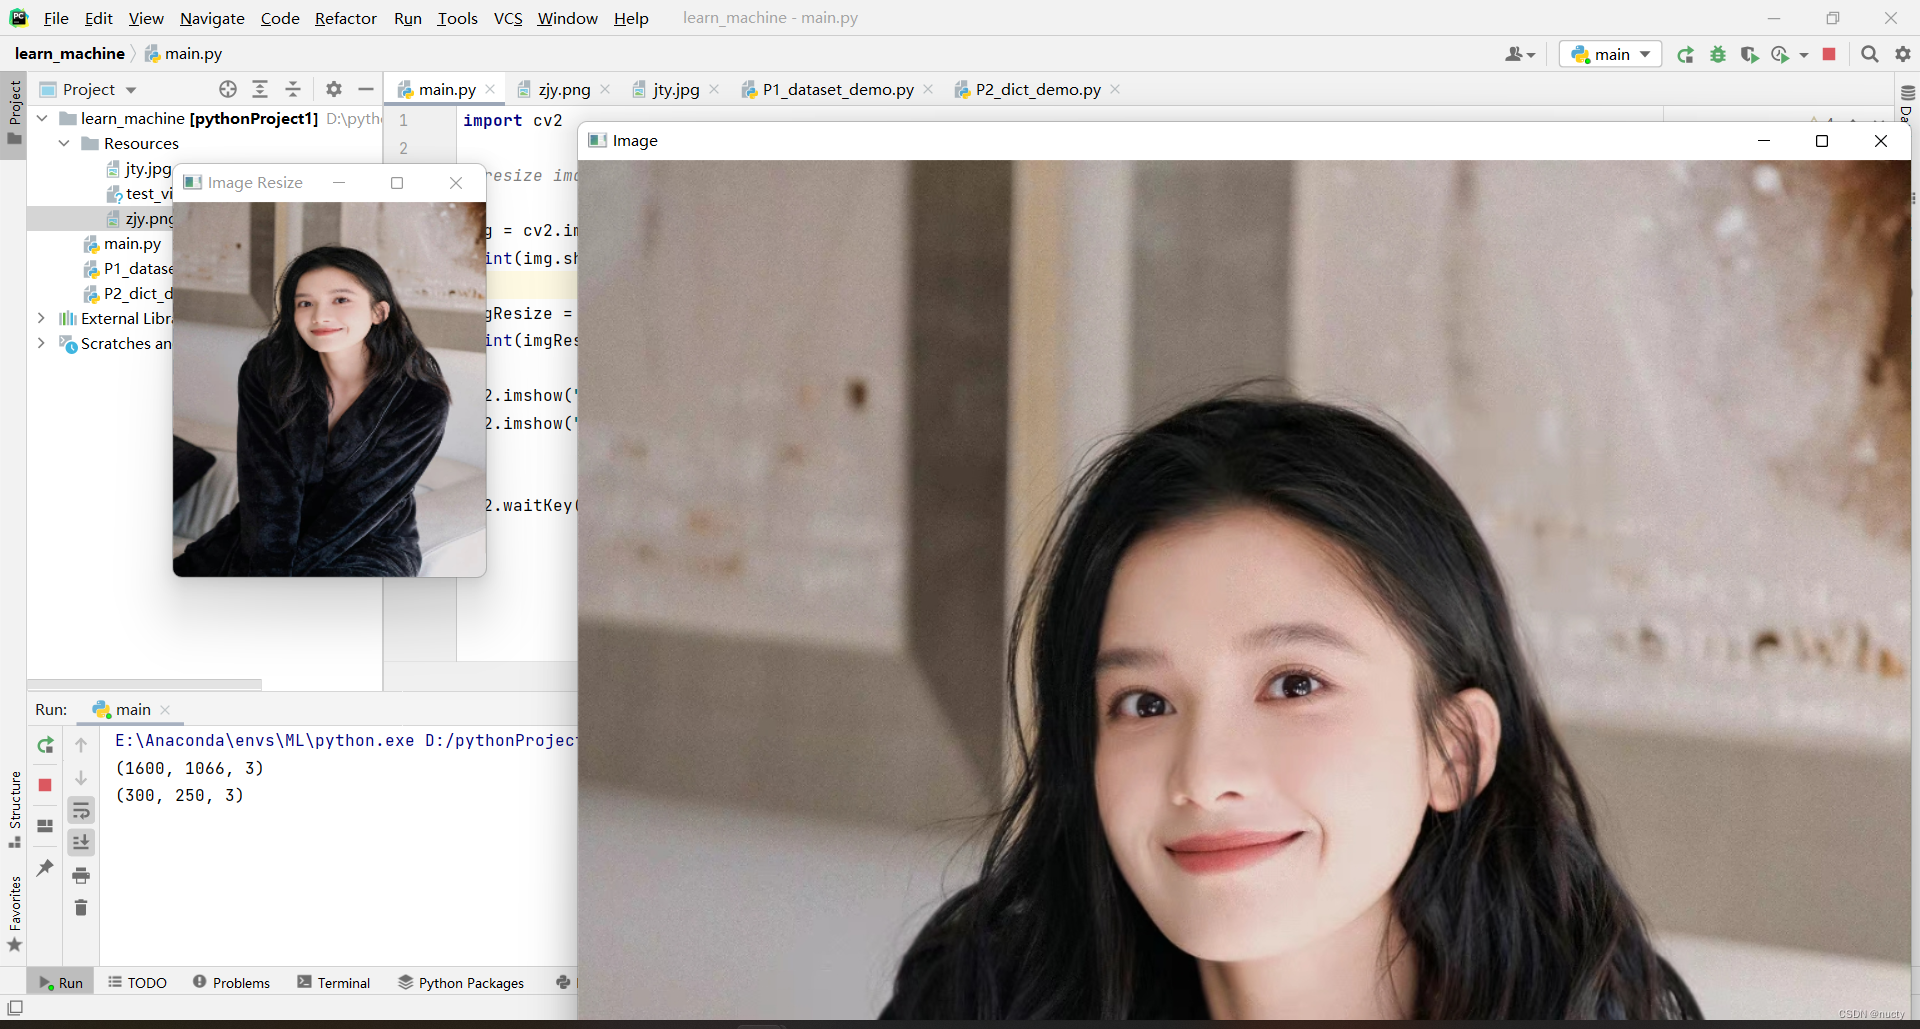
调整、裁剪图像
3.1 调整图像大小
import cv2img = cv2.imread("Resources/zjy.png")
print(img.shape)imgResize = cv2.resize(img,(250,300))
print(imgResize.shape)cv2.imshow("Image",img)
cv2.imshow("Image Resize",imgResize)cv2.waitKey(0)
裁剪图像
import cv2img=cv2.imread("Resources/zjy.png")
img = cv2.resize(img,(250,300))
cv2.imshow('image',img)print(img.shape)crop_img=img[20:200,50:200]
cv2.imshow('crop image',crop_img)cv2.waitKey(0)

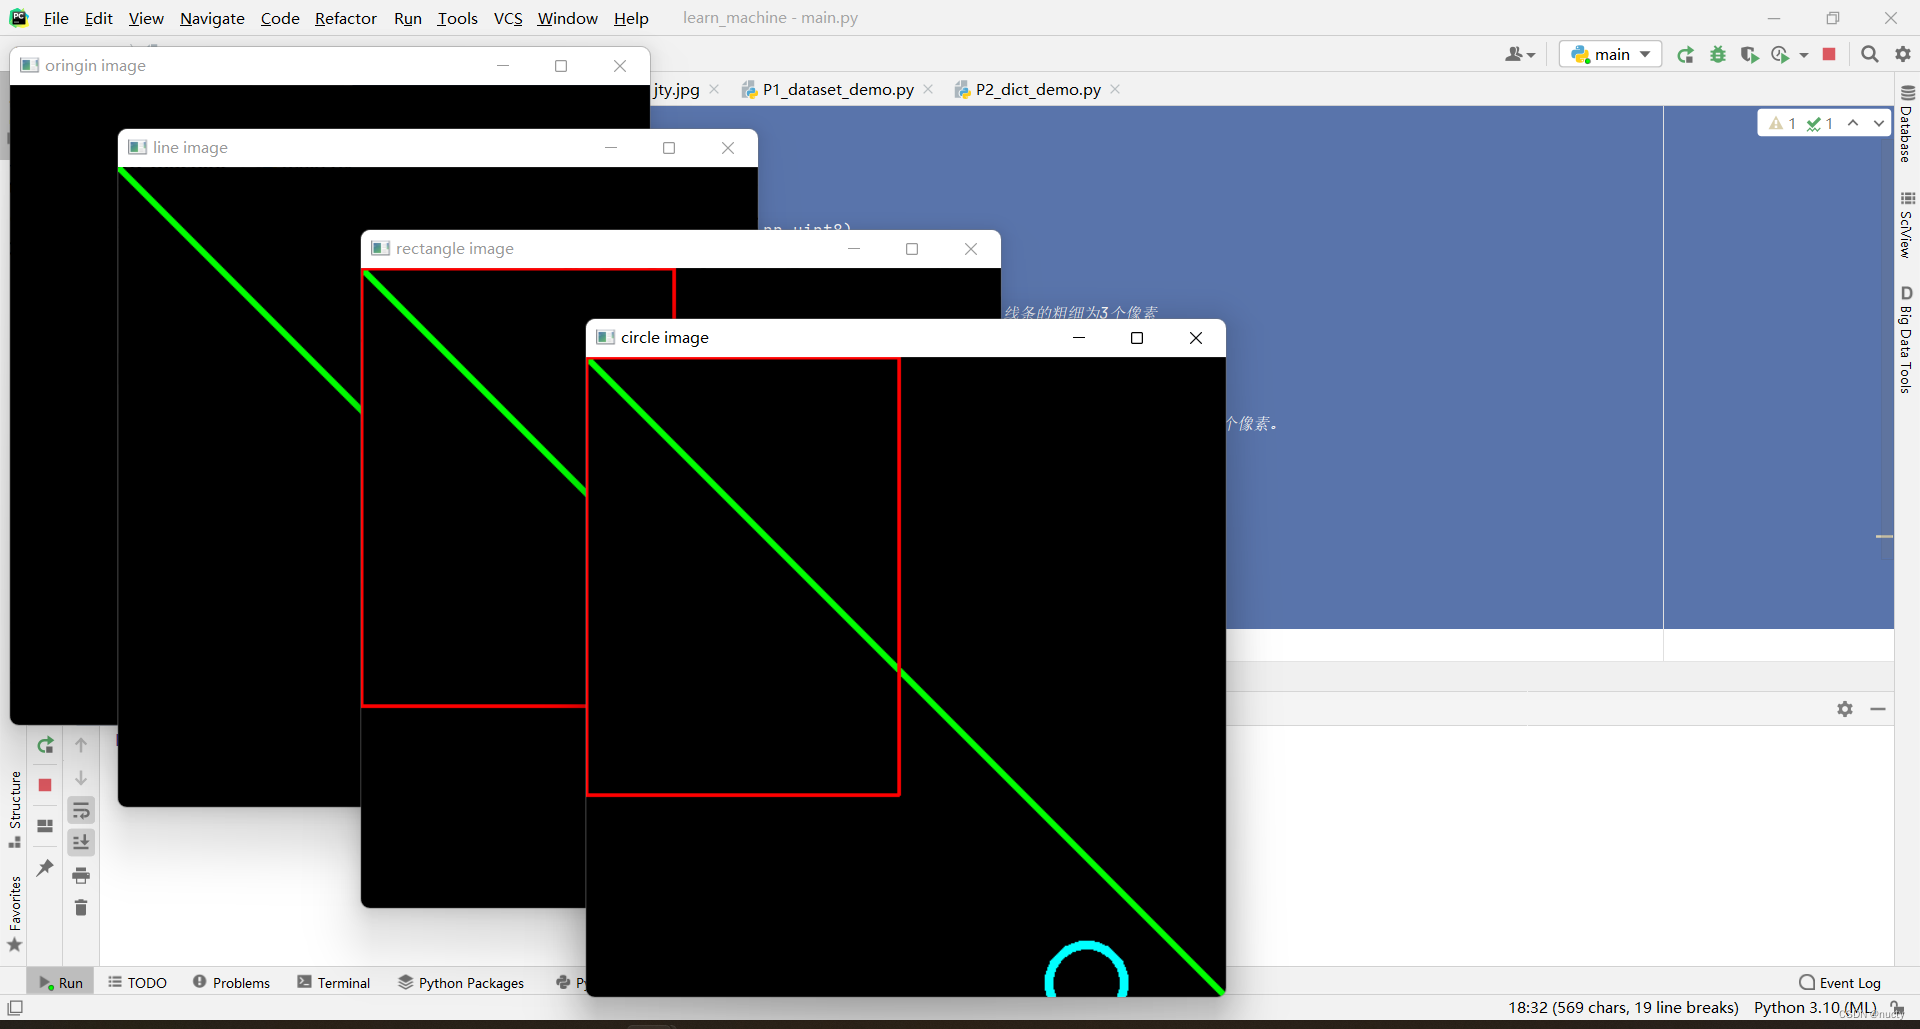
图像上绘制形状和文本
4.1 图像上绘制形状
import cv2
import numpy as np
img = np.zeros((512, 512, 3), np.uint8)
cv2.imshow('oringin image', img)
cv2.line(img, (0, 0), (img.shape[1], img.shape[0]), (0, 255, 0), 3)
cv2.imshow('line image', img)
cv2.rectangle(img, (0, 0), (250, 350), (0, 0, 255), 2)
cv2.imshow('rectangle image', img)
cv2.circle(img, (400, 500), 30, (255, 255, 0), 5)
cv2.imshow('circle image', img)cv2.waitKey(0)
4.2 图像上写文字
import cv2
import numpy as npimg = np.zeros((512,512,3),np.uint8)
cv2.imshow('oringin image',img)
cv2.putText(img,"OPENCV",(300,200),cv2.FONT_HERSHEY_COMPLEX,1,(0,150,0),1)
cv2.imshow("putText01 Image",img)
cv2.putText(img,"I LOVE XD",(100,300),cv2.FONT_HERSHEY_COMPLEX,1,(0,150,0),1)
cv2.imshow("putText02 Image",img)cv2.waitKey(0)

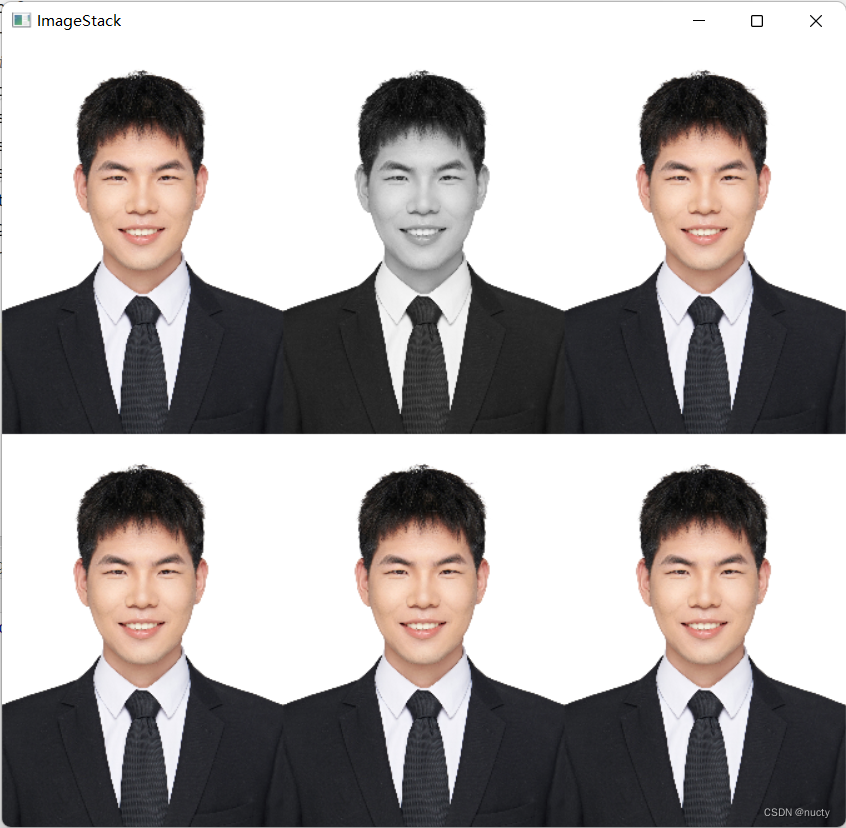
图像拼接
import cv2
import numpy as np
def stackImages(scale,imgArray):rows = len(imgArray)cols = len(imgArray[0])rowsAvailable = isinstance(imgArray[0], list)width = imgArray[0][0].shape[1]height = imgArray[0][0].shape[0]if rowsAvailable:for x in range ( 0, rows):for y in range(0, cols):if imgArray[x][y].shape[:2] == imgArray[0][0].shape [:2]:imgArray[x][y] = cv2.resize(imgArray[x][y], (0, 0), None, scale, scale)else:imgArray[x][y] = cv2.resize(imgArray[x][y], (imgArray[0][0].shape[1], imgArray[0][0].shape[0]), None, scale, scale)if len(imgArray[x][y].shape) == 2: imgArray[x][y]= cv2.cvtColor( imgArray[x][y], cv2.COLOR_GRAY2BGR)imageBlank = np.zeros((height, width, 3), np.uint8)hor = [imageBlank]*rowsfor x in range(0, rows):hor[x] = np.hstack(imgArray[x])ver = np.vstack(hor)else:for x in range(0, rows):if imgArray[x].shape[:2] == imgArray[0].shape[:2]:imgArray[x] = cv2.resize(imgArray[x], (0, 0), None, scale, scale)else:imgArray[x] = cv2.resize(imgArray[x], (imgArray[0].shape[1], imgArray[0].shape[0]), None,scale, scale)if len(imgArray[x].shape) == 2: imgArray[x] = cv2.cvtColor(imgArray[x], cv2.COLOR_GRAY2BGR)hor= np.hstack(imgArray)ver = horreturn verimg = cv2.imread('Resources/jty.jpg')
imgGray = cv2.cvtColor(img,cv2.COLOR_BGR2GRAY)imgStack = stackImages(0.15,([img,imgGray,img],[img,img,img]))cv2.imshow("ImageStack",imgStack)cv2.waitKey(0)
人脸识别
6.1 静态图片
import cv2
faceCascade = cv2.CascadeClassifier("Resources/haarcascade_frontalface_default.xml")
img = cv2.imread("Resources/jty.jpg")
img = cv2.resize(img,(250,300))
imgGray = cv2.cvtColor(img,cv2.COLOR_BGR2GRAY)faces = faceCascade.detectMultiScale(imgGray,1.1,4)for(x,y,w,h) in faces:cv2.rectangle(img,(x,y),(x+w,y+h),(255,0,0),2)
cv2.imshow("Result",img)cv2.waitKey(0)

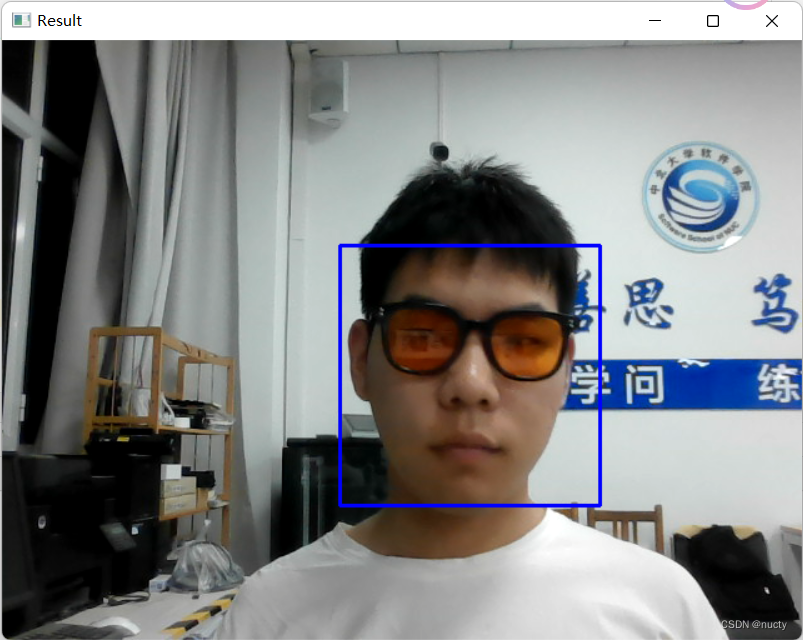
6.2 摄像头
import cv2faceCascade = cv2.CascadeClassifier("Resources/haarcascade_frontalface_default.xml")cap = cv2.VideoCapture(0)
cap.set(3,640)
cap.set(4,480)
cap.set(10,100)while True:success,img = cap.read()cv2.imshow("Video",img)imgGray = cv2.cvtColor(img, cv2.COLOR_BGR2GRAY)faces = faceCascade.detectMultiScale(imgGray, 1.1, 4)for (x, y, w, h) in faces:cv2.rectangle(img, (x, y), (x + w, y + h), (255, 0, 0), 2)cv2.imshow("Result", img)if cv2.waitKey(1) & 0xFF == ord('q'):break