
背景需求:
每年元宵、国庆都回带孩子做灯笼。用python对"对折灯笼“的纸模进行不同图案的填充(区分物权)
【教学类-39】A4红纸-国旗灯笼纸模(庆祝中华人民共和国成立74周年)_a4 打印 灯笼-CSDN博客文章浏览阅读1.1k次。【教学类-39】A4红纸-国旗灯笼纸模(庆祝中华人民共和国成立74周年)_a4 打印 灯笼https://blog.csdn.net/reasonsummer/article/details/133420000?sharetype=blogdetail&sharerId=133420000&sharerefer=PC&sharesource=reasonsummer&spm=1011.2480.3001.8118

大班孩子剪灯笼纸模水平不一,对”钢琴键”对称剪,也有很多剪断情况。


“剪的我手都酸了!”

孩子们即使做出来,灯笼外圈的一根根线也不是完全”圆圈状“,而是几根一簇并排的样式。


这里就有两个问题:
1、十几根的裁剪线条,并不是和所有的孩子——是否可以做少一点的线条。
2、如果内部不是“圆柱”,而是“棱柱”,边线的环形弯曲效果是不是更好。——制作多边形灯笼。
思路一:在word里手动做了3-8边形

做一个三变形的模板,然后复制四边形,手动拆分表格,一个一个平均列……7个模板做了很长时间


然后用把6个做成pdf(第1次没有考虑3边形,从4-8,圆形)
'''
元宵节多边形灯笼word手工制作,转打印PDF
星火讯飞、阿夏
20251202
'''import os,time
from docx import Document
from PIL import Image
from docx.enum.table import WD_CELL_VERTICAL_ALIGNMENT
from PyPDF2 import PdfFileMerger
from docx.shared import Cm  # Import Cm here
import pikepdf
import os
from docx import Document
from PyPDF2 import PdfFileMerger
from docx2pdf import convert
from pdf2image import convert_from_path
import pikepdf# 定义文件夹路径
path = r'C:\Users\jg2yXRZ\OneDrive\桌面\20250216元宵灯笼'
folder_123 = path + r'\图纸'temp_folder = path + r'\零时'
output_folder = os.path.dirname(folder_123)
os.makedirs(temp_folder, exist_ok=True)# 获取所有docx文件
docx_files = [f for f in os.listdir(folder_123) if f.endswith('.docx')]
print(docx_files)# 将每个docx文件转换为PDF
for docx_file in docx_files:doc_path = os.path.join(folder_123, docx_file)pdf_path = os.path.join(temp_folder, docx_file.replace('.docx', '.pdf'))convert(doc_path, pdf_path)time.sleep(2)print(f"所有PDF文件已合并并转换为图片,保存在 {images_folder}")import shutil
shutil.rmtree(temp_folder)# # 合并所有的PDF文件
# pdf_files = [f for f in os.listdir(temp_folder) if f.endswith('.pdf')]
# merger = PdfFileMerger()
# for pdf_file in pdf_files:
#     pdf_path = os.path.join(temp_folder, pdf_file)
#     merger.append(pdf_path)
# output_pdf_path = os.path.join(path, f'元宵节灯笼{docx_files}张.pdf')
# merger.write(output_pdf_path)
# merger.close()
# time.sleep(5)#


打印出来我随机挑了,两个纸膜制作。并给中班孩子展示制作过程。并提到
“可以选四边形、五边形、六边形”
“这个是立体的很难!”
出生牛犊的孩子们就热烈讨论“我要四边形的!”我要三边形的“。”好难啊!“”什么时候做?“
图片后补
考虑到之前几次的大班”元宵灯“制作的情况:孩子们初次做根本不理解制作方法(裁剪、折叠、黏贴,塑形、提手)最后都是吵着嚷着”老师帮我!”,每次做灯笼都让老师本人手忙脚乱,疲于奔命(浪费老师)。
为了给我自己减少麻烦,我决定把图纸变小,从一页A4一个灯笼变成1页2个灯笼。
这时我就明显看到“word人工制作的多边形”很难快速修改成一页两张。
于是我只能把docxz转jpg
'''
元宵节多边形灯笼word手工制作,转打印PDF
星火讯飞、阿夏
20251202
'''import os,time
from docx import Document
from PIL import Image
from docx.enum.table import WD_CELL_VERTICAL_ALIGNMENT
from PyPDF2 import PdfFileMerger
from docx.shared import Cm  # Import Cm here
import pikepdf
import os
from docx import Document
from PyPDF2 import PdfFileMerger
from docx2pdf import convert
from pdf2image import convert_from_path
import pikepdf# 定义文件夹路径
path = r'C:\Users\jg2yXRZ\OneDrive\桌面\20250216元宵灯笼'
folder_123 = path + r'\图纸'temp_folder = path + r'\零时'
output_folder = os.path.dirname(folder_123)
os.makedirs(temp_folder, exist_ok=True)# 获取所有docx文件
docx_files = [f for f in os.listdir(folder_123) if f.endswith('.docx')]
print(docx_files)# 将每个docx文件转换为PDF
for docx_file in docx_files:doc_path = os.path.join(folder_123, docx_file)pdf_path = os.path.join(temp_folder, docx_file.replace('.docx', '.pdf'))convert(doc_path, pdf_path)time.sleep(2)print(f"所有PDF文件已合并并转换为图片,保存在 {images_folder}")import shutil
shutil.rmtree(temp_folder)# # 合并所有的PDF文件
# pdf_files = [f for f in os.listdir(temp_folder) if f.endswith('.pdf')]
# merger = PdfFileMerger()
# for pdf_file in pdf_files:
#     pdf_path = os.path.join(temp_folder, pdf_file)
#     merger.append(pdf_path)
# output_pdf_path = os.path.join(path, f'元宵节灯笼{docx_files}张.pdf')
# merger.write(output_pdf_path)
# merger.close()
# time.sleep(5)#

因为是整页截图,所以白边也在里面(实际我不需要)

插入空白word,把然后边距改成0,打印时选一页两张。勉强打印了一页两图的小灯笼。
图片后补
给孩子再次示范后,并问:觉得自己不行的,举手,发3边形和4边形。
最后一些手艺好的孩子拿了5-8
操作中,果然孩子们眼睛看会了,操作还是“老师帮帮我!”
求助声音从开始就此起彼伏。所以一张照片也没有拍。
代做过程中,听孩子们叫嚷,真心感觉“自己在自讨苦吃”,孩子们等得都不耐烦了
一些能干的孩子看我忙死,就真的自己研究或和同伴商议了。
孩子们的难点:
1、第一步是什么——把纸张剪成两张(这里的白色缝隙可以不要,两张连在一起)


2、最后一步怎么粘
三位手艺好的孩子困在最后一步。我感觉是黏贴条宽度(1CM)太窄了,可以改成2CM


3、内部直筒的空边还是不要了(本来想让孩子们把这个条中间的白色剪下来做提手,两个灰色保留做最后的黏贴固定。实际操作中幼儿前面的步骤都搞不清楚,所以两张纸互相贴边后,发现根本没黏贴的位置了。我代做时都把这条剪了)


基于实操作中的问题。我认为用word手工做不行
1、全部手工调整,无法获取不同大小——如果想让孩子先练习体验了解制作流程,就需要一页1张、2张、4张
2、手工制作,无法实现很多的”X边形“——我费了一小时,也就做了3-8边形。因为需要反复的拆分、分布列,制作粗线条边框。
实验二——python做word表格
因此,回到python,用它来制作word表格单元格
from docx import Document
from docx.shared import Cm, Pt
from docx.enum.text import WD_ALIGN_PARAGRAPH
from docx.enum.table import WD_ROW_HEIGHT_RULE  # Import the WD_ROW_HEIGHT_RULE enumeration# 创建一个新的Word文档
doc = Document()# 设置上下左右边距为0.7厘米
sections = doc.sections
for section in sections:section.top_margin = Cm(0.7)section.bottom_margin = Cm(0.7)section.left_margin = Cm(0.7)section.right_margin = Cm(0.7)# 添加一个6行5列的表格
table = doc.add_table(rows=6, cols=5)# 设置表格样式
table.style = 'Table Grid'# 设置行高(通过设置单元格的最小高度)
row_heights = [Cm(1.5), Cm(10), Cm(1.5), Cm(1.5), Cm(7), Cm(1.5)]
for i, height in enumerate(row_heights):row = table.rows[i]for cell in row.cells:cell.height_rule = WD_ROW_HEIGHT_RULE.AT_LEAST  # Use the correct enumeration valuecell.height = height# 设置列宽
col_widths = [Cm(4), Cm(4), Cm(4), Cm(4), Cm(1.5)]
for i, width in enumerate(col_widths):for row in table.rows:row.cells[i].width = width# 保存文档
path = r'C:\Users\jg2yXRZ\OneDrive\桌面\20250216元宵灯笼'
doc.save(path + r'\123.docx')
可以生成6行5列表格,可以实现列宽,但是无论怎么调整,行高无法实现,它永远是默认的一倍行距,无法变成我想要的6个单元格高度,

实验三——python做图片(from PIL import Image, ImageDraw)
最后就只剩下做图片了。
把手动word里面3边形模板修改,上下左右边距0,然后做一份连在一起的。顶天立地、全页面的灯笼基础图纸

代码展示(默认制作A4大小210*297,黏贴边2CM)
'''
202502新年05元宵节灯笼python制作图片
星火讯飞、阿夏
20250220
'''from PIL import Image, ImageDraw
import math,os# 宽
w = 2100
# 高
h = 2970
# 骨架贴边
t = 200
# 上下贴边
b = 150
# 外边高度(需要乘以2)
g = 710
# 内柱高度
n = 910
# 虚线
dash_length = 20
space_length = 20path = r'C:\Users\jg2yXRZ\OneDrive\桌面\20250216元宵灯笼'
pic=path+r'\00多边形图片'
os.makedirs(pic,exist_ok=True)for d in range(3,50):# X边形(可修改遍历)# d = 3# 创建一个2100x2900的白色背景图片img = Image.new('RGB', (w, h), 'white')draw = ImageDraw.Draw(img)# 画外框图纸border_width = 5# 制作外边# 画一个从(0,0)到(15,210)的长方形灰色底纹填充# (右侧黏贴变宽度200)rectangle_color = (128, 128, 128)  # 灰色# 两个灰色draw.rectangle([(0, 0), (w-t, b)], fill=rectangle_color)draw.rectangle([(0, b + g * 2), (w - t, b * 2 + g * 2)], fill=rectangle_color)# 外边框线draw.rectangle([(0, 0), (w - t, b * 2 + g * 2)], outline='black', width=border_width)# 在(0, b*1+g*1)), (w-200, b*1+g*1))的地方画一条黑色2磅间隔2磅的虚线start_y = b + gend_y = start_y + gfor x in range(0, w - t, dash_length + space_length):draw.line([(x, start_y), (x + dash_length, start_y)], fill='black', width=border_width)# 插分等dd = []for x in range(d):f = (w - t) / d * (x)print(f)dd.append(f)print(dd)# 画从0,dd到100,dd的直线(多条)border_width2 = 10for x in dd:draw.line([(x, b), (x, b + g * 2)], fill='black', width=border_width2)# 画内柱图纸# 外边框线draw.rectangle([(w-t,g*2+b*2), (w, h)], fill=rectangle_color, width=border_width2)# 画白色draw.rectangle([(0, b * 2 + g * 2), (w-t, h)], fill='white')# border_width = 5# 制作外边# 画一个从(0,0)到(15,210)的长方形灰色底纹填充# (右侧黏贴变宽度200)rectangle_color = (150, 150, 150)  # 灰色# 两个灰色draw.rectangle([(0, b + g * 2), (w - t, b * 3 + g * 2)], fill=rectangle_color)draw.rectangle([(0, h - b), (w - t, h)], fill=rectangle_color)# 外边框线draw.rectangle([(0, b * 2 + g * 2), (w , h)], outline='black', width=border_width2)draw.rectangle([(0, 0), (w-t, b * 2 + g * 2)], outline='black', width=border_width2)# 插分等dd1 = []for x in range(d):f = (w - t) / d * (x+1)print(f)dd1.append(f)print(dd1)# 画从0,dd到100,dd的直线(多条)border_width2=10# # 画从0,dd到100,dd的直线(多条)# 设置虚线的参数dash_length = 30  # 黑线长度space_length = 30  # 空白间隔长度for x1 in dd1:start_x = x1  # 起始x坐标end_x = start_x  # 结束x坐标与起始x坐标相同,因为是竖线start_y = b*2+g*2  # 起始y坐标end_y = h   # 结束y坐标# 画从上到下的虚线for y in range(start_y, end_y, dash_length + space_length):draw.line([(start_x, y), (start_x, y + dash_length)], fill='black', width=border_width2)# 最下面补一条黑线draw.line([(0, h-15), (w,h-15)], fill='black', width=border_width2)# 保存图片img.save(pic + fr'\{d:02}边形灯笼图纸(A4).png')
虽然这段代码是一句一句的测试,观看图片效果,很费精力,但是完成后,随便多少边形都能快速实现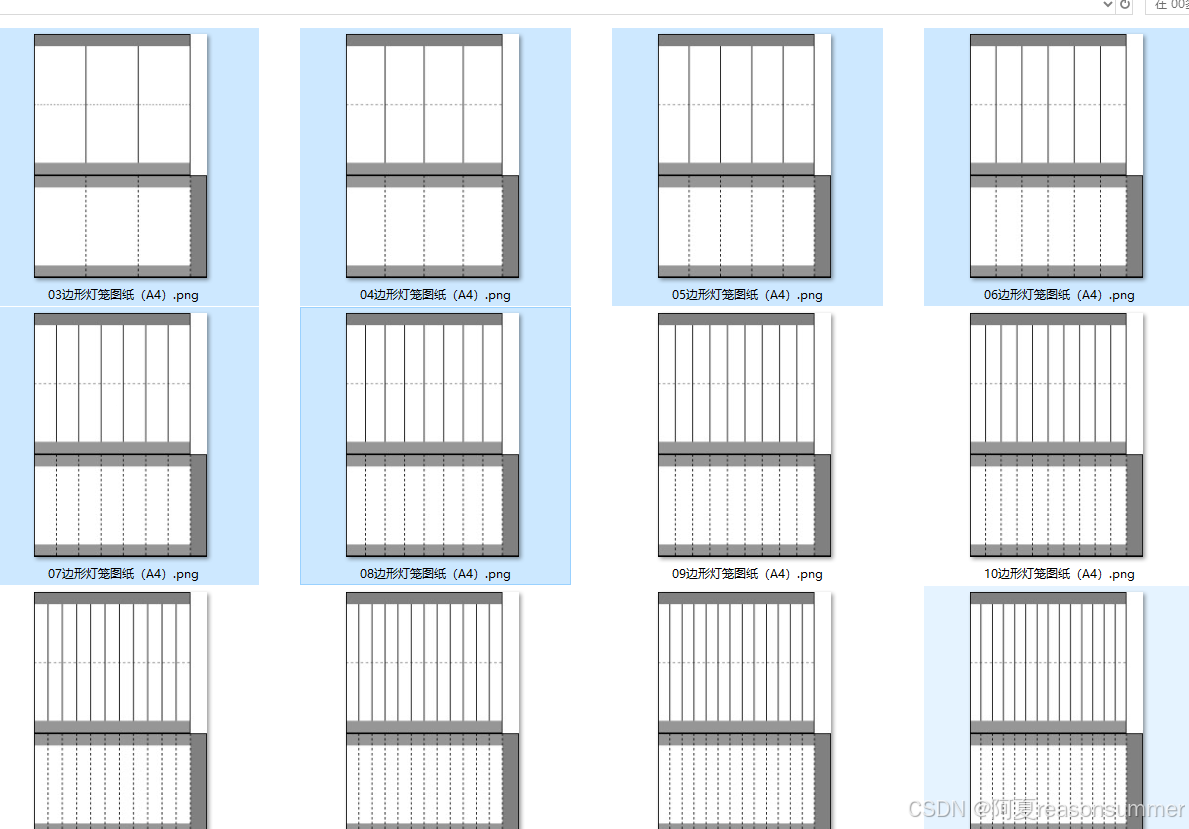
3边形灯笼纸膜

4边形灯笼纸膜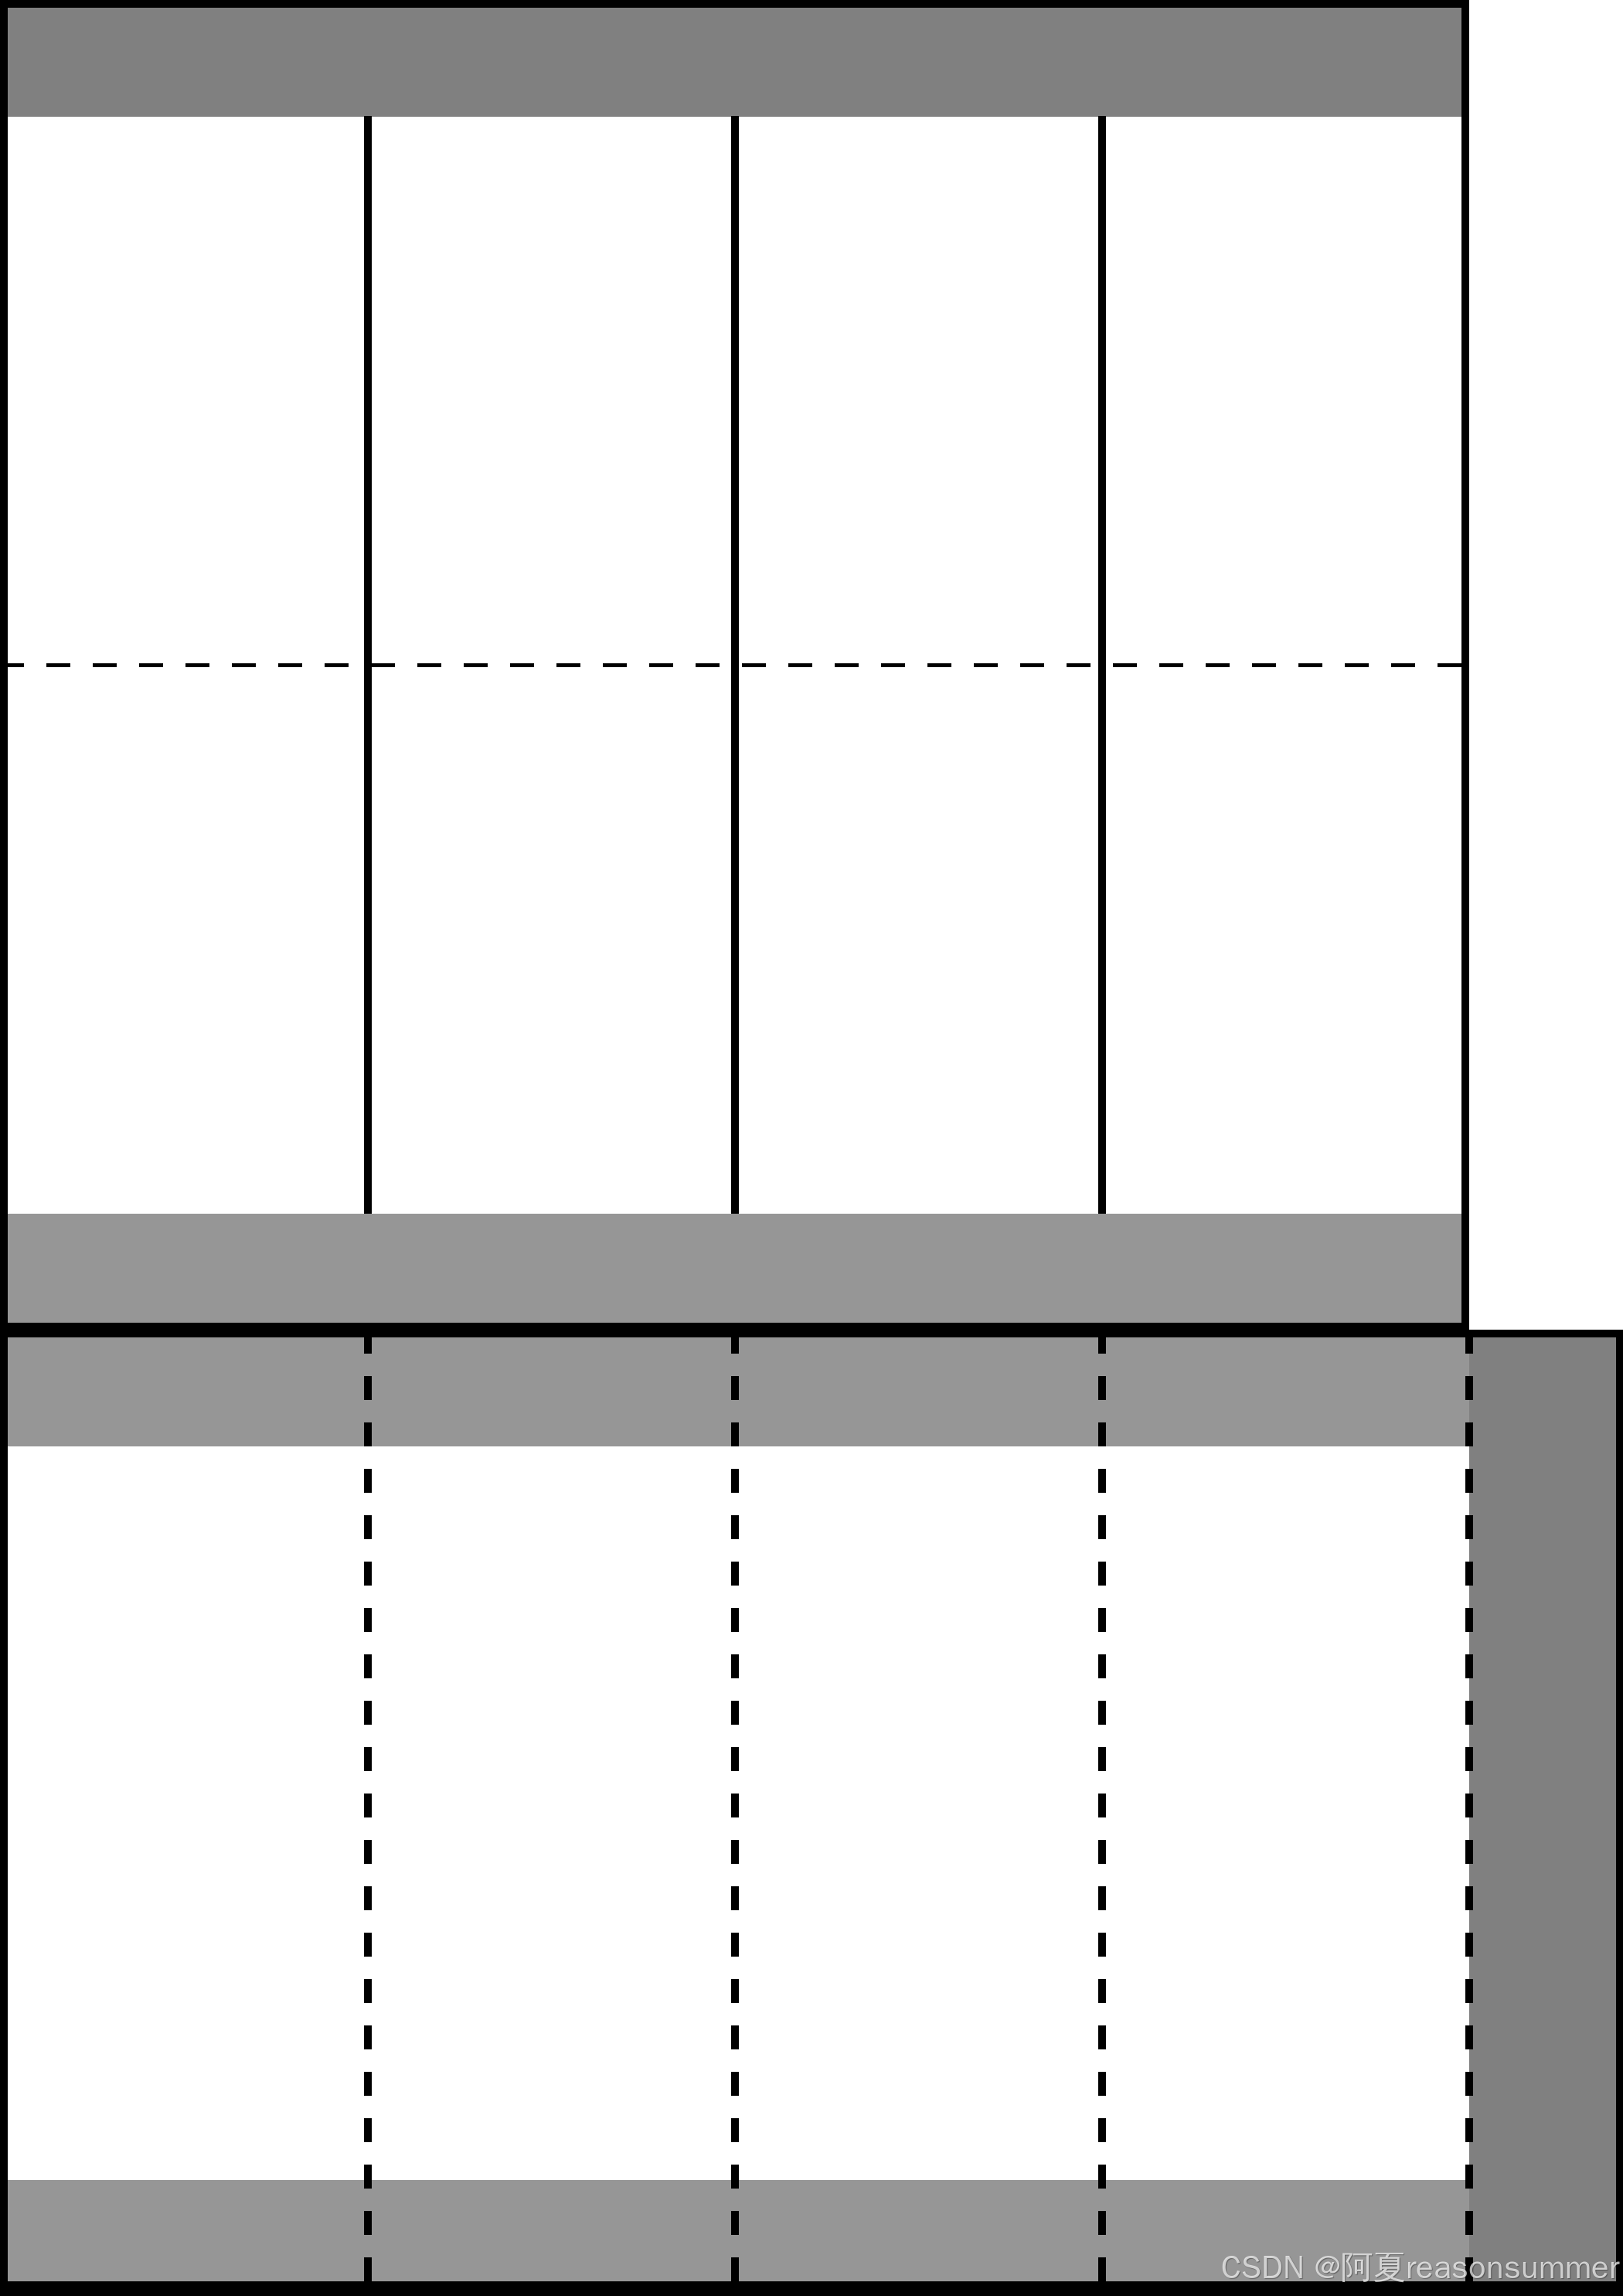
5边形灯笼纸膜
6边形灯笼纸膜
7边形灯笼纸膜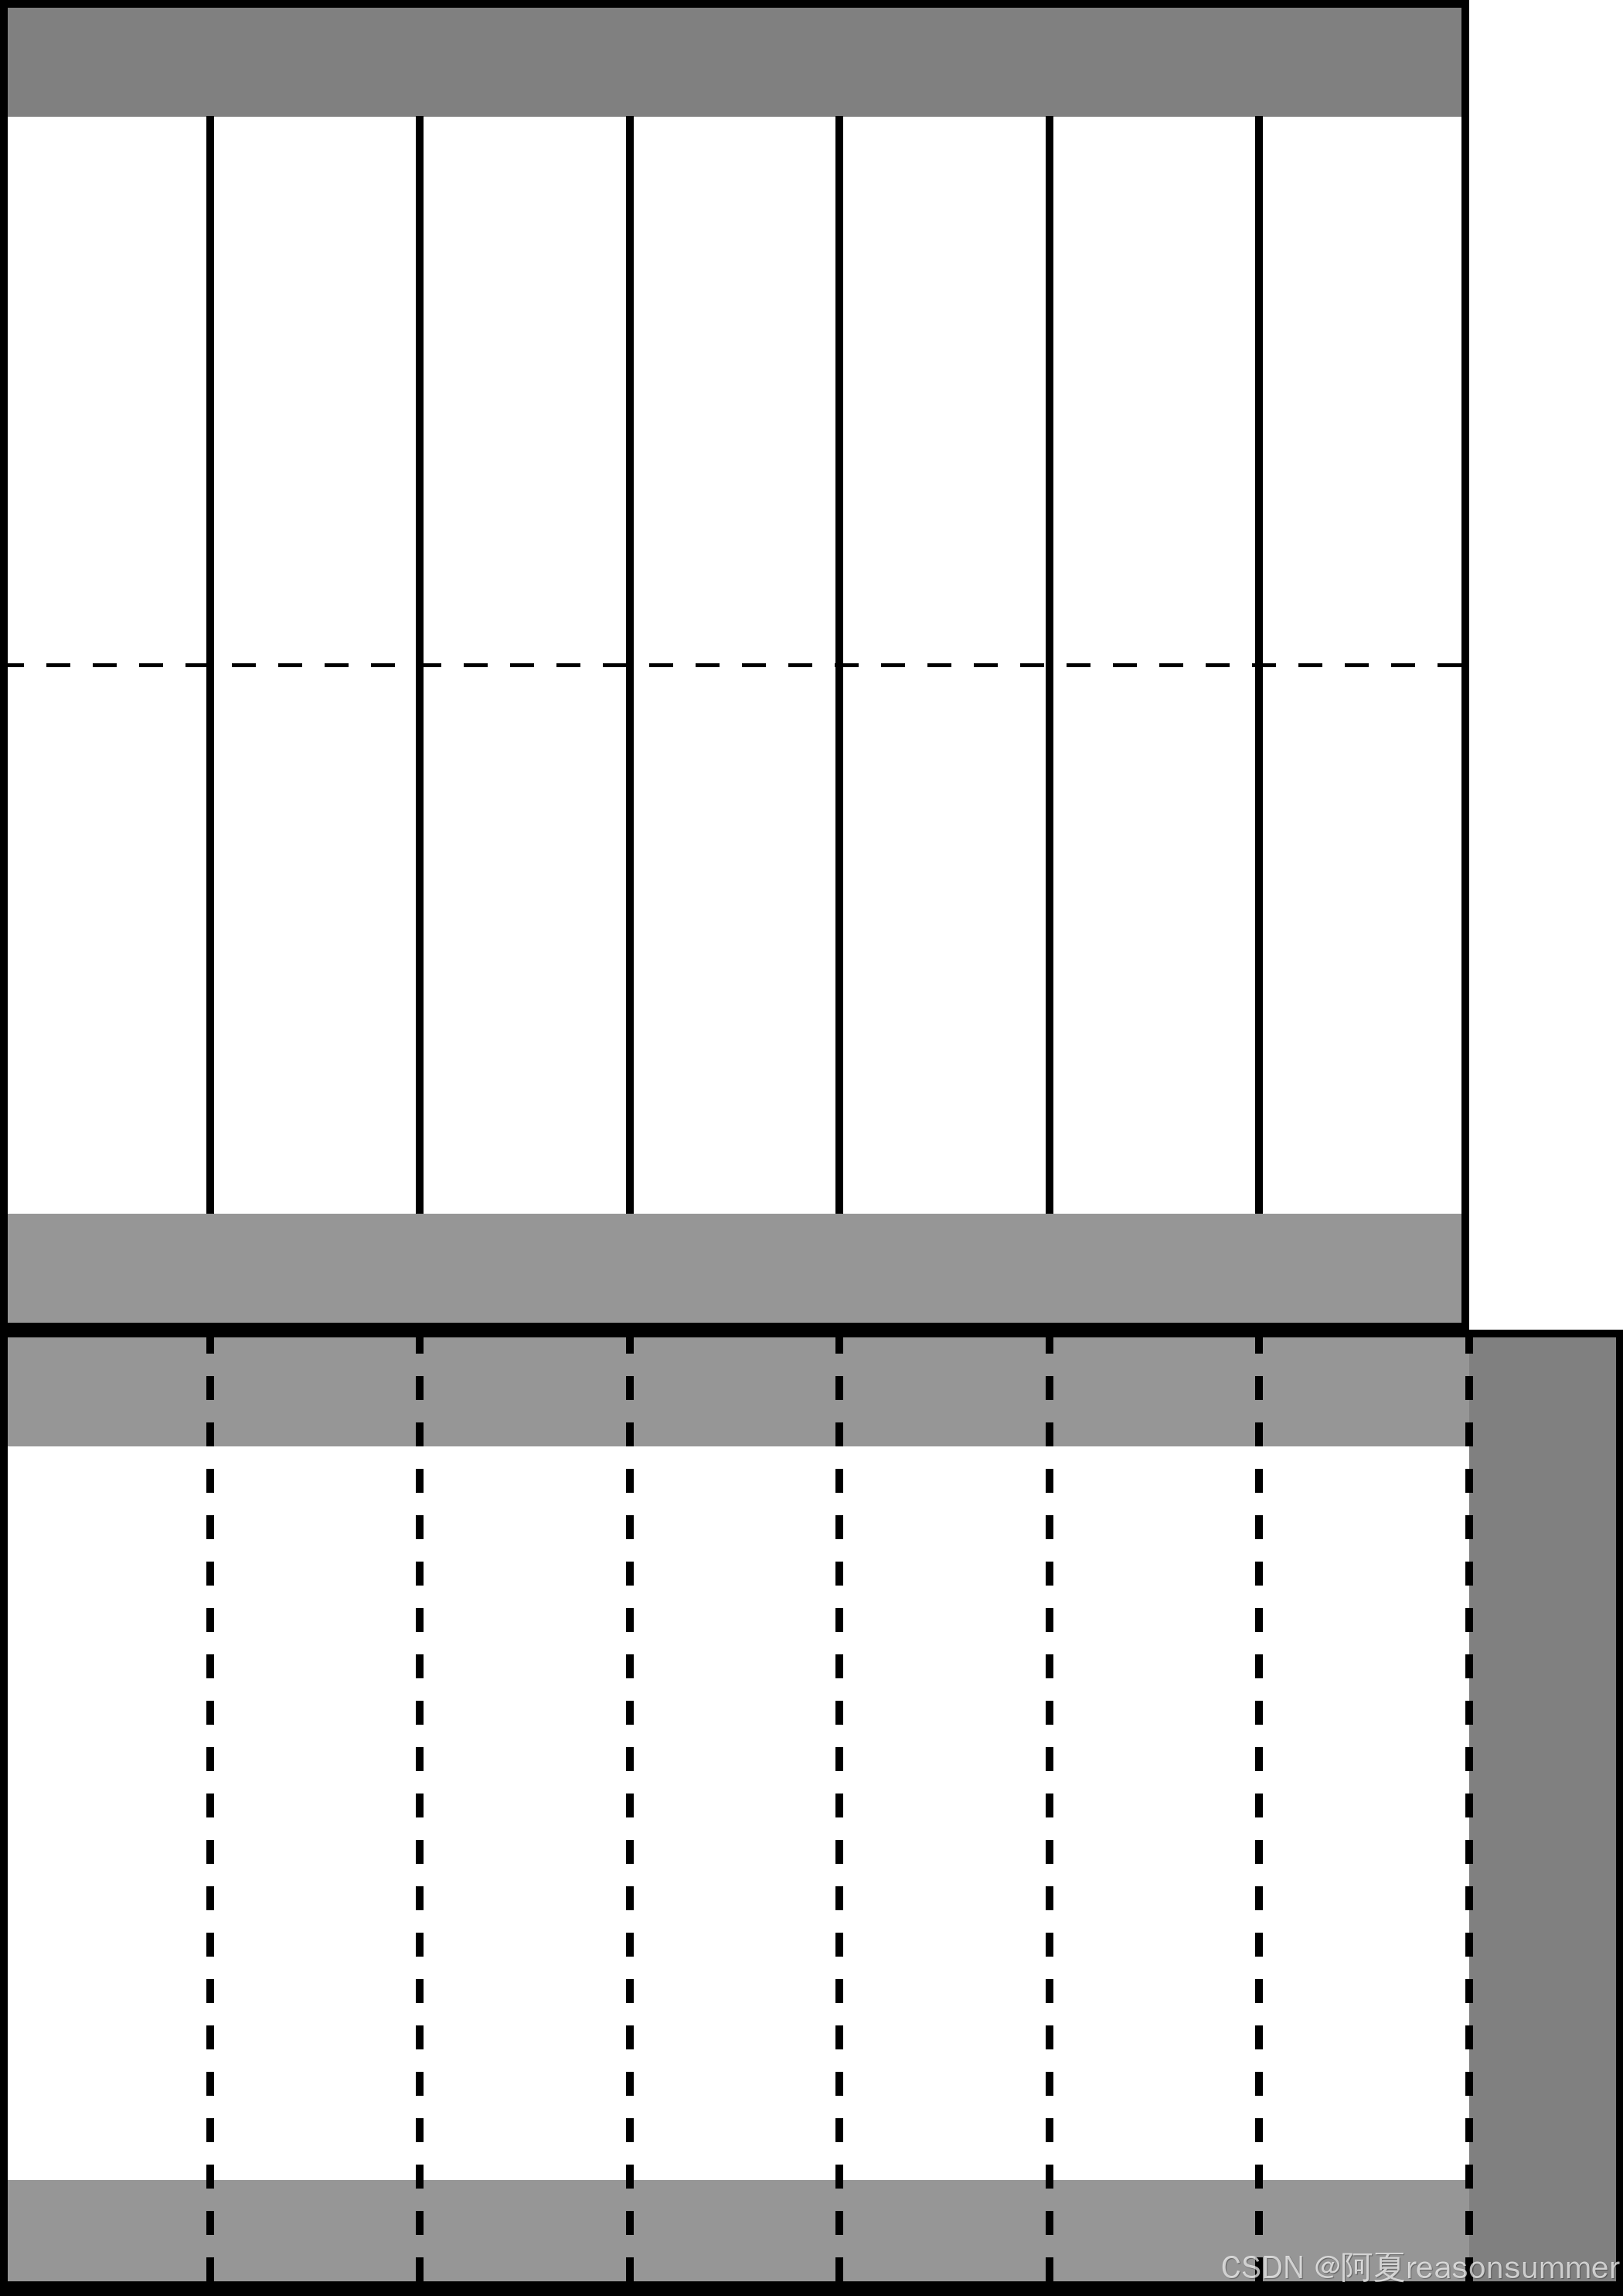
8边形灯笼纸膜

29边形纸膜
(超过10边形的灯笼已经近似圆形灯笼了),此时内部直筒的折痕线就没有必要折叠了)


然后我不想制作word模板了,而是直接在word里制作表格,插入想要的图片。
from docx import Document
from docx.shared import Cm
import os
# import matplotlib.cm as cmpath = r'C:\Users\jg2yXRZ\OneDrive\桌面\20250216元宵灯笼'
image_folder = os.path.join(path, '00多边形图片')
output_dir = os.path.join(path, '临时')
os.makedirs(output_dir, exist_ok=True)# 一页2图(横板)
t = 2# 创建一个新的Word文档
doc = Document()# 设置页面方向为横向
section = doc.sections[0]
new_width, new_height = section.page_height, section.page_width
section.orientation = 1  # 1表示横向
section.page_width = new_width
section.page_height = new_height# 设置页面边距
section.top_margin = Cm(0.7)
section.bottom_margin = Cm(0.7)
section.left_margin = Cm(0.7)
section.right_margin = Cm(0.7)# 添加一个表格
table = doc.add_table(rows=1, cols=2)# # 计算列宽
column_width = (29.7 - 0.7 * 2) / 2# 设置列宽
for row in table.rows:for cell in row.cells:cell.width = Cm(column_width)# 保存文档
doc.save(os.path.join(path, f'{t}图.docx'))import os
from docx import Document
from docx.shared import Cm
from docx.shared import Cm  # Import Cm here
import os,time
from docx import Document
from PIL import Image
from docx.enum.table import WD_CELL_VERTICAL_ALIGNMENT
from PyPDF2 import PdfFileMerger
from docx.shared import Cm  # Import Cm here
import pikepdf# 获取123文件夹下所有图片文件名列表image_files = [f for f in os.listdir(image_folder) if f.endswith(('.png', '.jpg', '.jpeg', '.bmp', '.gif'))]# 将图片列表拆分成每组2个
grouped_images = [image_files[i:i + 2] for i in range(0, len(image_files), 2)]
print(grouped_images)
# 打开1.docx文件for i in range(len(grouped_images)):doc = Document(os.path.join(path, f'2图.docx'))table = doc.tables[0]for j in range(0,2): cell = table.cell(0, j)            # 0,2,4# if image_path:run = cell.paragraphs[0].add_run()run.add_picture(os.path.join(image_folder,grouped_images[i][j]), width=Cm(13.25),height=Cm(20.07))# cell.vertical_alignment = WD_CELL_VERTICAL_ALIGNMENT.CENTER# 保存修改后的文档doc_path = os.path.join(output_dir, f"{i+1:02}.docx")doc.save(doc_path)# import os
# from docx import Document
# from reportlab.pdfgen import canvas
# from PyPDF2 import PdfFileMerger
# from docx2pdf import convert# # 获取所有docx文件
# docx_files = [f for f in os.listdir(temp_folder) if f.endswith('.docx')]
# # 获取所有docx文件# # 将每个docx文件转换为PDF
# for docx_file in docx_files:
#     doc_path = os.path.join(temp_folder, docx_file)
#     pdf_path = os.path.join(temp_folder, docx_file.replace('.docx', '.pdf'))
#     convert(doc_path, pdf_path)
#     time.sleep(1)# # 合并所有的PDF文件
# # 获取所有生成的PDF文件
# pdf_files = [f for f in os.listdir(temp_folder) if f.endswith('.pdf')]# # 创建PdfFileMerger对象
# merger = PdfFileMerger()# # 将所有PDF文件添加到合并器中
# for pdf_file in pdf_files:
#     pdf_path = os.path.join(temp_folder, pdf_file)
#     merger.append(pdf_path)# # 输出合并后的PDF文件
# output_pdf_path = os.path.join(path, f'九叠篆篆章单字_中2班_幼儿姓名{len(images_123)}人{int(len(images_123)/12)}张.pdf')
# # output_pdf_path = os.path.join(path, f'九叠篆篆章_中2班_幼儿姓名{len(images_123)}人{int(len(images_123)/12)}张.pdf')
# merger.write(output_pdf_path)
# merger.close()# print(f"所有PDF文件已合并到 {output_pdf_path}")# import shutil
# shutil.rmtree(temp_folder)# # 以下是一行行插入的代码
# # num_docs = len(images_123) // 12
# # for i in range(num_docs):
# #     doc = Document(doc_template_path)
# #     table1 = doc.tables[0]# #     # 添加第一行图片到第一张表格的第一行
# #     for j in range(4):
# #         cell = table1.cell(0, j)
# #         image_path = images_123[i * 12 + j] if (i * 12 + j) < len(images_123) else ""
# #         if image_path:
# #             run = cell.paragraphs[0].add_run()
# #             run.add_picture(image_path, width=Cm(size), height=Cm(size))
# #             cell.vertical_alignment = WD_CELL_VERTICAL_ALIGNMENT.CENTER# #     # 添加第二行图片到第一张表格的第二行(旋转180度)
# #     for j in range(4):
# #         cell = table1.cell(1, j)
# #         image_path = images_234[i * 12 + j] if (i * 12 + j) < len(images_234) else ""
# #         if image_path:
# #             # 打开图片并旋转180度
# #             with Image.open(image_path) as img:
# #                 img = img.rotate(180, expand=True)
# #                 img_path = os.path.join(temp_folder, f"temp_{i}_{j}.png")
# #                 img.save(img_path)# #             run = cell.paragraphs[0].add_run()
# #             run.add_picture(img_path, width=Cm(size), height=Cm(size))
# #             cell.vertical_alignment = WD_CELL_VERTICAL_ALIGNMENT.CENTER# #             # 删除临时文件
# #             os.remove(img_path)# #     # 添加第三行图片到第一张表格的第三行
# #     for j in range(4):
# #         cell = table1.cell(2, j)
# #         image_path = images_123[i * 12 + 4 + j] if (i * 12 + 4 + j) < len(images_123) else ""
# #         if image_path:
# #             run = cell.paragraphs[0].add_run()
# #             run.add_picture(image_path, width=Cm(size), height=Cm(size))
# #             cell.vertical_alignment = WD_CELL_VERTICAL_ALIGNMENT.CENTER# #     # 添加第四行图片到第一张表格的第四行(旋转180度)
# #     for j in range(4):
# #         cell = table1.cell(3, j)
# #         image_path = images_234[i * 12 + 4 + j] if (i * 12 + 4 + j) < len(images_234) else ""
# #         if image_path:
# #             # 打开图片并旋转180度
# #             with Image.open(image_path) as img:
# #                 img = img.rotate(180, expand=True)
# #                 img_path = os.path.join(temp_folder, f"temp_{i}_{j+4}.png")
# #                 img.save(img_path)# #             run = cell.paragraphs[0].add_run()
# #             run.add_picture(img_path, width=Cm(size), height=Cm(size))
# #             cell.vertical_alignment = WD_CELL_VERTICAL_ALIGNMENT.CENTER# #             # 删除临时文件
# #             os.remove(img_path)# #     # 添加第五行图片到第一张表格的第五行
# #     for j in range(4):
# #         cell = table1.cell(4, j)
# #         image_path = images_123[i * 12 + 8+ j] if (i * 12 + 8 + j) < len(images_123) else ""
# #         if image_path:
# #             run = cell.paragraphs[0].add_run()
# #             run.add_picture(image_path, width=Cm(size), height=Cm(size))
# #             cell.vertical_alignment = WD_CELL_VERTICAL_ALIGNMENT.CENTER# #     # 添加第六行图片到第一张表格的第六行(旋转180度)
# #     for j in range(4):
# #         cell = table1.cell(5, j)
# #         image_path = images_234[i * 12 + 8 + j] if (i * 12 + 8 + j) < len(images_234) else ""
# #         if image_path:
# #             # 打开图片并旋转180度
# #             with Image.open(image_path) as img:
# #                 img = img.rotate(180, expand=True)
# #                 img_path = os.path.join(temp_folder, f"temp_{i}_{j+8}.png")
# #                 img.save(img_path)# #             run = cell.paragraphs[0].add_run()
# #             run.add_picture(img_path, width=Cm(size), height=Cm(size))
# #             cell.vertical_alignment = WD_CELL_VERTICAL_ALIGNMENT.CENTER# #             # 删除临时文件
# #             os.remove(img_path)# #     # 保存修改后的文档
# #     doc_path = os.path.join(temp_folder, f"{i+1:02}.docx")
# #     doc.save(doc_path)
一页2图,因为有0.7CM白边,所以实际上黏贴边小于2CM。
回到第一个代码,把200的黏贴边,改成250

