这个系列专栏是为了记录在研一接触到的第一个横向课题中的实际应用,我的任务包括,训练一个多分类的深度学习模型,为模型开发一个GUI方便无计算机背景的人使用。同时我希望将它打包成一个exe文件,当其他人的电脑没有对应的python环境时也可以使用该系统。在编程语言的选择上,我对python最为熟练,C++稍微差一些,因此首先选择python开发,在日后若有机会,希望可以使用C++重写该系统。
设计思路:
- 要对屏幕中的指定区域进行实时检测,因此需要编写一个DiagnosisAreaSelector.py选择检测区域,还需要一个ScreenCapture.py来实时捕获屏幕。
- 当诊断区域选择成功后,需要使用DLInference.py对实时捕获的屏幕进行推理。
- 当得到推理结果后,我们需要使用ResultPlot.py将结果可视化,方便观察
- 使用PyQt5绘制页面,编写信号与槽函数将一些相关功能绑定在按钮上,需要为实时捕获屏幕和模型推理功能放置在不同的线程中防止主线程卡死。
在实际的检测过程中,也许我们并不需要对屏幕中的所有内容进行深度学习模型的推理,所以我在这里设计了一个选择模型推理区域的功能。在这里我将该类起名为:DiagnosisAreaSelector.py
一、代码:
可以解开print语句的注释调试代码。
import numpy as np
import cv2
import pyautogui
from MouseController import mouse_listener
from PIL import ImageGrab
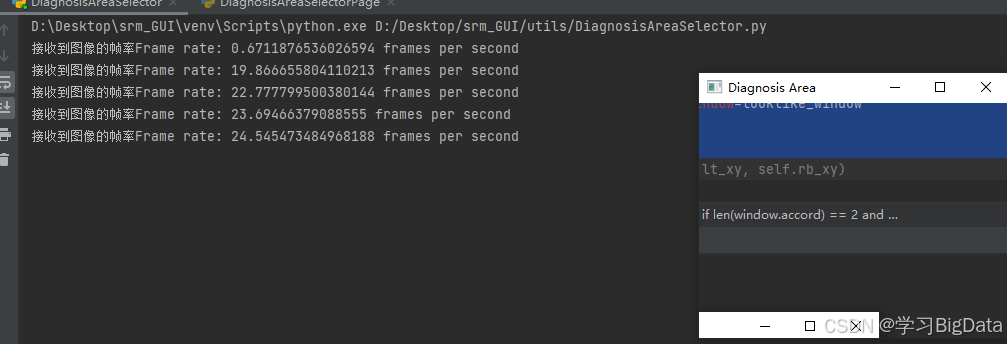
import timeclass DiagnosisArea:def __init__(self):self.lt_xy = Noneself.rb_xy = Noneself.frame_count = 0self.start_time = time.time()passdef acquire_accord(self, wh_format: bool, looklike_window: str):''':param wh_format: 是否需要宽高形式的数据:left, top, width, height。如果选择False,则会返回lt_xy, rb_xy,分别是区域左上坐标的元组和右下坐标的元组。:param looklike_window: 相似区域的图像:return: 以不同格式表示的检测区域'''# looklike_window,如果每次启动程序要检测的区域都很相似,那么可以传入一个looklike_window,他会自动找到屏幕上的这部分区域,并将其设置为检测区域left, top, width, height = -1, -1, -1, -1# 在我的实际应用中并没有使用left, top, width, height格式的数据,因此就没有将它设置为属性try:  # 如果能找到完全相同的区域,直接返回该区域坐标left, top, width, height = pyautogui.locateOnScreen(looklike_window)except (pyautogui.ImageNotFoundException):  # 如果找不到完全相同的区域,就通过鼠标监听的方式获取区域坐标# print("The image was not found on the screen.")# print("Start listening for the image...")window = mouse_listener()window.listen()if len(window.accord) == 2 and window.accord[0] != window.accord[1]:self.lt_xy = window.accord[0]self.rb_xy = window.accord[1]if self.lt_xy[0] > self.rb_xy[0] or self.lt_xy[1] > self.rb_xy[1]:# print(#     "错误:请先在区域的左上角按下鼠标,再在区域的右下角松开鼠标。"# )self.acquire_accord(wh_format=False, looklike_window=looklike_window)  # 递归调用以重新选择# else:#     # print("窗口区域已设置:", self.lt_xy, self.rb_xy)else:# print("未能获取正确的坐标。请重新选择。")self.acquire_accord(wh_format=False, looklike_window=looklike_window)if wh_format:if self.lt_xy is not None and self.rb_xy is not None:left = self.lt_xy[0]top = self.lt_xy[1]# 计算宽度和高度width = self.rb_xy[0] - self.lt_xy[0]height = self.rb_xy[1] - self.lt_xy[1]# 返回左上角坐标和宽高return left, top, width, heightelse:if left != -1 and top != -1 and width != -1 and height != -1:self.lt_xy, self.rb_xy = self.caculate_accord(left, top, width, height)return self.lt_xy, self.rb_xydef cap_screen(self, looklike_window: str):if self.lt_xy is None and self.rb_xy is None:# print("执行了这段代码")self.acquire_accord(wh_format=False, looklike_window=looklike_window)screen = self.lt_xy + self.rb_xyimg = ImageGrab.grab(screen)return imgdef caculate_accord(self, left, top, width, height):lt_xy = (left, top)rb_xy = (left + width, top + height)return lt_xy, rb_xy# --------------------------------测试用函数------------------------------------def dispaly_realtime(self, looklike_window):while True:self.frame_count += 1current_time = time.time()elapsed_time = current_time - self.start_timeif elapsed_time > 1:  # 每秒计算一次帧率frame_rate = self.frame_count / elapsed_timeprint(f"接收到图像的帧率Frame rate: {frame_rate} frames per second")self.frame_count = 0self.start_time = current_timeimg = self.cap_screen(looklike_window)img_np = cv2.cvtColor(np.array(img), cv2.COLOR_RGB2BGR)cv2.imshow("Diagnosis Area", img_np)if cv2.waitKey(1) & 0xFF == ord("q"):breakdef draw_rect(self, lt_xy, rb_xy):screenshot = pyautogui.screenshot()frame = np.array(screenshot)frame = cv2.cvtColor(frame, cv2.COLOR_BGR2RGB)cv2.rectangle(frame, lt_xy, rb_xy, (0, 255, 0), 2)cv2.imshow("window", frame)cv2.waitKey(0)cv2.destroyAllWindows()if __name__ == "__main__":window = DiagnosisArea()looklike_window = "D:/Desktop/srm_GUI/assets/like_window.png"window.cap_screen(looklike_window)window.dispaly_realtime(looklike_window)cv2.destroyAllWindows()

二、总结:
- 这里的Image.grab()方法有点慢,在实际中使用了mss库方法。
