变量理解:
context_image: 表示投影的 refrence image
Epipolar Transformer vs Swin Transformer : 不同于 Pixel Splat 使用的是 Epipolar Transformer. MVspalt 使用的是 Swin Transformer, 但是作者在 Code 里面 也使用了 Epipolar Transformer 并对此进行了 消融实验:
网络架构,得到 CNN_feature 和 Transformer_feature :
- 假设 context_imgae shape :
(1,2,3,256,256) - 进入一个 Backbone Multiview 的Encoder; 这个是 一个 CNN 的 Encoder 去提取 Image 的 feature, 进行了 4 倍的 downsampling , 对应的 cnn_features shape
(1,2,128,64,64)
## CNN 提取特征
features_list = self.extract_feature(self.normalize_images(images))  # list of features
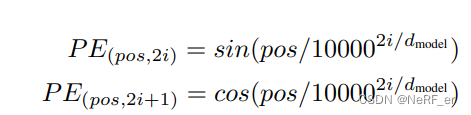
- 对这个 Feature 添加位置信息,使用Transformer 里面的 PE, 但是不会改变 Tensor 的大小。shape
(1,2,128,64,64)
- 将上面的 Tensor 送入到 Transformer 当中, 输出的 Tensor 维度不变, transformer 计算的 shape 依然是
(1,2,128,64,64)
经过Transformer 网络之后,预测 3D Gaussian feature 和 深度:
depths, densities, raw_gaussians = self.depth_predictor(in_feats, ## transformer feature (1,2,128,64,64)context["intrinsics"],context["extrinsics"],context["near"],context["far"],gaussians_per_pixel=True,deterministic=deterministic,extra_info=extra_info,cnn_features=cnn_features, ## CNN feature (1,2,128,64,64))
变量 refine_out:(1,32,256,256)
image:(2,3,256,256)
pro_fea_in_fullers:(2,128,256,256)
1. 在这个函数中首先进行 数据预处理:
feat_comb_lists, intr_curr, pose_curr_lists, disp_candi_curr = ( prepare_feat_proj_data_lists(features,intrinsics,extrinsics,near,far,num_samples=self.num_depth_candidates))
主要的 功能如下:
* 对于 depth 进行等间距的 128 个采样点.* feat_comb_lists 第0个元素是 [0,1] 排列的 transformer feature feature_01; 第1个元素是 [1,0] 排列的 transformer feature feature_10 ;* 对于 re10k format 的内参 unnormalize* pose_curr_lists 分别是 0->1 的位姿变换和 1->0 的位姿变换
2. 构建两个 Feature 的 Cost Volume:
feat10: 第一个元素是feature map 1; 第2个元素是feature map 2
pose_curr: 第一个元素是camera 1 -> camera 0 的 Transform ; 第2个元素是camera 0 -> camera 1 的 Transform
2.1 作用: 将feature map 1 根据深度 lift 成一个 3D Volume, 然后根据 Pose 将 3D 点投影到 image 0 的 2D 平面上 interpolate feature.
for feat10, pose_curr in zip(feat_comb_lists[1:], pose_curr_lists):# 1. project feature1 to camera0 and project feture0 to camera 1# feat10: [0] is feature map 1; [1] is feature map 0feat01_warped = warp_with_pose_depth_candidates(feat10,intr_curr,pose_curr,1.0 / disp_candi_curr.repeat([1, 1, *feat10.shape[-2:]]),warp_padding_mode="zeros",) # [B, C, D, H, W] [2, 128, 128, 64, 64] 表示 128,64,64 个3D点 投影到2D平面上query 的feature. 每个feature 的 维度是 128维度
2.2 根据 不同的 depth 投影得到的 featuure 和原始的 feature 计算 点积 (相似度),然后对于 feature channel 那一个维度 求取 sum
raw_correlation_in = (feat01.unsqueeze(2) * feat01_warped).sum(1) / (c**0.5) # [vB, D, H, W]

2.3 使用2D U-Net 进行 CostVolume 的 Refine, 再使用Softmax 函数 估计 出每一个 采样 Depth的 权重。 (准确的Depth 权重应该最大)
pdf = F.softmax(self.depth_head_lowres(raw_correlation), dim=1) # [2xB, D, H, W]

2.4 SoftMax 得到的权重和 depth_candi 点积,可以得到 depth 的预测,然后上采样到原始分辨率
coarse_disps = (disp_candi_curr * pdf).sum(dim=1, keepdim=True) # (vb, 1, h, w)fullres_disps = F.interpolate(coarse_disps,scale_factor=self.upscale_factor,mode="bilinear",align_corners=True,)
coarse_disps :(2,1,64,64) 是feature map 的图像 的 Dpeth 预测
fullres_disps :(2,1,256,256) 是原始 Resolution 的图像 的 Dpeth 预测
2.5 对于预测的 Depth 使用 2DU-Net 进行Refine, 得到feature volume。
refine_out = self.refine_unet(torch.cat((extra_info["images"], proj_feature, fullres_disps, pdf_max), dim=1))
最后的 refine depth 是 fullres_disps + delta_disps
fine_disps = (fullres_disps + delta_disps).clamp(1.0 / rearrange(far, "b v -> (v b) () () ()"),1.0 / rearrange(near, "b v -> (v b) () () ()"),)
refine_out :(2,32,256,256) 是输入U-Net 得到的feature, 是32通道
2.6 利用 Transformer feature, CNN feature, Depth 的预测 和 原始的color 图像, 得到 Gaussian 的 feature map
这个 self. to_gaussians 是一个 两层的 CNN。 输入c=163, 输出 c=84
 # gaussians head
raw_gaussians_in = [refine_out, extra_info["images"], proj_feat_in_fullres]
raw_gaussians_in = torch.cat(raw_gaussians_in, dim=1)
raw_gaussians = self.to_gaussians(raw_gaussians_in)
输出:raw_gaussians (2,84,256,256), 原始分辨率的 Gaussian feature map
下面是各种 Gaussian 属性的 预测 :
1. Opcaity 的 预测
对前面得到的 Costvolume 进行卷积。
输入是 refine_out:(1,32,256,256), 通过卷积 变成2个通道,其中一个作为 density, 另一个作为 视差。 文章的解释: matching volume 里面 对应关系越强,那么 density 越大
delta_disps_density = self.to_disparity(refine_out)
delta_disps, raw_densities = delta_disps_density.split(gaussians_per_pixel, dim=1)# combine coarse and fine info and match shape
densities = repeat(F.sigmoid(raw_densities),"(v b) dpt h w -> b v (h w) srf dpt",b=b,v=v,srf=1,
)
之后将 density 转成opacity, 转换通过一个构造函数进行的:
y = { 0 < x < 1 : 0.5 ⋅ ( 1 − ( 1 − x ) t + x 1 t ) } y = \left\{0<x<1: 0.5 \cdot\left(1-(1-x)^t+x^{\frac{1}{t}}\right)\right\} y={0<x<1:0.5⋅(1−(1−x)t+xt1)}

2. Center 的 预测
每一个 pixel 生成一个坐标, 对应一个 Gaussian. Pixel 发生光线,根据 depth 反投影得到 Gaussian 的 Center.. 并不一定是从 像素 中点 发生光心, 因此,每一个 pixel 还有一个 2D 的offset 偏移量· offset_xy ,也是泛化得到的,从 raw_gaussians (2,84,256,256) 的前2个channel 生成。
offset_xy = gaussians[..., :2].sigmoid()
pixel_size = 1 / torch.tensor((w, h), dtype=torch.float32, device=device)
xy_ray = xy_ray + (offset_xy - 0.5) * pixel_size means = origins + directions * depths[..., None]
3. Scale 的 预测
Scale 由 前3 个channel 确定,还需要和 depth 以及相机内参数有关系。 需要注意一下2点:
- Regarding multiplying by depths, further objects will be smaller when projected.
- Regarding multiplying by multiplier. This operation constrains the Gaussian scale concerning the pixel width in the image space, which
aims to ensure that the Gaussian scale with scale 1 is roughly the
same as 1 pixel in the image space.
scales = scale_min + (scale_max - scale_min) * scales.sigmoid()
h, w = image_shape
pixel_size = 1 / torch.tensor((w, h), dtype=torch.float32, device=device)
multiplier = self.get_scale_multiplier(intrinsics, pixel_size)
scales = scales * depths[..., None] * multiplier[..., None]
4. Covariance 的 预测
Rotations 是由 raw_gaussians 的4个通道预测的,先得到四元数。 之后再和 Scale 构成 协方差矩阵, 注意: 这里的 协方差矩阵是 camera 系下面的,还需要外参转到 world 坐标系:
rotations = rotations / (rotations.norm(dim=-1, keepdim=True) + eps)
covariances = build_covariance(scales, rotations)
c2w_rotations = extrinsics[..., :3, :3]
covariances = c2w_rotations @ covariances @ c2w_rotations.transpose(-1, -2)
4. SH 的 预测
剩下的 75个 channel 对应着 SH 系数
opacity 的生成 在 传入下面的函数之前已经生成了,是将 density 转换成 Gaussian 的 Opacity:
 # 得到SH系数
sh = rearrange(sh, "... (xyz d_sh) -> ... xyz d_sh", xyz=3)
sh = sh.broadcast_to((*opacities.shape, 3, self.d_sh)) * self.sh_mask
根据上面的属性,得到 泛化的 Gaussian
return Gaussians(means=means,covariances=covariances,harmonics=rotate_sh(sh, c2w_rotations[..., None, :, :]),opacities=opacities,# NOTE: These aren't yet rotated into world space, but they're only used for# exporting Gaussians to ply files. This needs to be fixed...scales=scales,rotations=rotations.broadcast_to((*scales.shape[:-1], 4)),)
生成当前场景的 3DGS 之后,在 Target View 上进行 Render
Pytorch Lighting 的基础知识:
Train 的主函数: training_step 函数:
Test 的主函数: test_step 函数:
Test 的 dataloader 的主函数:
val_dataloader 函数
test_dataloader 函数
数据Dataset 类 全部在 dataset_re10k.py 这个文件
def test_dataloader(self, dataset_cfg=None):##主要用来 读取的数据文件都在 .torchdataset = get_dataset(self.dataset_cfg if dataset_cfg is None else dataset_cfg,"test",self.step_tracker,) dataset = self.dataset_shim(dataset, "test")return DataLoader(dataset,self.data_loader_cfg.test.batch_size,num_workers=self.data_loader_cfg.test.num_workers,generator=self.get_generator(self.data_loader_cfg.test),worker_init_fn=worker_init_fn,persistent_workers=self.get_persistent(self.data_loader_cfg.test),shuffle=False,)
MVSplat 是加载 chunk 进行实验的:
每一个 chunk 是由 一个 xx.torch 文件加载过来的:
chunk = torch.load(chunk_path)
每一个 chunk 里面有 5个 dtu数据集, 每一个数据集里面存放着 45 张图像, 而每一个 数据集的以字典的形式进行存放。 如下所示,里面存放在 图像的 camera, image 和 数据集的名称 “key”. y 从 “camera” 读取随机一个场景的 内外参数:example 是 chunk 里面的某一个数据集:
extrinsics, intrinsics = self.convert_poses(example["cameras"])之后 读取图像。
因此,代码里有两个 for loop, 一个 循环 .torch 文件, 一个 循环 torch 文件里面的数据集。