目录
引言
一、创建新项目
二、通过spring boot创建顾客查询的项目
1.实体类:
2.mapper接口
3.service服务层接口
4.service服务层接口实现类
5.mapper映射文件
三、可能遇到的问题
引言
在通过之前ssm框架的学习后,你是否会感觉ssm的配置过多,操作不是很简便呢,现在,我们来学习一下Spring Boot框架。
Spring Boot框架化了基于 Spring 框架的应用程序的开发和部署,它通过自动配置和默认设置来减少开发人员的工作量。它集成了许多常见的第三方库和框架,如 Spring MVC、Spring Data、Spring Security 等,使开发人员能够更轻松地构建功能丰富、可扩展的应用程序。
一、创建新项目
现在,我们开始创建第一个Spring Boot框架项目吧
首先,新建——》项目——》Spring Initializr
项目SDK选择电脑上有的SDK,我用的是1.8


java version的版本进去后再进行修改
点击下一步,在选择配置时可能会有问题,我们可以在项目中进行后继的调整。
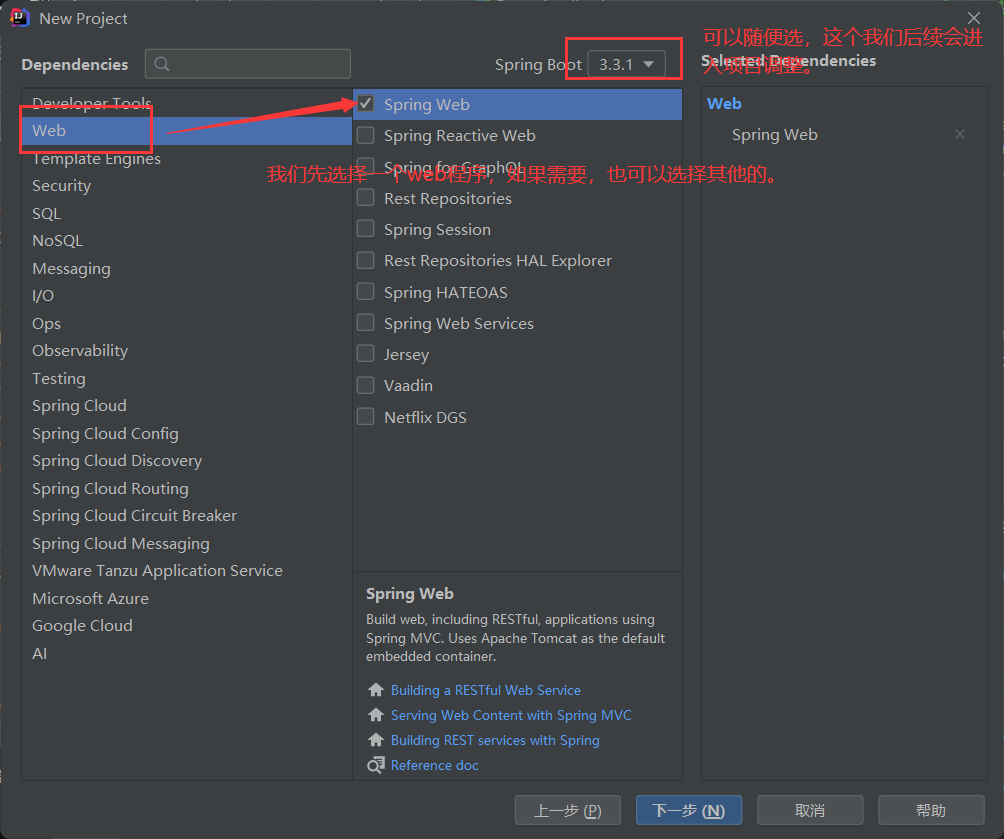
进入程序后,先运行一下检查是否有错误。

如果运行报错
springboot java: 错误: 无效的源发行版:15
这时,我们就要修改一下我们的java version和spring boot版本了。
打开项目结构——》项目,如果你的java SDK版本为1.8,那么在pom文件中,你的java version版本就要改为8
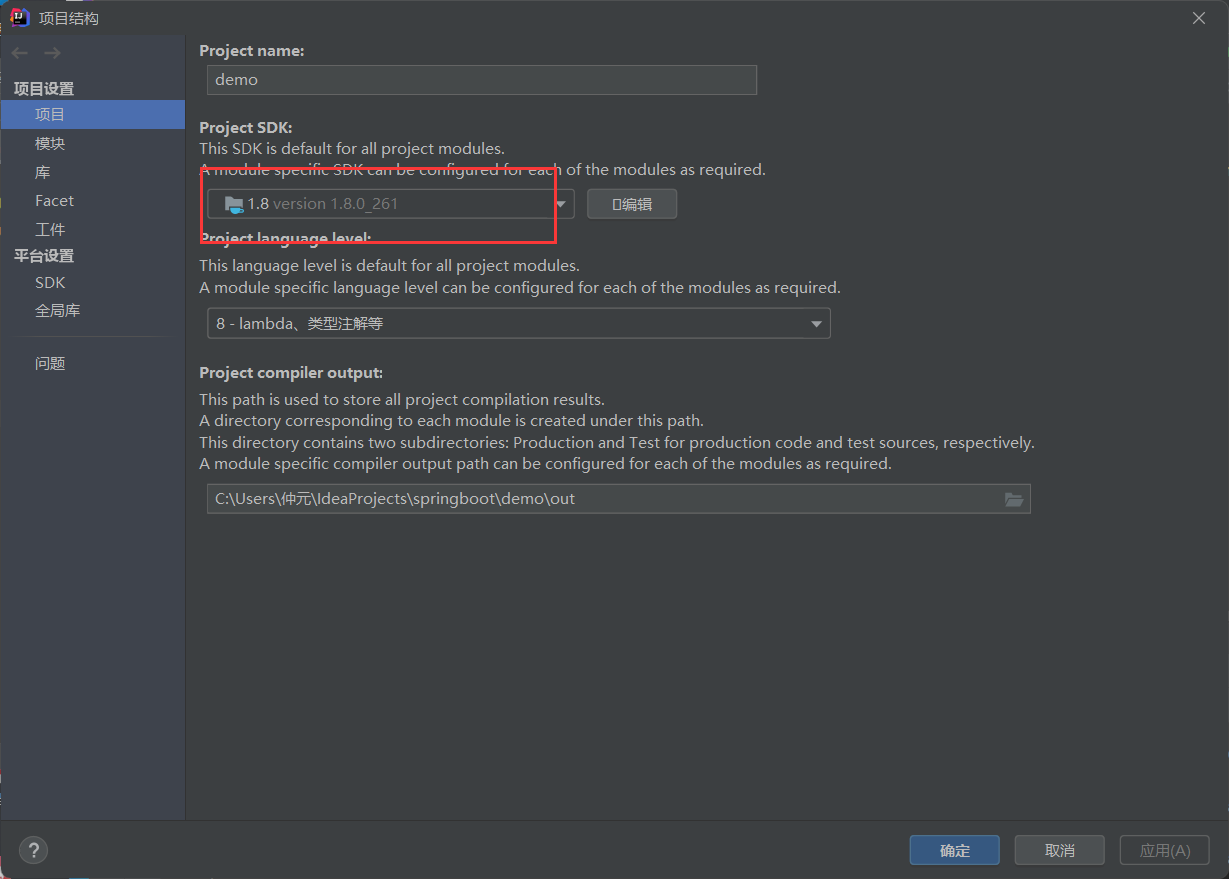
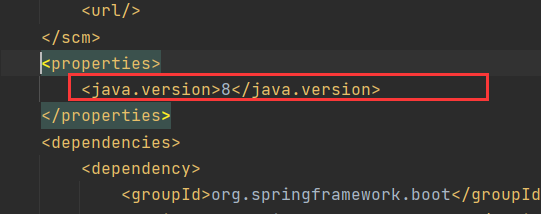
之后再修改springboot的版本,这里我使用的就是2.7.11版本的

全部结束后点击刷新,等待jar包等的导入。
之后,我们在controller层写一下返回
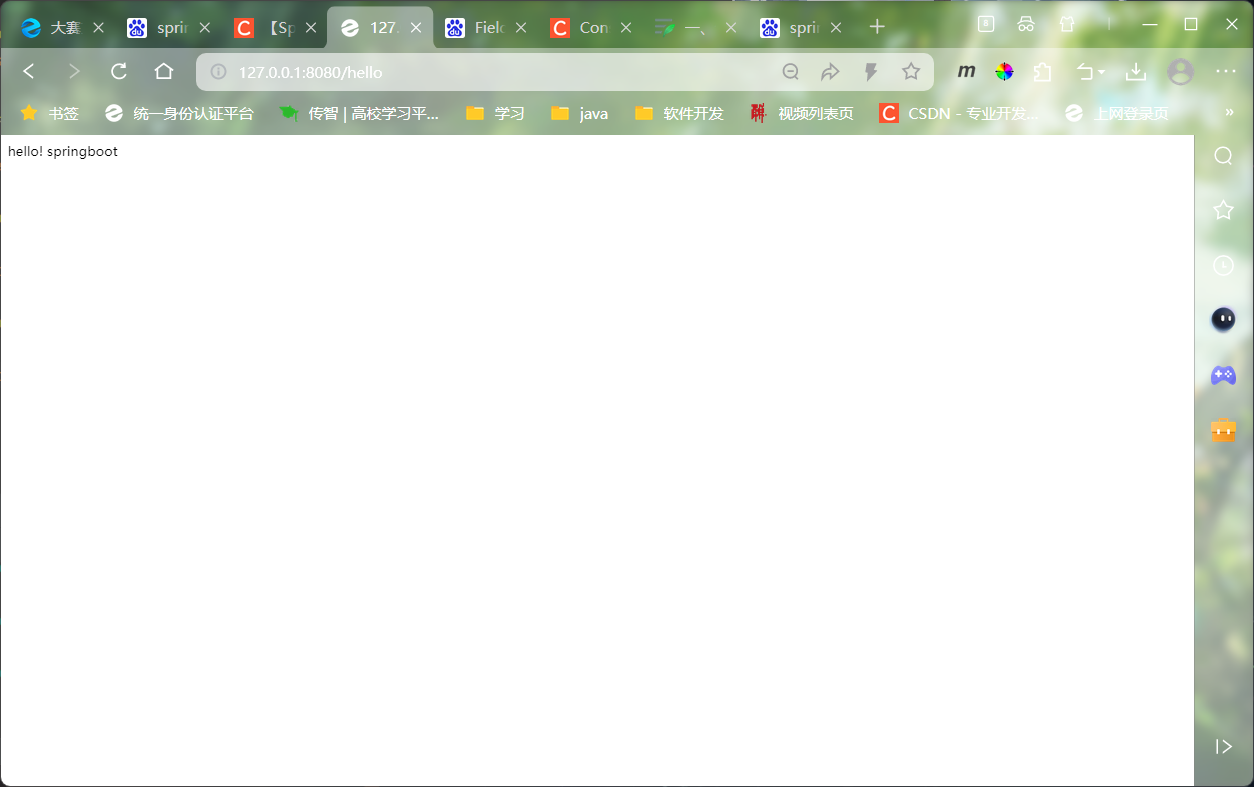
这时,我们发现,可以通过http访问
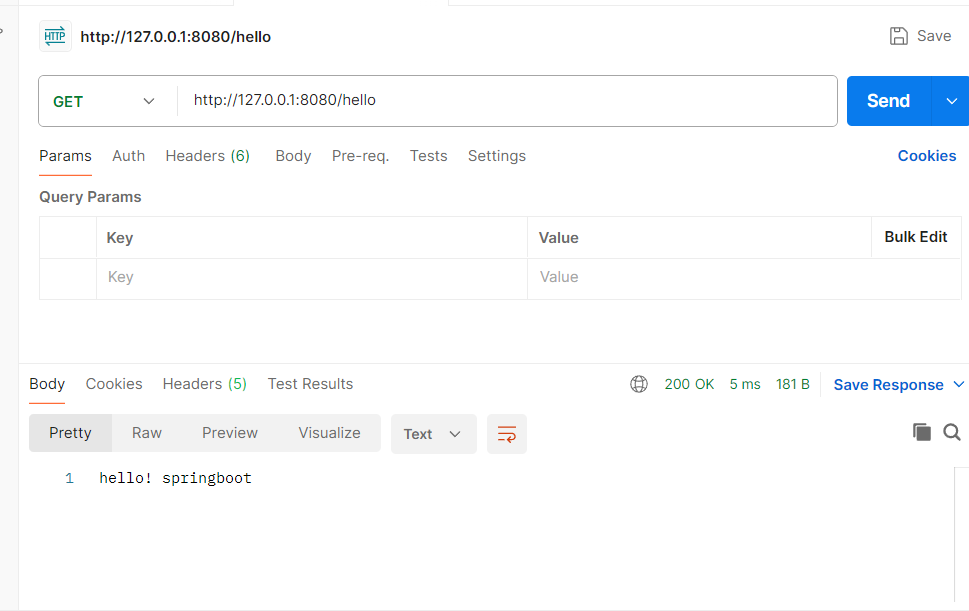
我们发现,无论是直接访问还是通过postman访问都可以得到数据。
那么,现在我们就来编写一个顾客查询。
二、通过spring boot创建顾客查询的项目
准备pojo,mapper,service,controller等各个层。
先在application.properties中配置一下url等
spring.application.name=com.example.demo
spring.datasource.url=jdbc:mysql://localhost:3306/mybatis
spring.datasource.username=root
spring.datasource.password=123456
这是我的数据库:
create table customer
(id       int auto_incrementprimary key,username varchar(20) not null,jobs     varchar(50) null,phone    varchar(13) null
);
1.实体类:
package com.example.demo.pojo;import lombok.AllArgsConstructor;
import lombok.Data;
import lombok.NoArgsConstructor;@Data
@AllArgsConstructor
@NoArgsConstructor
public class Customer {private int id;private String username;private String jobs;private String phone;}
2.mapper接口
package com.example.demo.mapper;import com.example.demo.pojo.Customer;import java.util.List;public interface CustomerMapper {List<Customer> findAll();
}
3.service服务层接口
package com.example.demo.service;import com.example.demo.pojo.Customer;import java.util.List;public interface CustomerService {List<Customer> findAll();
}
4.service服务层接口实现类
package com.example.demo.service.impl;import com.example.demo.mapper.CustomerMapper;
import com.example.demo.pojo.Customer;
import com.example.demo.service.CustomerService;
import org.mybatis.spring.annotation.MapperScan;
import org.springframework.beans.factory.annotation.Autowired;
import org.springframework.stereotype.Service;import java.util.List;@Service
public class CustomerServiceImpl implements CustomerService {@Autowiredprivate CustomerMapper customerMapper;public List<Customer> findAll() {return customerMapper.findAll();}
}
5.mapper映射文件
<?xml version="1.0" encoding="UTF-8"?>
<!DOCTYPE mapper PUBLIC "-//mybatis.org//DTD Mapper 3.0//EN"
"http://mybatis.org/dtd/mybatis-3-mapper.dtd">
<mapper namespace="com.example.demo.mapper.CustomerMapper"><resultMap id="BaseResultMap" type="com.example.demo.pojo.Customer"><!--@JPA.Support generated on 2024-05-27 08:48:59.--><!--@Table customer--><id column="id" jdbcType="INTEGER" property="id"/><result column="username" jdbcType="VARCHAR" property="username"/><result column="jobs" jdbcType="VARCHAR" property="jobs"/><result column="phone" jdbcType="VARCHAR" property="phone"/></resultMap><sql id="Base_Column_List"><!--@JPA.Support generated on 2024-05-27 08:48:59.-->id, username, jobs, phone</sql><select id="findAll" resultMap="BaseResultMap">select * from customer</select></mapper>
package com.example.demo.controller;import com.example.demo.pojo.Customer;
import com.example.demo.service.CustomerService;
import org.springframework.beans.factory.annotation.Autowired;
import org.springframework.stereotype.Controller;
import org.springframework.web.bind.annotation.GetMapping;
import org.springframework.web.bind.annotation.RestController;import java.util.List;@RestController
@RequestMapping(produces = "application/json;charset=UTF-8")
public class HelloController {@Autowiredprivate CustomerService customerService;@GetMapping("/customer/list")public List<Customer> find(){return customerService.findAll();}@GetMapping("hello")public String hello(){return "hello! springboot";}
}
三、可能遇到的问题
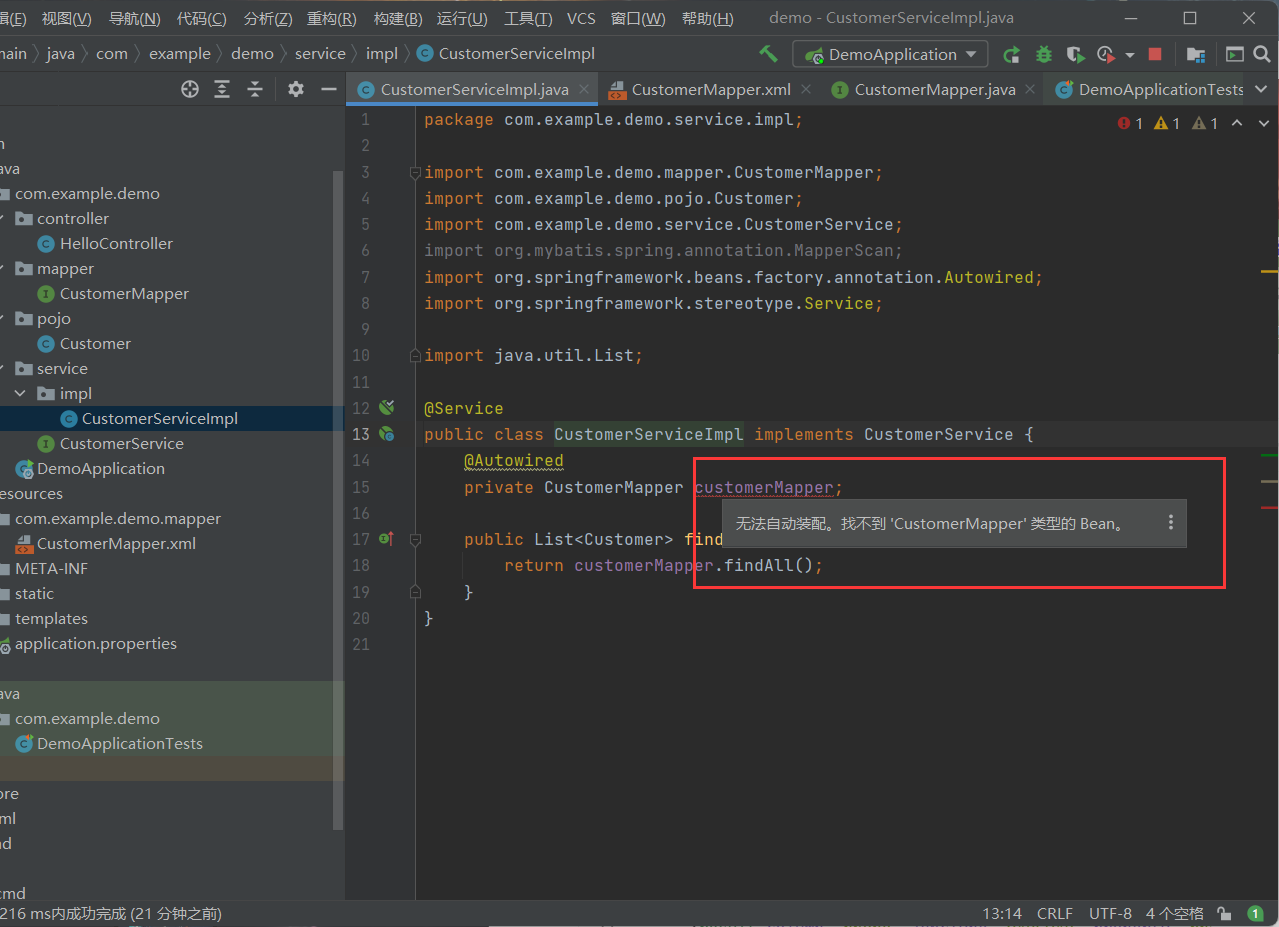
在注入时候无法找到bean,我们可以在启动项中添加MapperScan来解析mapper中的文件。在添加后我们发现pom配置文件出错。这时我们需要修改pom文件。之前我们用的是spring的mybatis启动器,我们将spring的mybatis启动器删除,添加springboot的mybatis启动器。
<!--SpringBoot的Mybatis启动器-->
<dependency><groupId>org.mybatis.spring.boot</groupId><artifactId>mybatis-spring-boot-starter</artifactId><version>2.0.1</version>
</dependency>
在配置好后刷新一下Maven
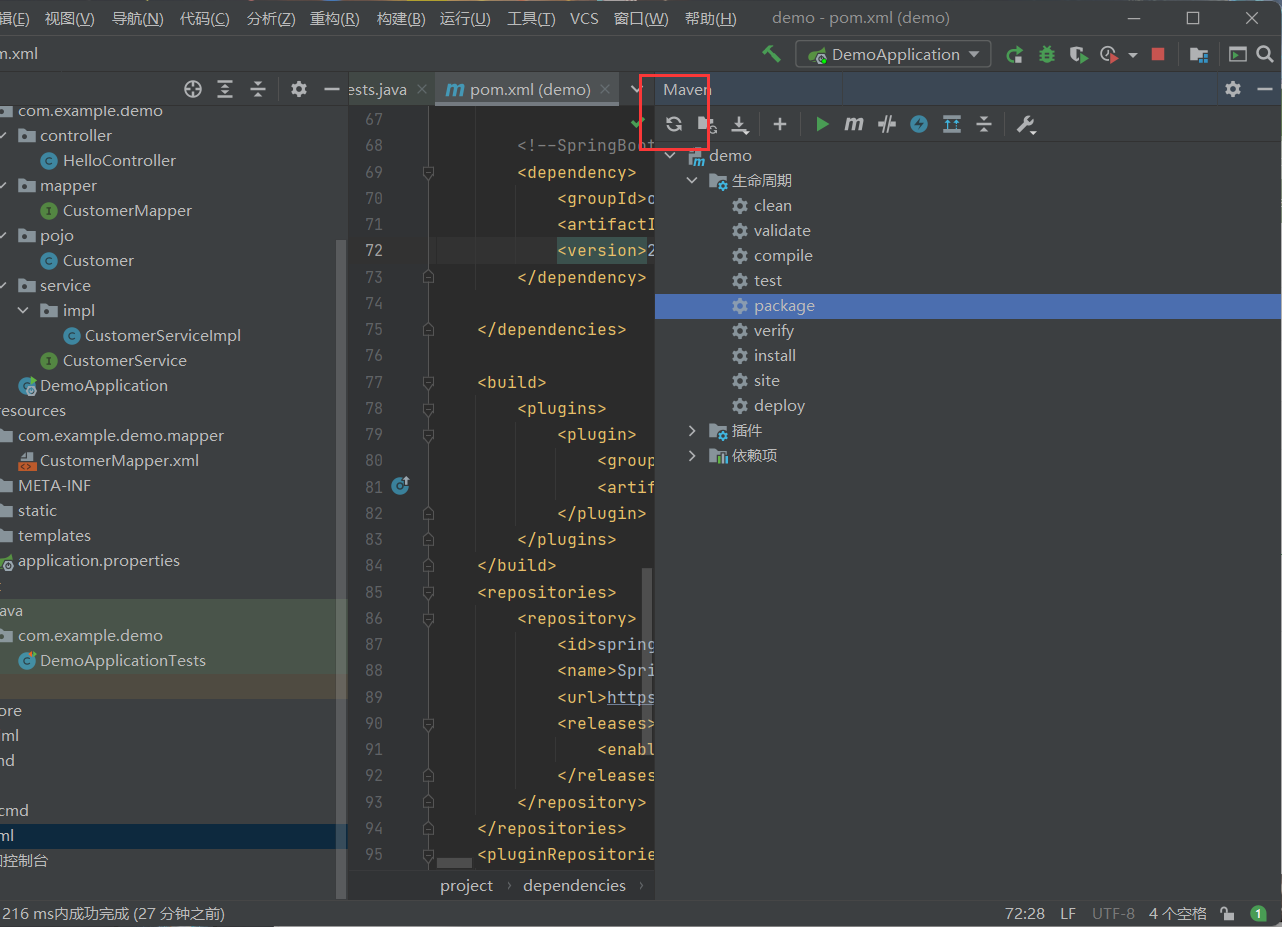
在刷新Maven后修改DemoApplication文件

这样基本上就解决了,可能第一个service实现类问题解决了,建第二个时又出现这种情况,但并不影响项目的运行,这种是正常情况,如果看着难受,重启一下idea就可以了
这时我们再次启动项目。访问一下http://127.0.0.1:8080/customer/list,查看是否有数据。

我们发现在浏览器中是能看到数据的。
我们再次在postman中查询。
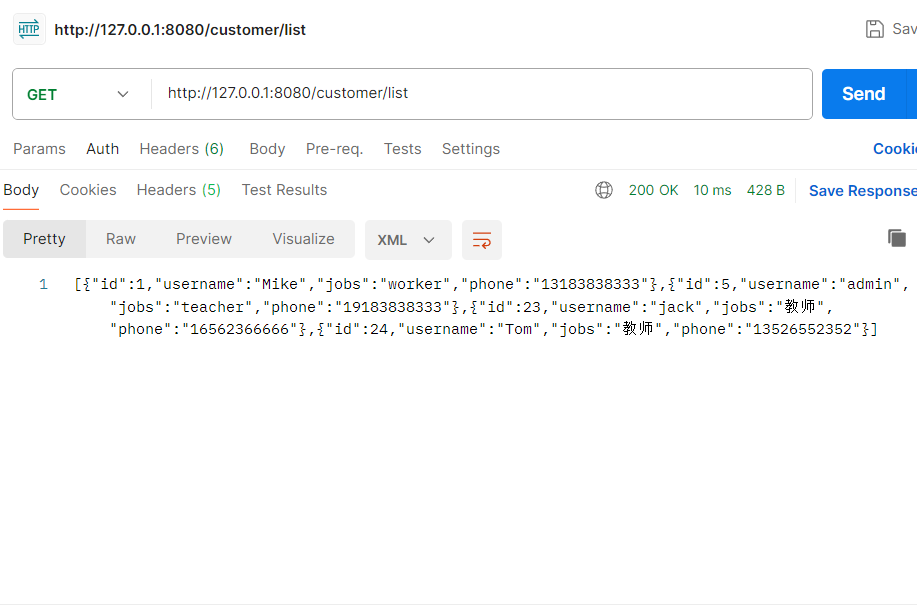
我们发现可以查到数据,这样,我们的springboot查询就完成了。
