大家好,我是网创有方,今天来学习如何使用thymeleaf渲染html。该模板运用不广泛,所以本节内容了解既可。
第一步:创建html文件。
在模板templates目录下创建一个html文件。

编写代码如下:
<!DOCTYPE html>
<html lang="en" xmlns:th="www.thymeleaf.org"/>
<head><meta charset="UTF-8"><title>thymeleaf演示</title>
</head>
<body>
<p th:text="${description}"/>thymeleaf
</body>
</html>
第二步:编写动态渲染属性值。
并返回渲染的html文件。
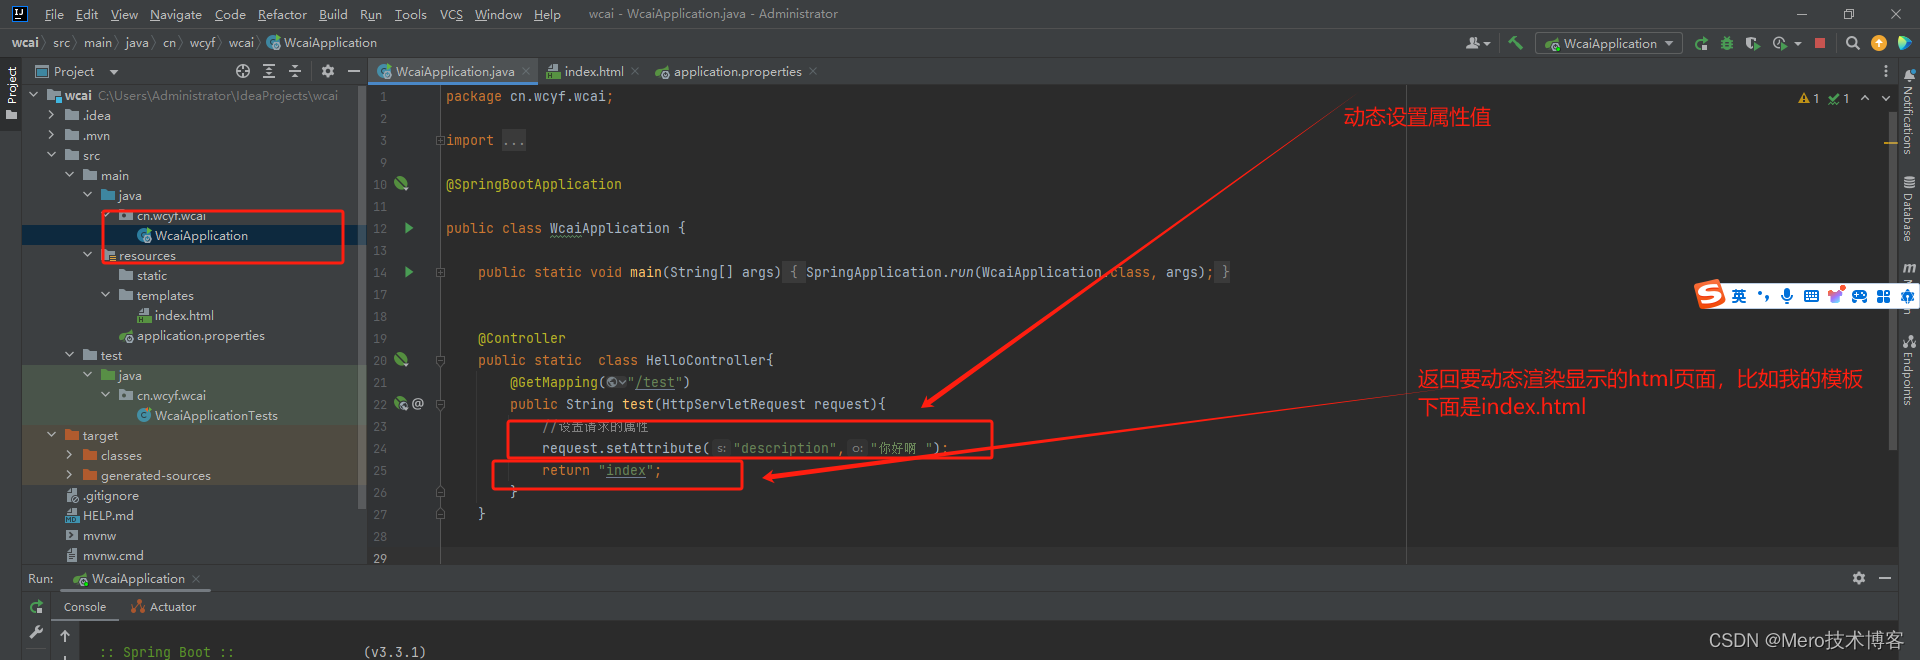
package cn.wcyf.wcai;import jakarta.servlet.http.HttpServletRequest;
import org.springframework.boot.SpringApplication;
import org.springframework.boot.autoconfigure.SpringBootApplication;
import org.springframework.stereotype.Controller;
import org.springframework.web.bind.annotation.GetMapping;
import org.springframework.web.bind.annotation.RestController;@SpringBootApplicationpublic class WcaiApplication {public static void main(String[] args) {SpringApplication.run(WcaiApplication.class, args);}@Controllerpublic static  class HelloController{@GetMapping("/test")public String test(HttpServletRequest request){//设置请求的属性request.setAttribute("description","你好啊 ");return "index";}}}
第三步:点击运行
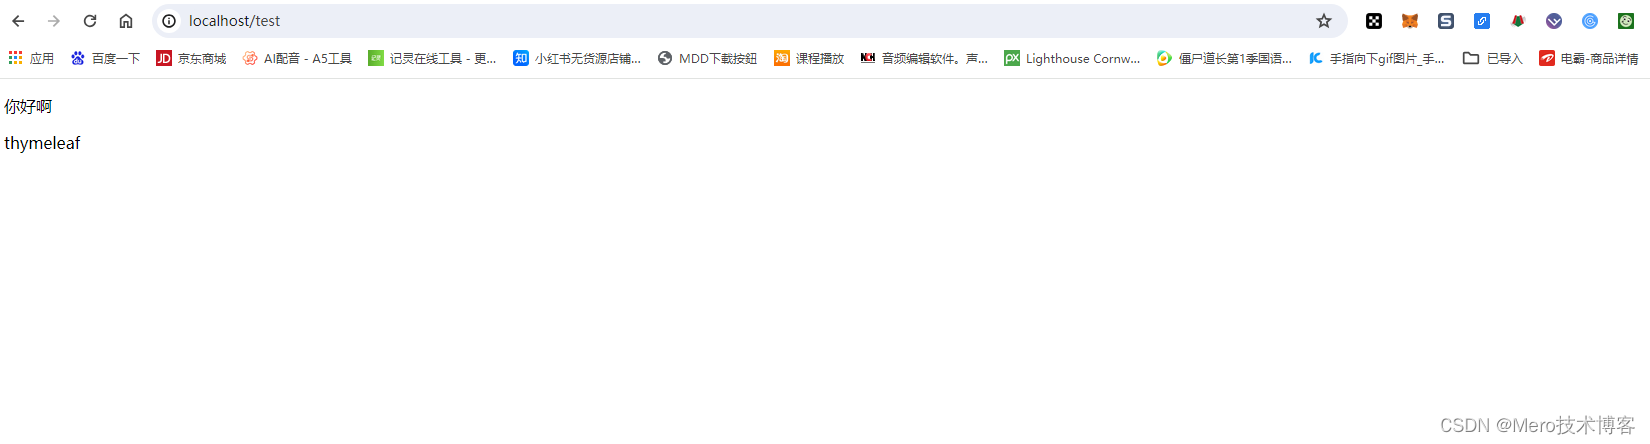
接下来访问localhost:test
参考:《深入浅出spring-boot 3.x》