需求:做个公文系统,需要将正文文档在某个节点点击套红按钮,实现文档套红
试了很多方法,大多数网上能查到但是实际代码不能找到关键方法,可能是跟包的版本有关系,下面记录能用的这个。
一:添加依赖
<dependency><groupId>org.apache.poi</groupId><artifactId>poi</artifactId><version>4.1.2</version></dependency><dependency><groupId>org.apache.poi</groupId><artifactId>poi-ooxml</artifactId><version>4.1.2</version></dependency><dependency><groupId>org.apache.poi</groupId><artifactId>poi-ooxml-schemas</artifactId><version>4.1.2</version></dependency><dependency><groupId>com.deepoove</groupId><artifactId>poi-tl</artifactId><version>1.9.1</version><exclusions><exclusion><artifactId>slf4j-log4j12</artifactId><groupId>org.slf4j</groupId></exclusion></exclusions></dependency><dependency><groupId>e-iceblue</groupId><artifactId>spire.doc</artifactId><version>12.6.2</version></dependency>
二、文档
模板:{{date}}是可以获取到的变量

文档:

三、代码
public static void word2RedDocument(String content, Map<String, Object> data, String destDocx) throws Exception {//模板文件地址String model = "D:\\套红模板.docx";//模板文件 参数填写XWPFTemplate template = XWPFTemplate.compile(model).render(data);//获取模板文件  公文NiceXWPFDocument main = template.getXWPFDocument();//正文文档NiceXWPFDocument sub = new NiceXWPFDocument(new FileInputStream(content));List<XWPFParagraph> paragraphs = main.getParagraphs();NiceXWPFDocument newDoc = new NiceXWPFDocument();for (XWPFParagraph p:paragraphs) {if( null != p && p.getText().contains("正文")){//这里是要去掉正文两个字,自己debug看了索引,为了保险起见应该遍历run判断p.removeRun(0);XWPFRun run = p.createRun();// 合并两个文档到指定位置newDoc = main.merge(Arrays.asList(sub),run);break;}}// 设置页码--开始--没有需求可以删掉XWPFFooter footer = newDoc.createFooter(HeaderFooterType.DEFAULT);//创建一个新的XWPFFooter对象XWPFParagraph paragraph = footer.createParagraph();//创建新的XWPFParagraph对象paragraph.setAlignment(ParagraphAlignment.CENTER);//设置样式居中//设置段落对象XWPFRun runPre = paragraph.createRun();//新的段落对象runPre.setText("- ");XWPFRun run = paragraph.createRun();//新的段落对象CTFldChar fldChar = run.getCTR().addNewFldChar();//新的CTFldChar对象fldChar.setFldCharType(STFldCharType.Enum.forString("begin"));CTText ctText = run.getCTR().addNewInstrText();ctText.setStringValue("PAGE  \\* MERGEFORMAT");ctText.setSpace(SpaceAttribute.Space.Enum.forString("preserve"));fldChar = run.getCTR().addNewFldChar();fldChar.setFldCharType(STFldCharType.Enum.forString("end"));//设置段落对象XWPFRun runSuf = paragraph.createRun();//新的段落对象runSuf.setText(" -");// 将页脚添加到所有的页面XWPFHeaderFooterPolicy headerFooterPolicy = new XWPFHeaderFooterPolicy(newDoc);headerFooterPolicy.createFooter(STHdrFtr.DEFAULT, new XWPFParagraph[]{paragraph});
// 设置页码--结束--没有需求可以删掉//可以是生成新文档,也可以生成到原来的正文content = "D:\\新文档.docx";// 生成新文档FileOutputStream out = new FileOutputStream(content);newDoc.write(out);newDoc.close();out.close();//doc转pdfdoc2Pdf(content);
//        ByteArrayOutputStream os = new ByteArrayOutputStream();
//        newDoc.write(os);
//        InputStream is = new ByteArrayInputStream(os.toByteArray());
//        os.close();}
调用方法测试
 public static void main(String[] args) throws Exception {String sourceFile = "D:\\模板.docx";String targetFile = "D:\\测试.docx";Map<String, Object> data = new HashMap<>(2);List<String> list = Arrays.asList("技术", "测试", "评选结果", "测试", "评选结果", "测试", "评选结果");StringBuilder builder = new StringBuilder();for (int i =0;i<list.size();i++) {builder.append(list.get(i));if (i != list.size() -1){builder.append("  ");}}data.put("num", "931");data.put("year", "2024");data.put("name", "销售中心销售中心销售中心销售中心销售中心销售中心销售中心销售中心销售中心销售中心销售中心销售中心销售中心销售中心销售中心销售中心销售中心");data.put("keyword",builder );
//        data.put("keyword", Arrays.asList("技术","测试","评选结果","测试","评选结果","测试","评选结果"));
//        data.put("keyword", Arrays.asList("技术","测试"));data.put("user", "李斯");
//        data.put("company", "股份有限公司技术股份有限公司");data.put("date", getChineseDate());word2RedDocument(targetFile,data,"新文档.docx");}
转换时间的方法
public static String getChineseDate() {Calendar cal = Calendar.getInstance();SimpleDateFormat sdf = new SimpleDateFormat("yyyy年MM月dd日", Locale.CHINA);String date = sdf.format(cal.getTime());// 将数字转换为汉字String[] chineseNumbers = {"〇", "一", "二", "三", "四", "五", "六", "七", "八", "九"};StringBuilder chineseDate = new StringBuilder();for (int i = 0; i < date.length(); i++) {if(i==4 || i==7 || i==10){chineseDate.append(date.charAt(i));} else {int number = Character.getNumericValue(date.charAt(i));if(i==5 || i==8 ){if(number==0){continue;}}chineseDate.append(chineseNumbers[number]);}}return chineseDate.toString();}
执行方法:

结果文档如下:

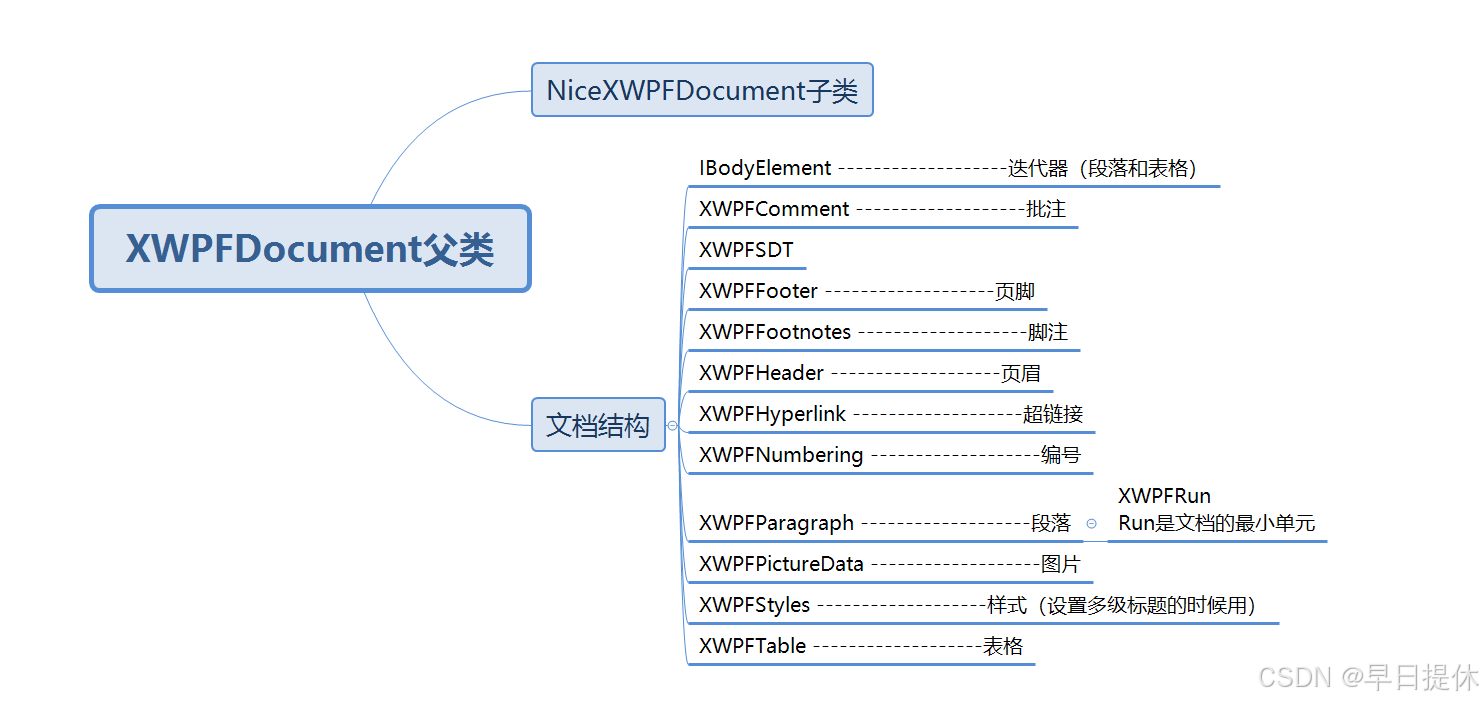
XWPFDocument类相关:

