SpringBoot的web开发
静态资源映射规则
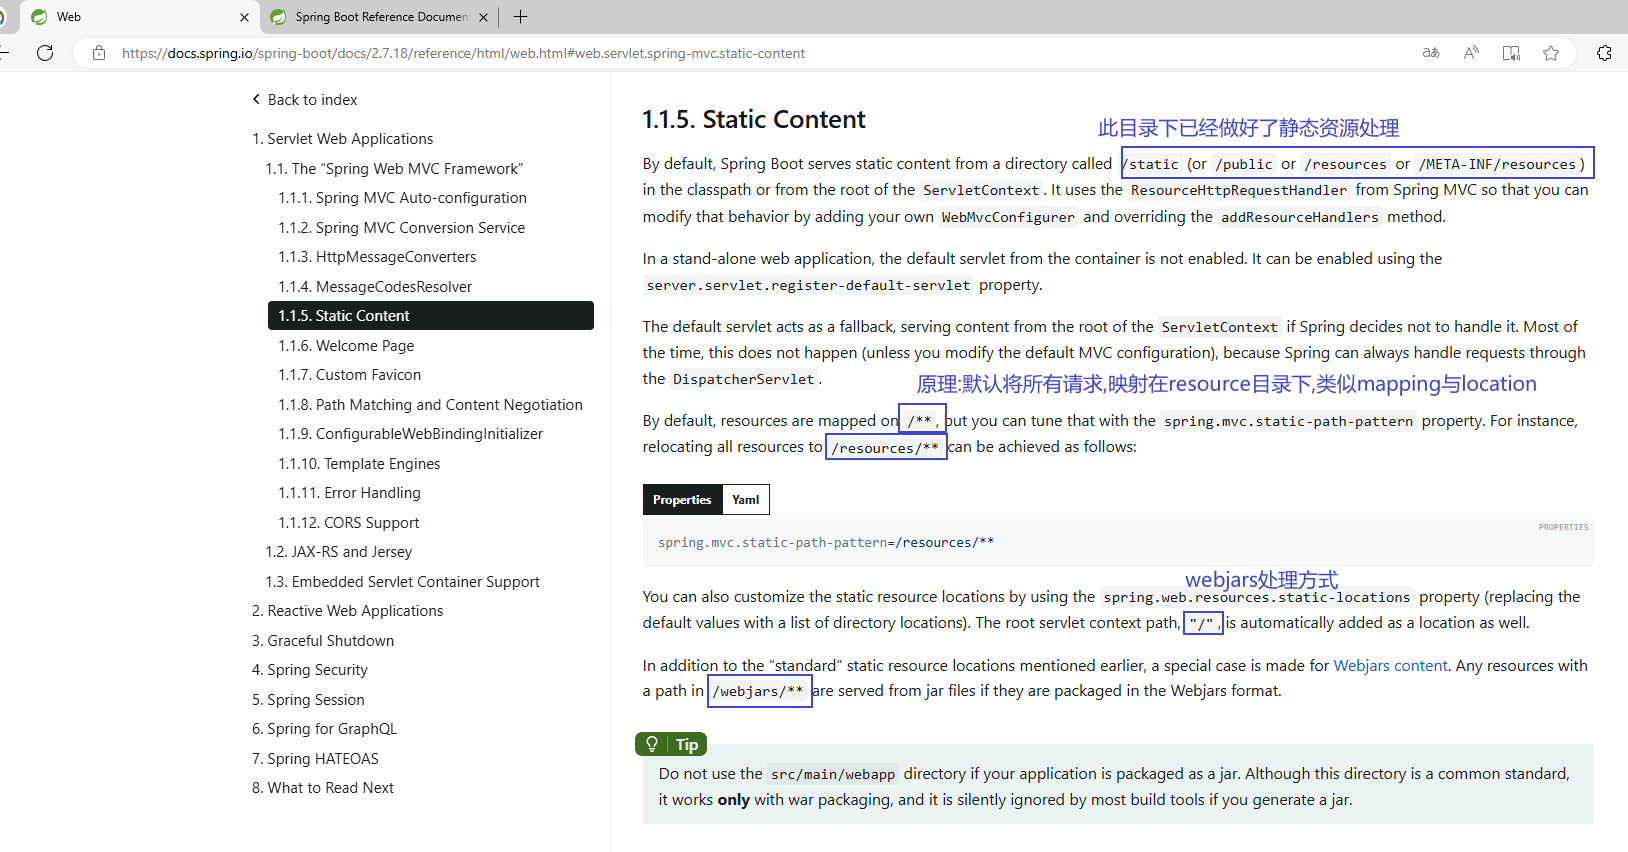
总结:只要静态资源放在类路径下:
called /static (or /public or /resources or //METAINF/resources
一启动服务器就能访问到静态资源文件
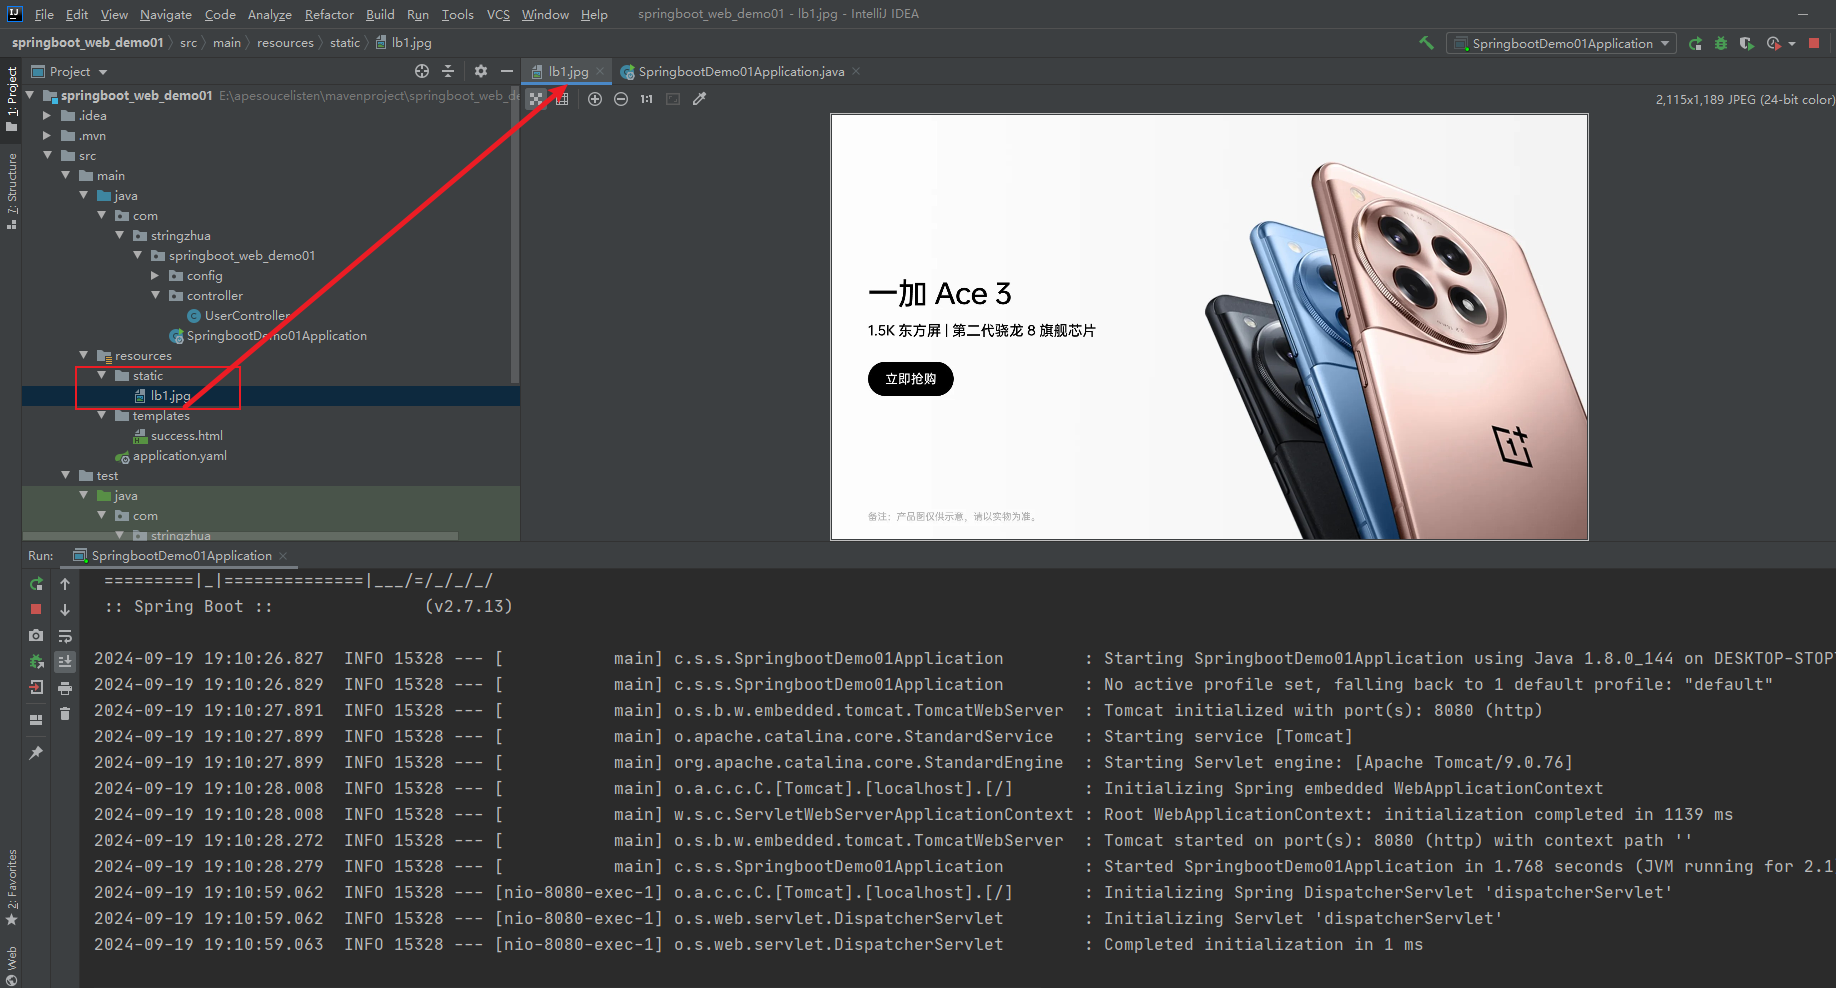
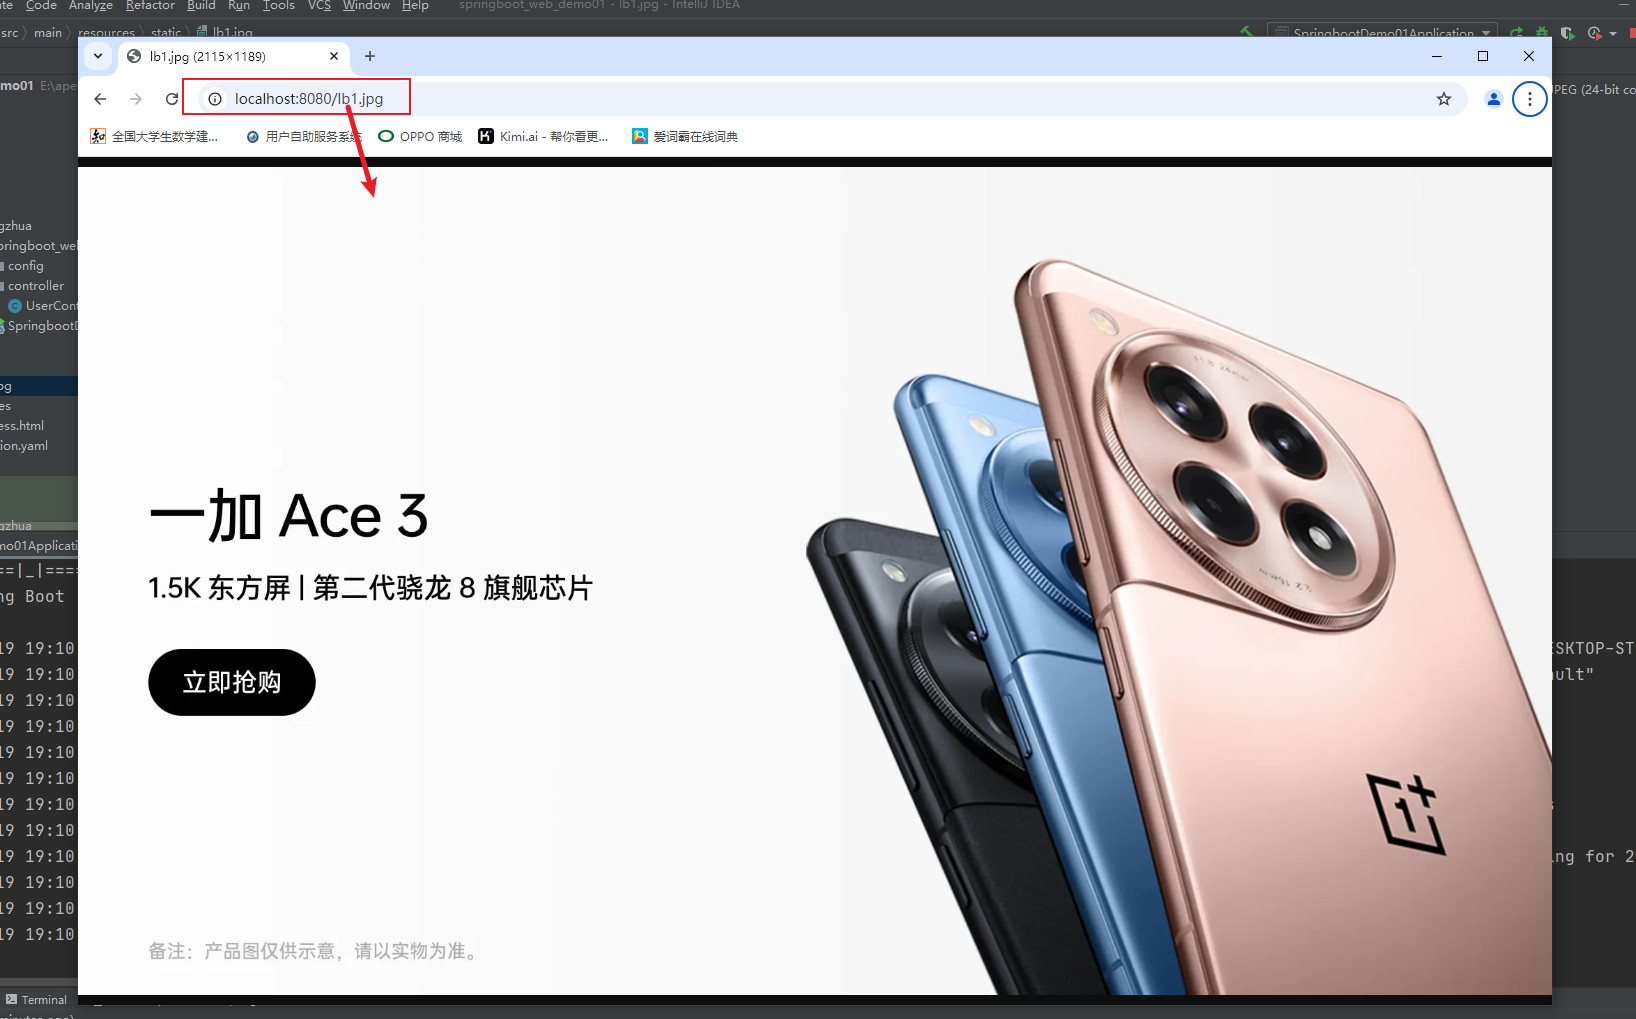
springboot只需要将图片放在 static 下 就可以被访问到了
总结:
只要静态资源放在类路径下: called /static (or INF/resources
访问:当前项目根路径/ + 静态资源名
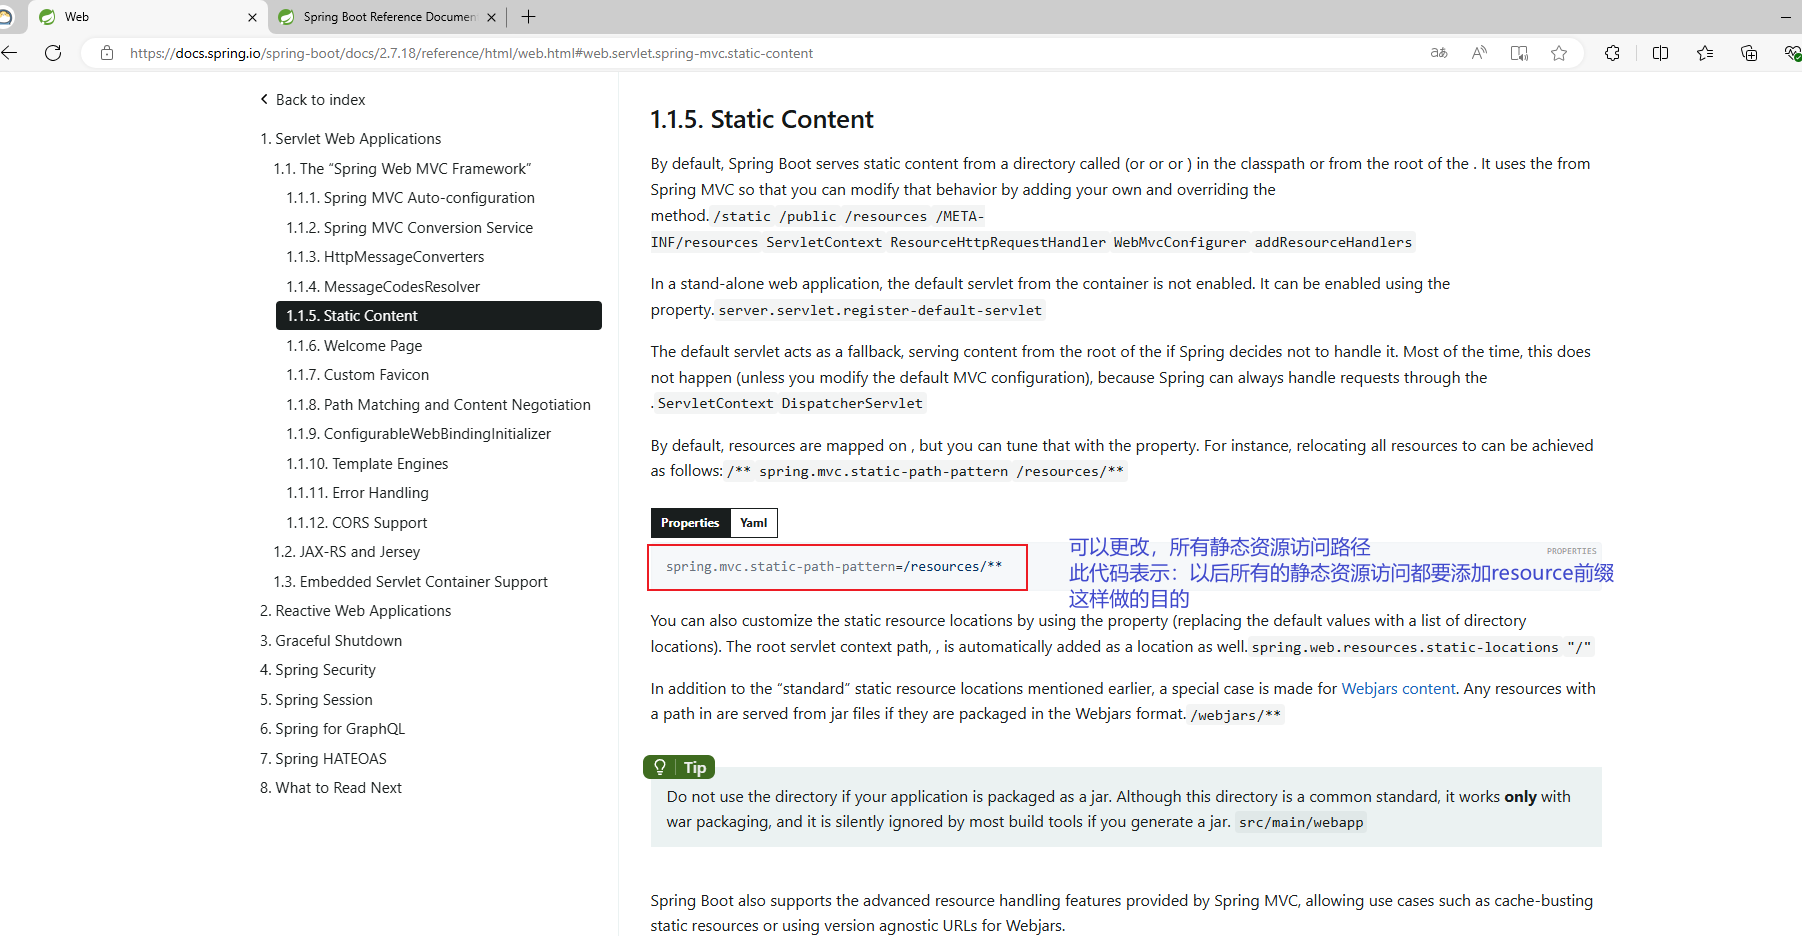
静态资源访问前缀
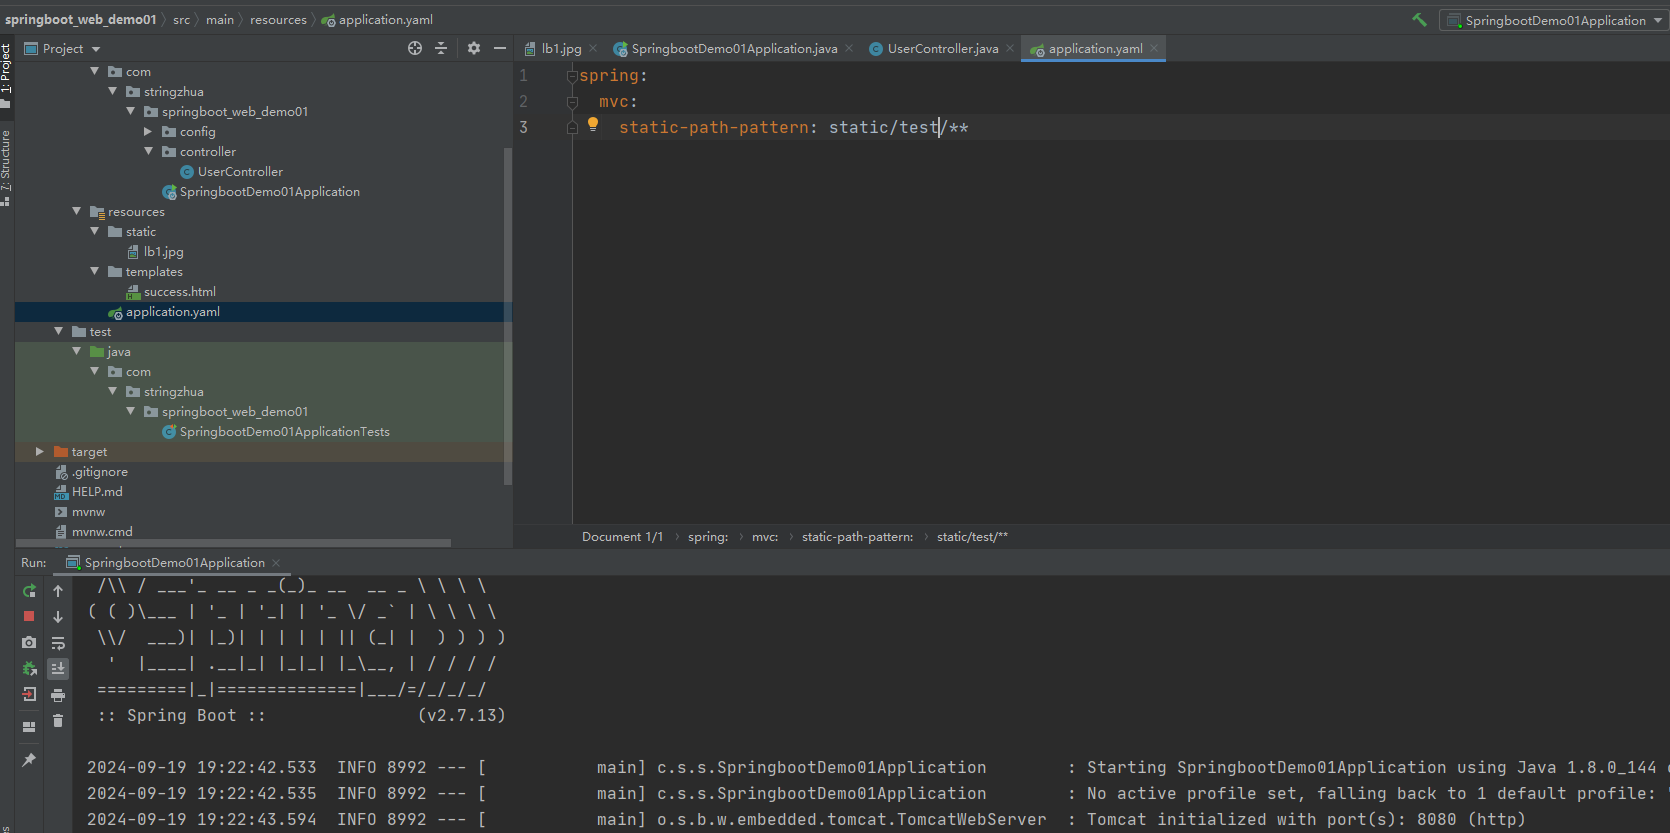
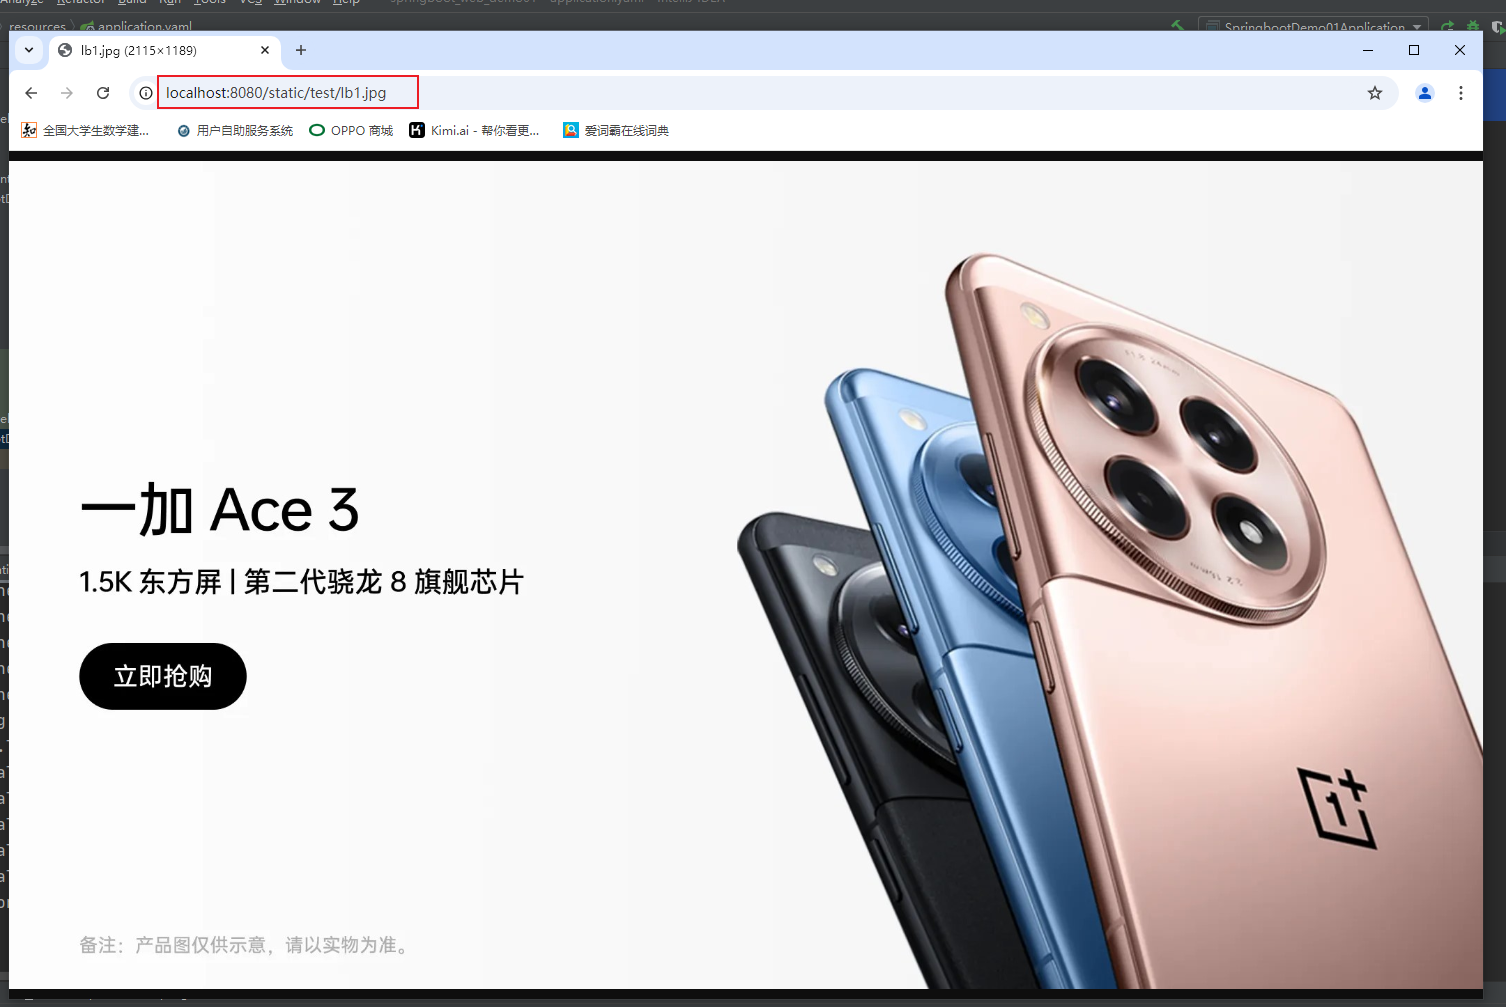
spring:mvc:static-path-pattern: static/test/**
enjoy模板引擎
四个步骤:
1.加坐标
<dependency><groupId>com.jfinal</groupId><artifactId>enjoy</artifactId><version>5.0.3</version>
</dependency>
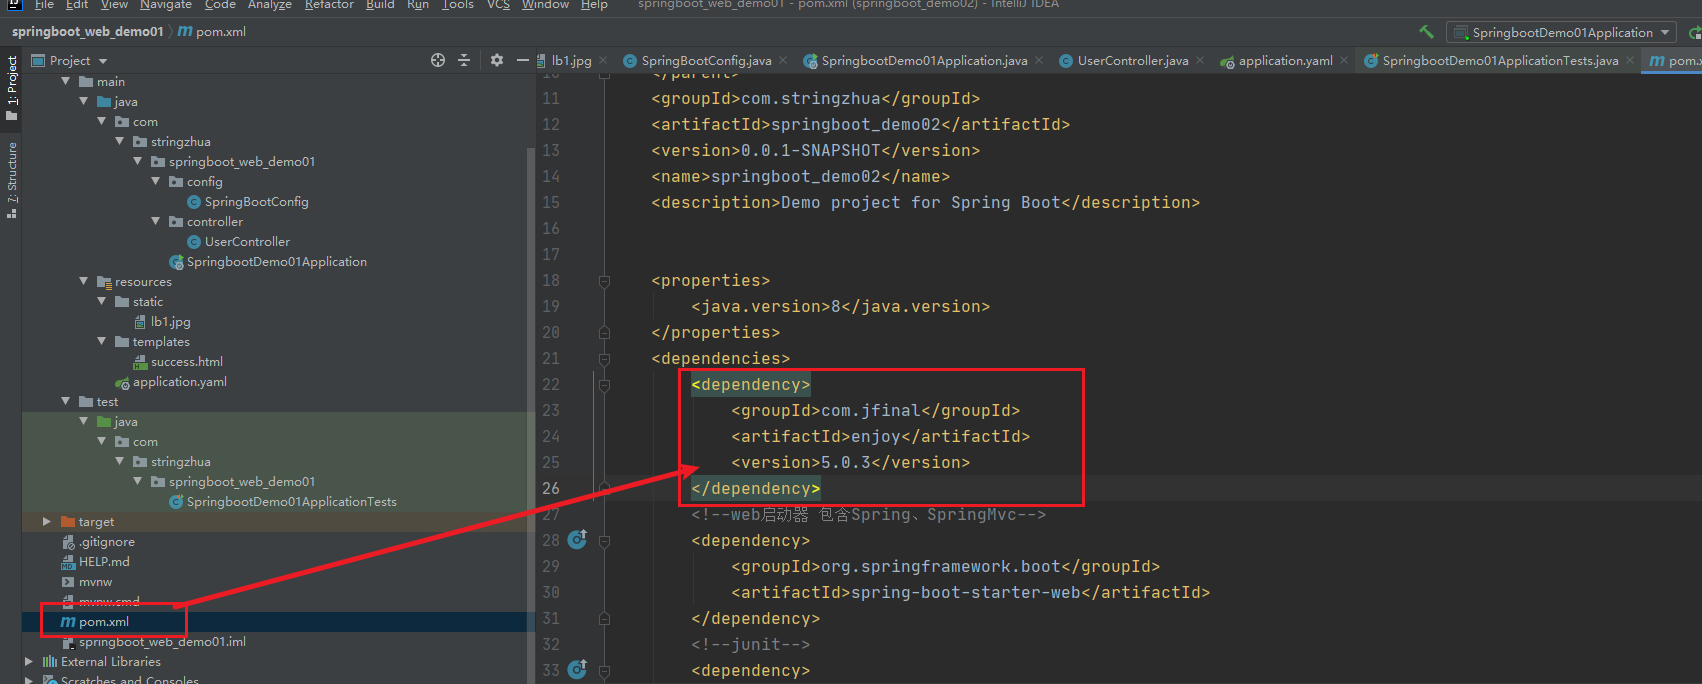
2.开启配置
在configure包下新建配置类 官网可以复制https://gitee.com/jfinal/enjoy
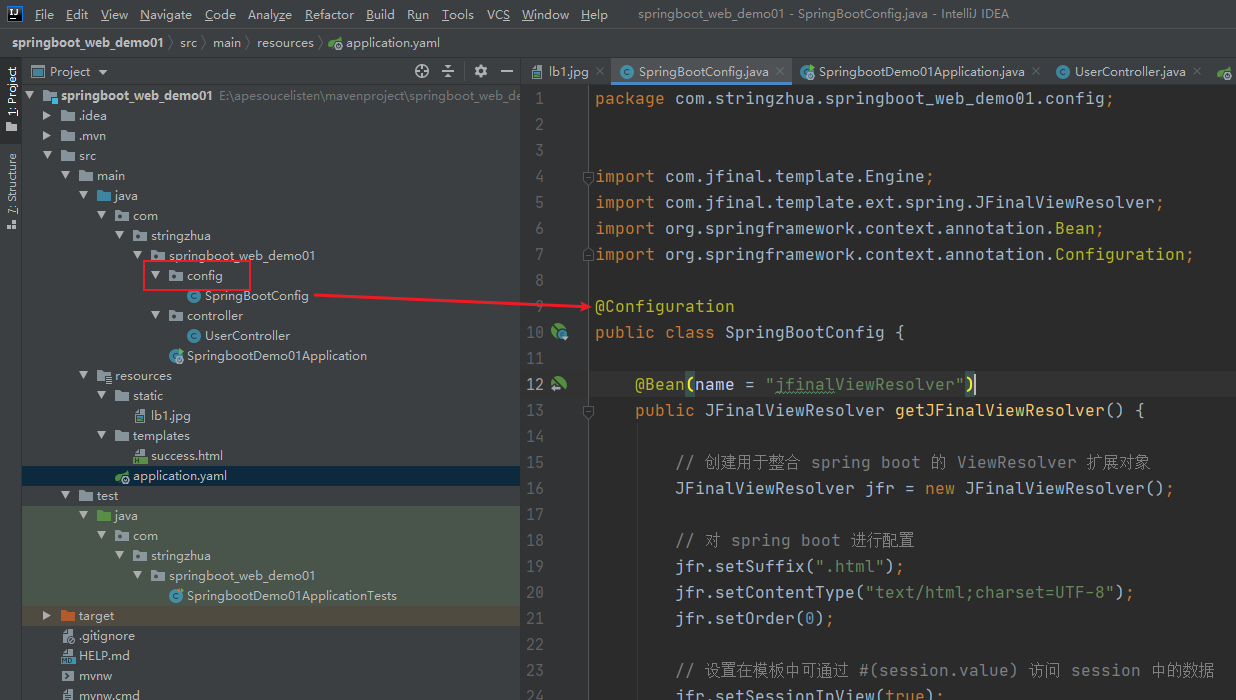
package com.stringzhua.springboot_web_demo01.config;import com.jfinal.template.Engine;
import com.jfinal.template.ext.spring.JFinalViewResolver;
import org.springframework.context.annotation.Bean;
import org.springframework.context.annotation.Configuration;@Configuration
public class SpringBootConfig {@Bean(name = "jfinalViewResolver")public JFinalViewResolver getJFinalViewResolver() {// 创建用于整合 spring boot 的 ViewResolver 扩展对象JFinalViewResolver jfr = new JFinalViewResolver();// 对 spring boot 进行配置jfr.setSuffix(".html");jfr.setContentType("text/html;charset=UTF-8");jfr.setOrder(0);// 设置在模板中可通过 #(session.value) 访问 session 中的数据jfr.setSessionInView(true);// 获取 engine 对象,对 enjoy 模板引擎进行配置,配置方式与前面章节完全一样Engine engine  = JFinalViewResolver.engine;// 热加载配置能对后续配置产生影响,需要放在最前面engine.setDevMode(true);// 使用 ClassPathSourceFactory 从 class path 与 jar 包中加载模板文件engine.setToClassPathSourceFactory();// 在使用 ClassPathSourceFactory 时要使用 setBaseTemplatePath// 代替 jfr.setPrefix("/view/")engine.setBaseTemplatePath("/templates/");// 更多配置与前面章节完全一样// engine.addDirective(...)// engine.addSharedMethod(...);return jfr;}
}
3.将页面保存在templates目录下
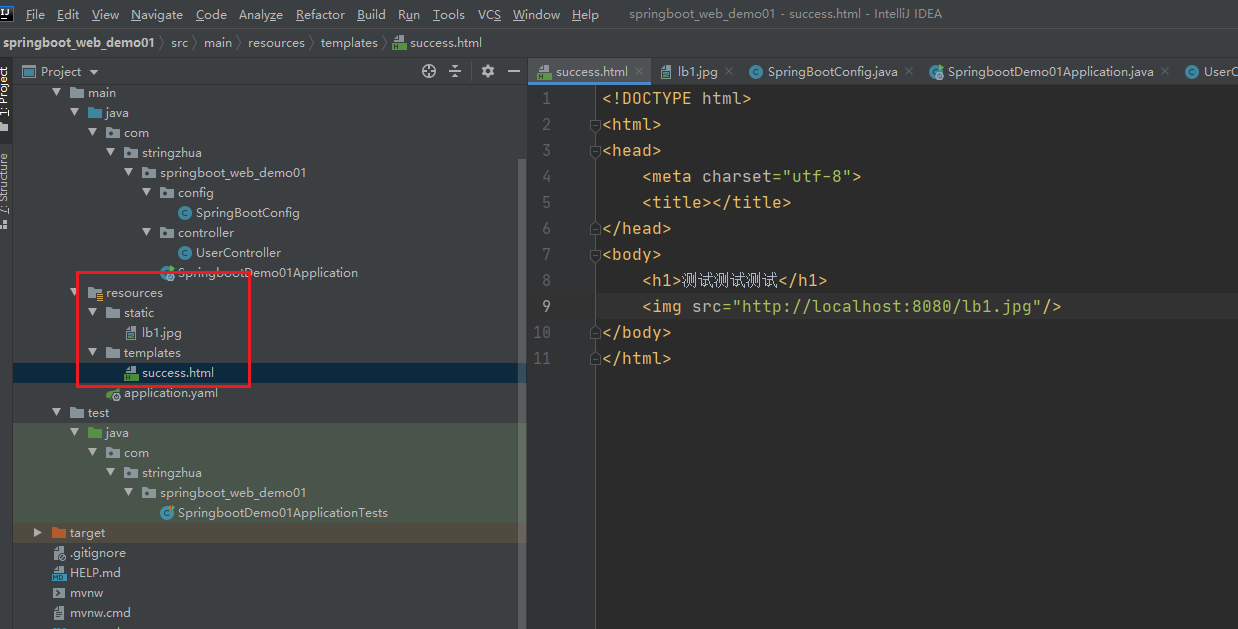
<!DOCTYPE html>
<html>
<head><meta charset="utf-8"><title></title>
</head>
<body><h1>测试测试测试</h1><img src="http://localhost:8080/lb1.jpg"/>
</body>
</html>
4.编写代码逻辑
package com.stringzhua.springboot_web_demo01.controller;import org.springframework.stereotype.Controller;
import org.springframework.web.bind.annotation.*;/*** @Author Stringzhua* @Date 2024/9/18 12:05* description:*/
@Controller
@RequestMapping("/user")//一级目录
public class UserController {/*** @RequestMapping 意义:处理用户的请求,相似于doget与dopost* 位置:* 类上:一级目录* 方法:二级目录* 例如:user/save* user/delete* student/save* student/delete* 属性:* value = "",path = "" value等同于path,只有它时可省略* 表示请求路径* =========================* method=常量,此请求的类型(get,post),若不设置则此请求适配所有的请求方式* =========================* params = ""* 限制请求参数,例如:params={"msg1","msg2"}表示请求路径中必须携带参数名为msg1与msg2的参数* 注意:1.超链接默认发送的是get请求* 2.所有请求所携带的参数格式均为:key = value* @DeleteMapping 删除* @PutMapping 修改* @GetMapping 查询* @PostMapping 新增* @RequestMapping 可以点击查看源码* @Target({ElementType.METHOD,ElementType.TYPE}) METHOD==代表修饰方法,TYPE==代表修饰类*/@RequestMapping(value = "/init")//二级目录public String init() {System.out.println("==========进入了springMVC的控制器=========");System.out.println("返回业务层,调用持久层");return "success";//返回方法执行完要跳转的页面名称}
}
加坐标 写配置类
在templates 下有success.html
不加 responsebody
测试:
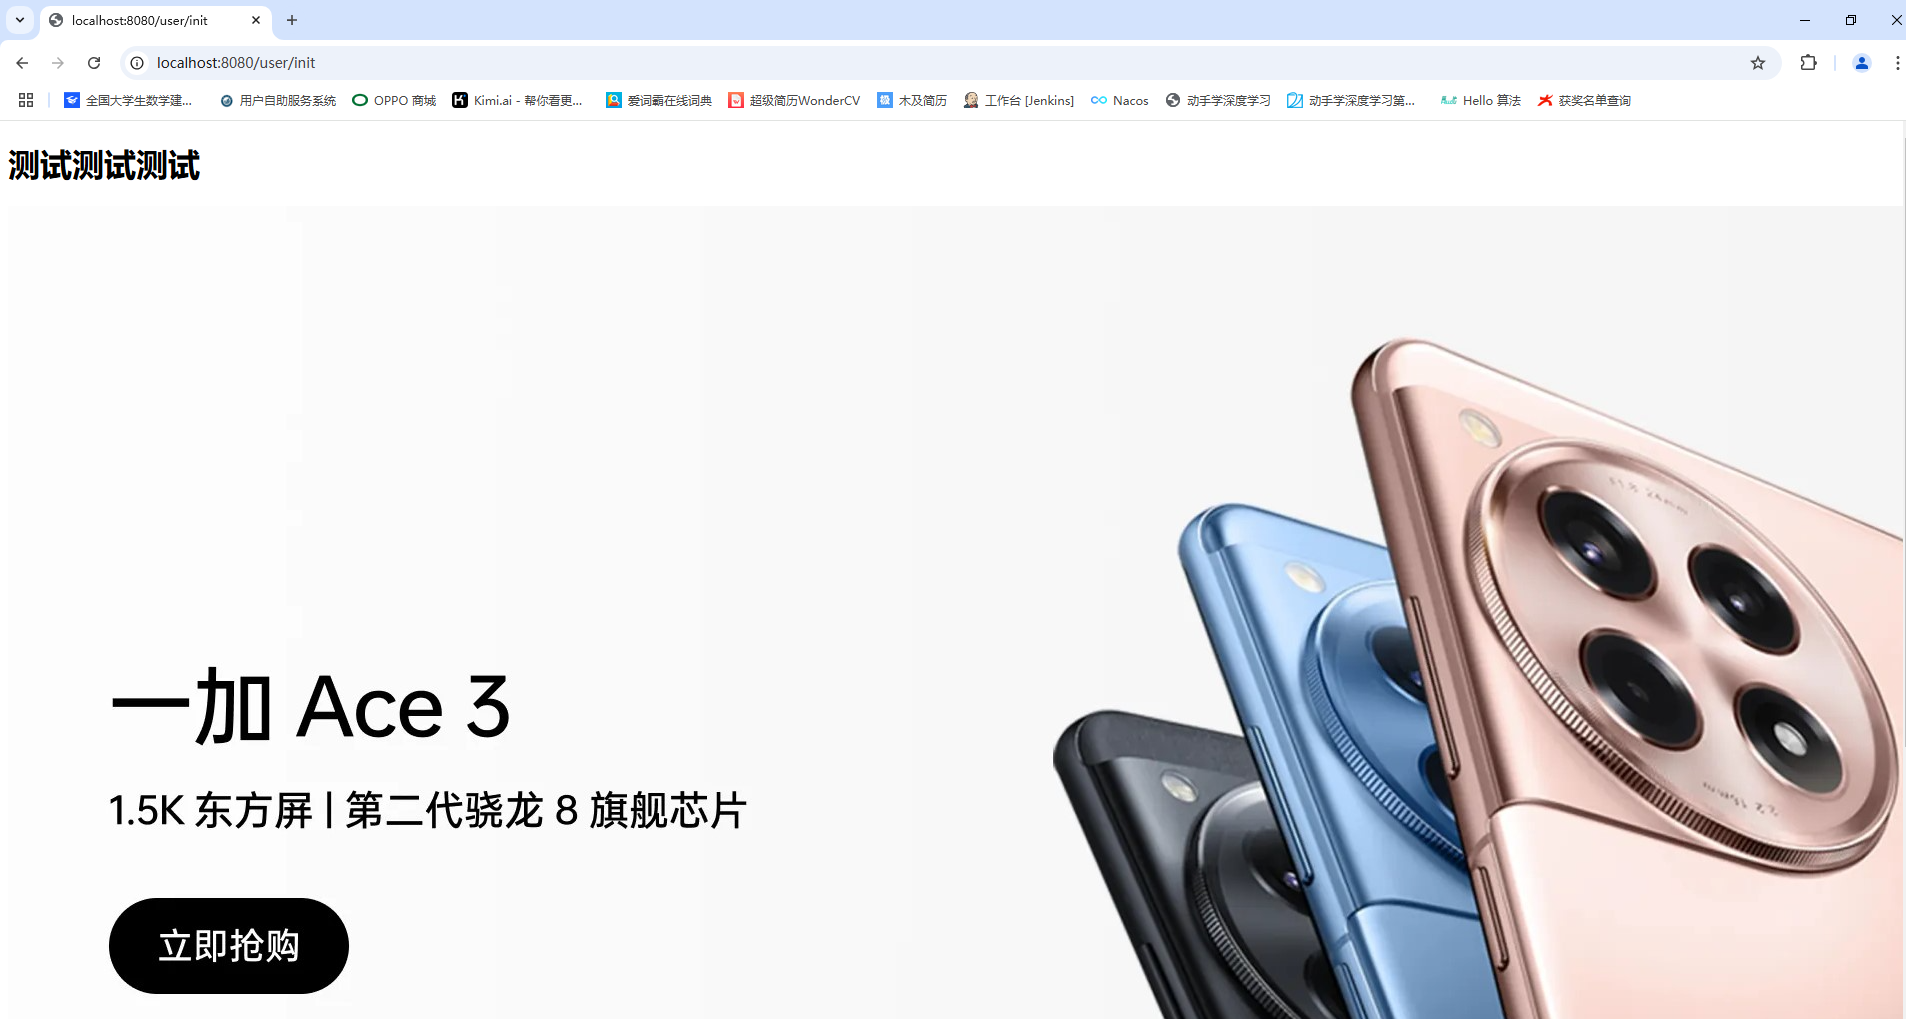
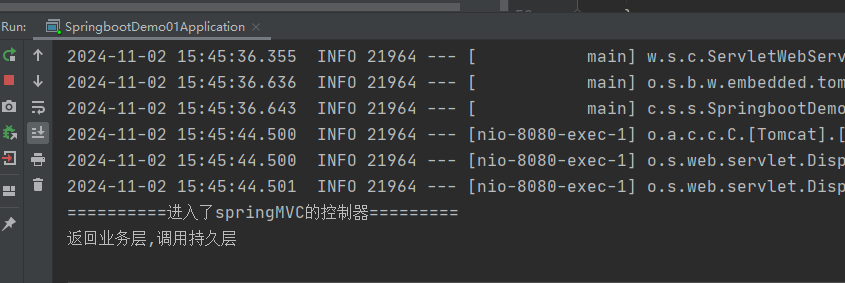
SpringMVC
1.请求处理
2.参数绑定
3.常用注解
4.数据传递
5.文件上传
SpringMVC-请求处理
@RequestMapping
- 意义:处理用户的请求,相似于doget与dopost
- 位置:
- 类上:一级目录
- 方法:二级目录
例如:
- user/save
- user/delete
- student/save
- student/delete
属性:
- value = “”,path = “” 表示请求路径
- method=常量,此请求的类型(get,post),若不设置则此请求适配所有的请求方式
- params = ""限制请求参数,
- 例如:params={“msg1”,“msg2”}表示请求路径中必须携带参数名为msg1与msg2的参数
注意:
- 超链接默认发送的是get请求
- 所有请求所携带的参数格式均为:key = value
还有这些请求
- @GetMapping 查询
- @PostMapping 新增
- @PutMapping 修改
- @DeleteMapping 删除
@RequestMapping可以点击查看源码
@Target({ElementType.METHOD, ElementType.TYPE})
METHOD代表修饰方法,TYPE代表修饰类
浏览器默认 get请求
post 跳转不了
测试:
demo01.postman_collection.json
准备工作:下载postman
官网:https://www.postman.com/
1.下载postman使用postman测试
2.新建文件夹,新建测试:使用上面的success.html作为返回页面
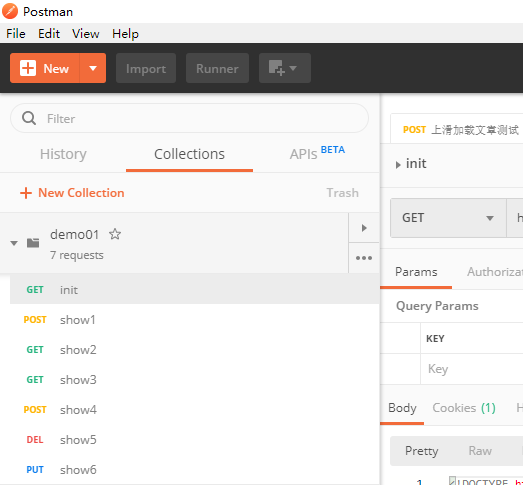
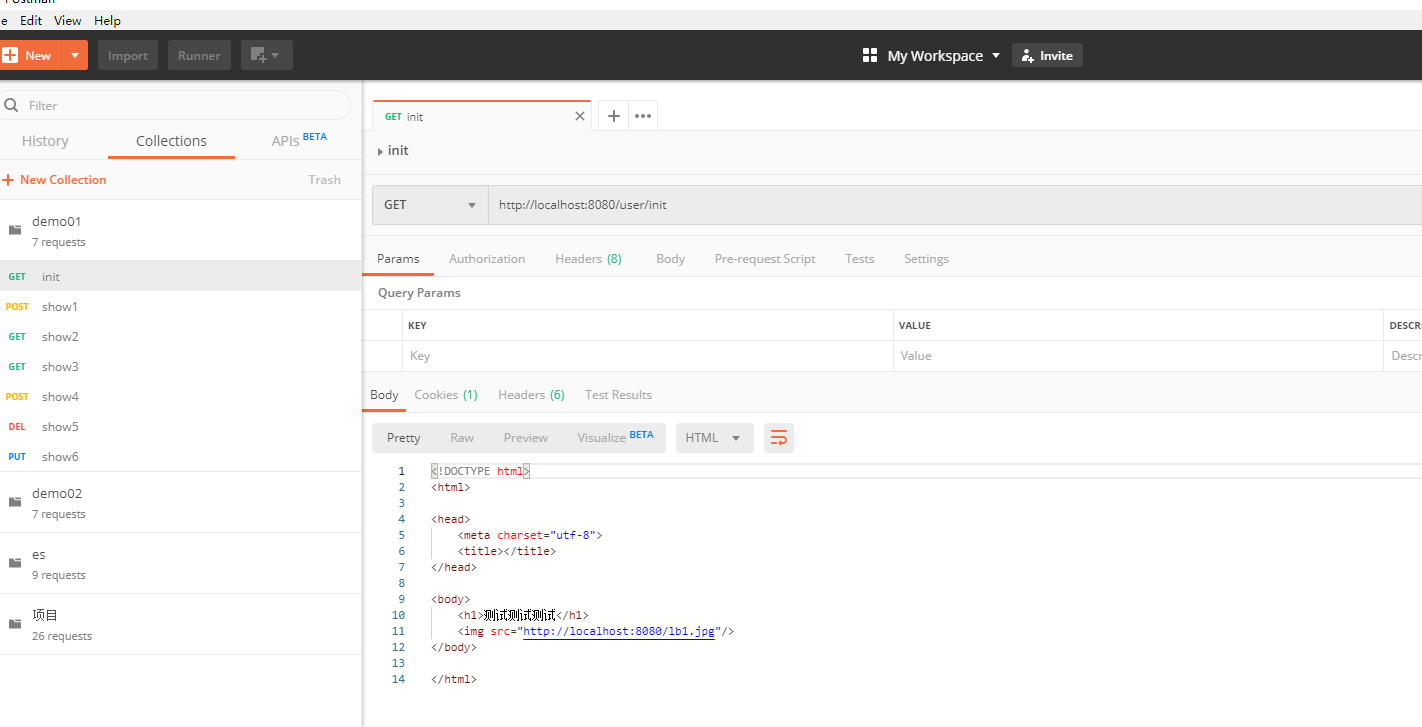
Get方式请求:
 @RequestMapping(value = "/init")//二级目录
public String init() {System.out.println("==========进入了springMVC的控制器=========");System.out.println("返回业务层,调用持久层");return "success";//返回方法执行完要跳转的页面名称
}

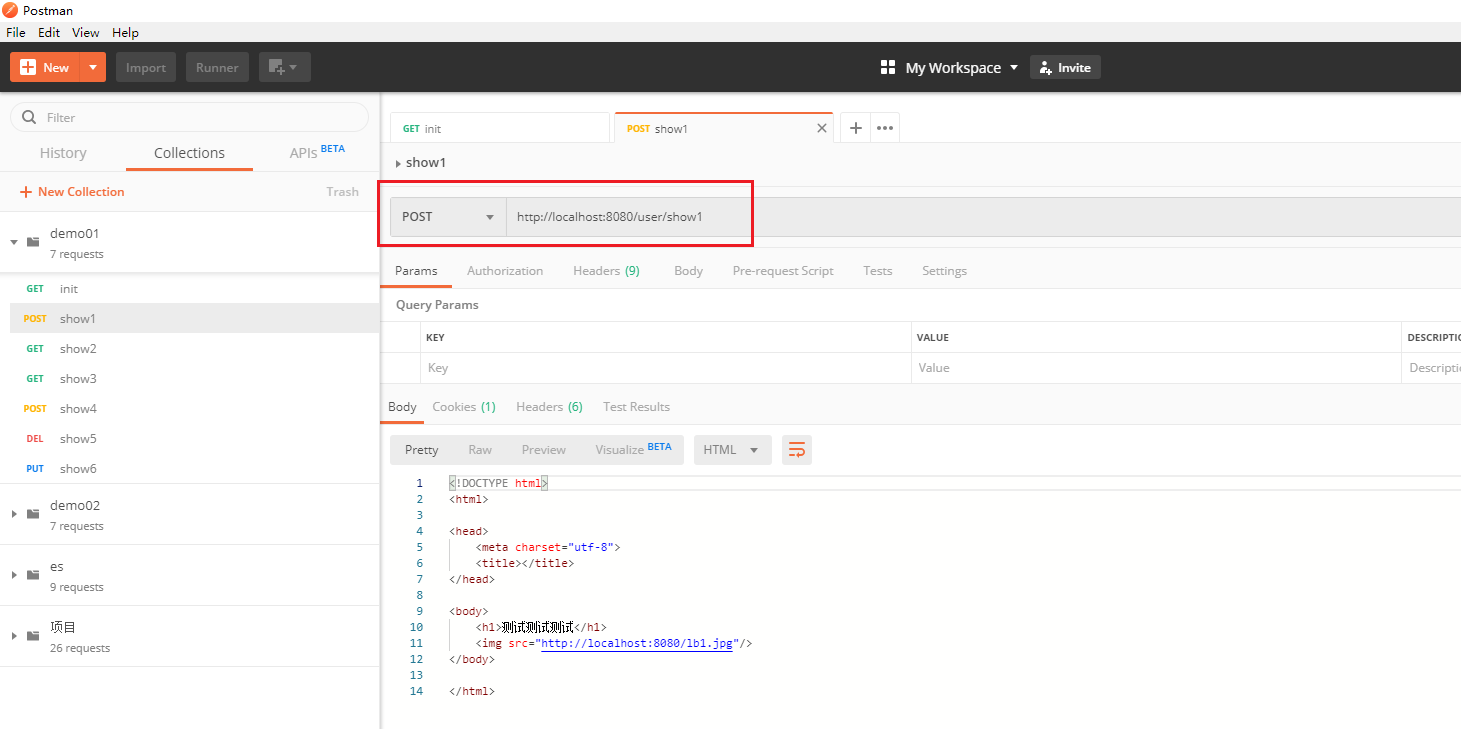
Post方式请求
package com.stringzhua.springboot_web_demo01.controller;import org.springframework.stereotype.Controller;
import org.springframework.web.bind.annotation.*;/*** @Author Stringzhua* @Date 2024/9/18 12:05* description:*/
@Controller
@RequestMapping("/user")//一级目录
public class UserController {/*** @RequestMapping 意义:处理用户的请求,相似于doget与dopost* 位置:* 类上:一级目录* 方法:二级目录* 例如:user/save* user/delete* student/save* student/delete* 属性:* value = "",path = "" value等同于path,只有它时可省略* 表示请求路径* =========================* method=常量,此请求的类型(get,post),若不设置则此请求适配所有的请求方式* =========================* params = ""* 限制请求参数,例如:params={"msg1","msg2"}表示请求路径中必须携带参数名为msg1与msg2的参数* 注意:1.超链接默认发送的是get请求* 2.所有请求所携带的参数格式均为:key = value* @DeleteMapping 删除* @PutMapping 修改* @GetMapping 查询* @PostMapping 新增* @RequestMapping 可以点击查看源码* @Target({ElementType.METHOD,ElementType.TYPE}) METHOD==代表修饰方法,TYPE==代表修饰类*/@RequestMapping(value = "/show1", method = {RequestMethod.POST})public String show1() {System.out.println("==========进入了springMVC的控制器=========");System.out.println("使用post方式发送请求访问show1");return "success";}
}

限制请求携带的参数
@RequestMapping(value = "/show2", params = {"param1=aa", "param2=bb"})
public String show2() {System.out.println("==========进入了springMVC的控制器=========");return "success";
}


@GetMapping
//postman测试
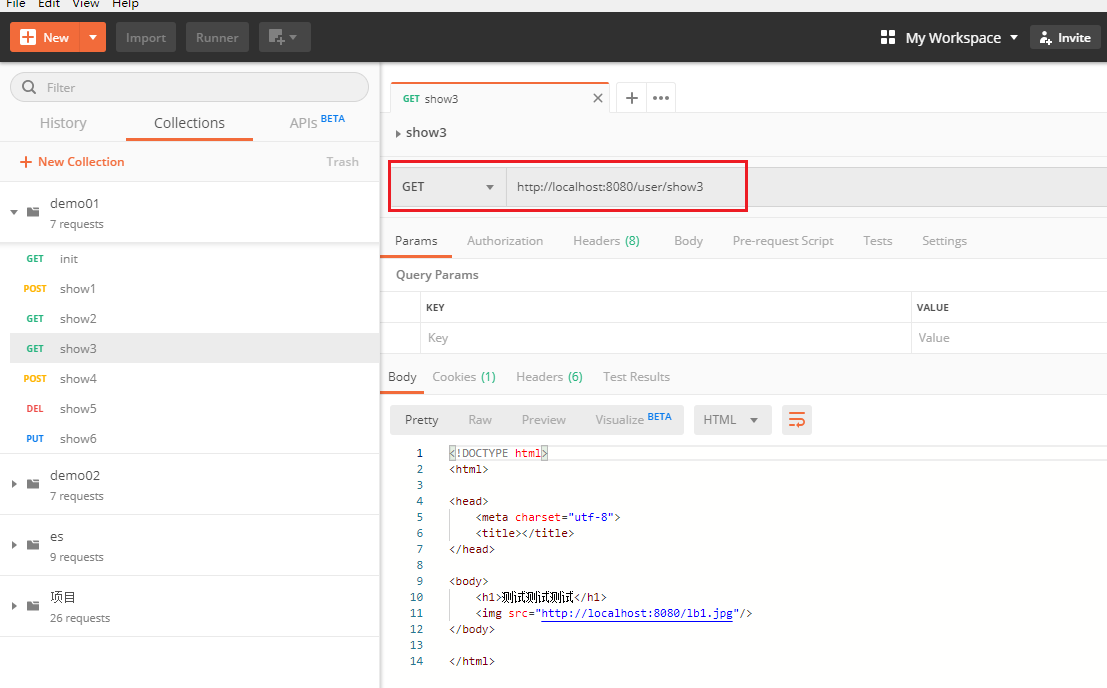
@GetMapping("/show3")
public String show3() {System.out.println("==========进入了springMVC的控制器=========");System.out.println("必须使用get方式请求[默认]查询");return "success";
}

@PostMapping
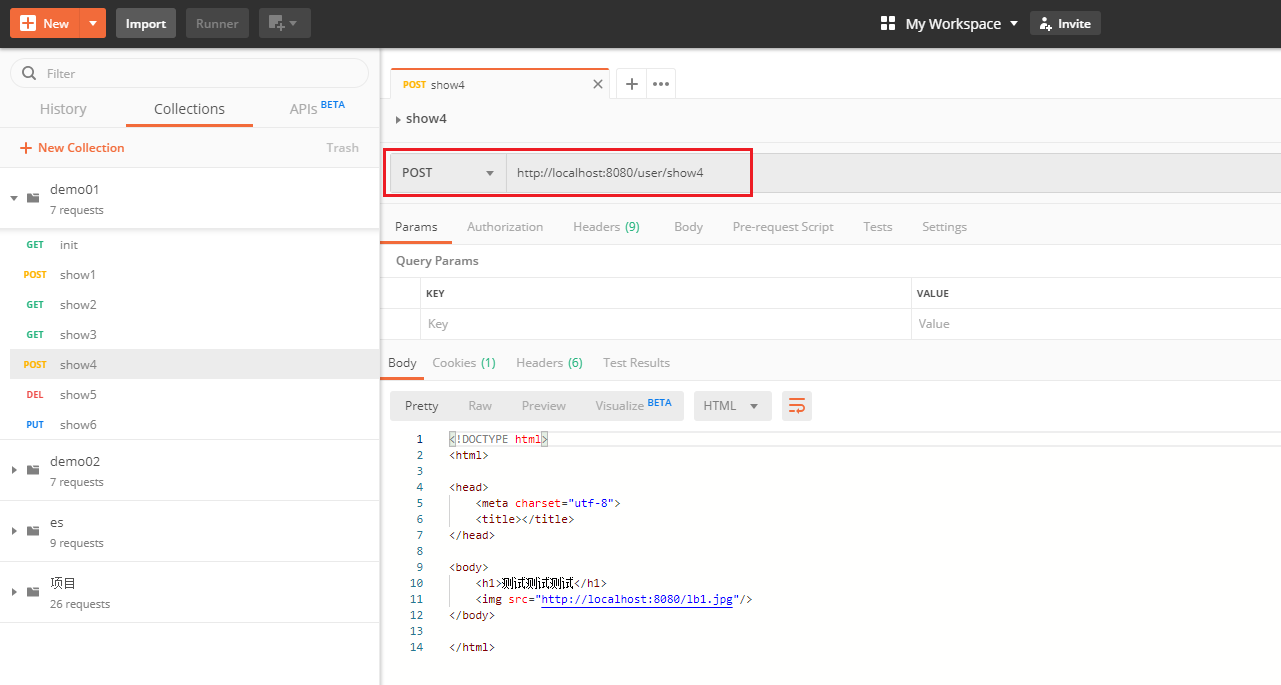
 @PostMapping("/show4")
public String show4() {System.out.println("==========进入了springMVC的控制器=========");System.out.println("必须使用post方式请求新增");return "success";
}

@DeleteMapping
@DeleteMapping("/show5")
public String show5() {System.out.println("==========进入了springMVC的控制器=========");System.out.println("必须使用delete方式请求删除");return "success";
}
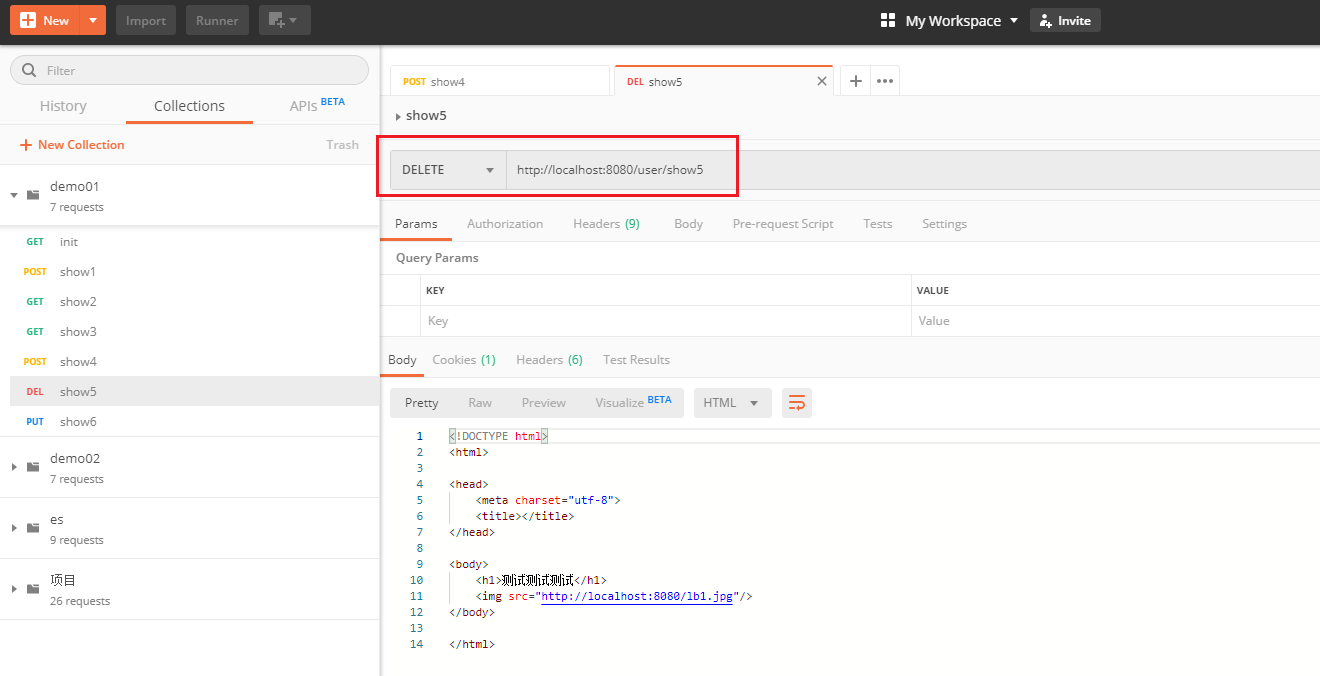

@PutMapping
@PutMapping("/show6")
public String show6() {System.out.println("==========进入了springMVC的控制器=========");System.out.println("必须使用put方式请求修改");return "success";
}


SpringMVC-参数绑定
springMVC请求参数的绑定
绑定的机制:SpringMVC 绑定请求参数的过程是通过把表单提交请求参数,作为控制器中方法参数进行绑定的
支持数据类型:
1.基本类型参数:
包括基本类型和 String 类型
2.POJO类型参数:
包括实体类,以及关联的实体类
3.数组和集合类型参数:
包括 List 结构和 Map 结构的集合(包括数组)
4.使用 ServletAPI 对象作为方法参数
HttpServletRequestHttpServletResponseHttpSessionjava.security.PrincipalLocaleInputStreamOutputStreamReaderWriter
使用要求
- 发送请求中携带数据的key与方法参数的name必须一致
- 数据类型合法
测试项目准备:
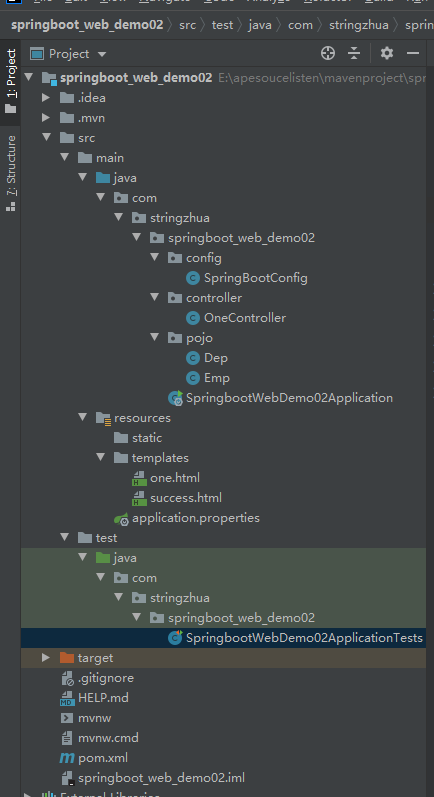
controller层OneController的完整代码:
package com.stringzhua.springboot_web_demo02.controller;/*** @Author Stringzhua* @Date 2024/9/18 16:27* description:*/import com.stringzhua.springboot_web_demo02.pojo.Dep;
import com.stringzhua.springboot_web_demo02.pojo.Emp;
import org.springframework.stereotype.Controller;
import org.springframework.web.bind.annotation.RequestMapping;
import org.springframework.web.bind.annotation.RequestParam;import javax.servlet.ServletContext;
import javax.servlet.http.HttpServletRequest;
import javax.servlet.http.HttpServletResponse;
import javax.servlet.http.HttpSession;
import java.io.IOException;
import java.io.UnsupportedEncodingException;
import java.util.Arrays;
import java.util.List;
import java.util.Map;/*** springMVC请求参数的绑定* 绑定的机制:SpringMVC 绑定请求参数的过程是通过把表单提交请求参数,作为控制器中方法参数进行绑定的** 一.支持数据类型:*      1.基本类型参数:*                  包括基本类型和 String 类型*      2.POJO类型参数:*                  包括实体类,以及关联的实体类*      3.数组和集合类型参数:*                  包括 List 结构和 Map 结构的集合(包括数组)*      4.使用 ServletAPI 对象作为方法参数*          HttpServletRequest*          HttpServletResponse*          HttpSession*          java.security.Principal*          Locale*          InputStream*          OutputStream*          Reader*          Writer**  二.使用要求*     1.发送请求中携带数据的key与方法参数的name必须一致*     2.数据类型合法** */
@Controller
@RequestMapping("/one")
public class OneController {//打开one的html页面@RequestMapping("/show")public String show(){return "one";}/***********************基本类型和 String 类型作为参数*********************************/@RequestMapping("/show1")public String show1(String msg1){System.out.println("接收到用户发送的数据为:" + msg1);return "success";}@RequestMapping("/show2")public String show2(String msg1,int msg2){System.out.println("接收到用户发送的数据为:" + msg1);System.out.println("接收到用户发送的数据为:" + msg2);return "success";}/***********************POJO 类型作为参数*********************************///单一对象@RequestMapping("/show3")public String show3(Emp emp){System.out.println("接收到用户发送的数据为:" + emp);return "success";}//对象嵌套@RequestMapping("/show4")public String show4(Emp emp){System.out.println("接收到用户发送的数据为:" + emp);return "success";}//数组、map集合[list集合不行]@RequestMapping("/map")public String map(@RequestParam Map map){System.out.println(map);return "success";}/***********************POJO 类型中包含集合类型的参数*********************************/@RequestMapping("/show5")public String show5(Dep dep){System.out.println("接受到用户发送数据为" + dep);return "success";}@RequestMapping("/show6")public String show6(int[] nums){System.out.println("接受到用户发送数据为" + Arrays.toString(nums));return "success";}/*********************使用 ServletAPI 对象作为方法参数*********************************/@RequestMapping("/show7")public String show7(HttpServletRequest request, HttpServletResponse response){
//        request.setCharacterEncoding("UTF-8");
//        response.setCharacterEncoding("UTF-8");System.out.println(request);System.out.println(response);request.getParameter("msg1");HttpSession session =     request.getSession();System.out.println(session);session.setAttribute("","");//        try {
//            response.sendRedirect("重定向");
//        } catch (IOException e) {
//            e.printStackTrace();
//        }ServletContext applaction =  session.getServletContext();return "success";}
}
pojo下创建俩实体类:
Dep.java
package com.stringzhua.springboot_web_demo02.pojo;import java.util.List;
import java.util.Map;/*** @Author Stringzhua* @Date 2024/9/18 16:38* description:*/
public class Dep {private int did;private String dname;//依赖员工集合private List<Emp> mylist;private Map<String, Emp> myMap;@Overridepublic String toString() {return "Dep{" +"did=" + did +", dname='" + dname + '\'' +", mylist=" + mylist +", myMap=" + myMap +'}';}public int getDid() {return did;}public void setDid(int did) {this.did = did;}public String getDname() {return dname;}public void setDname(String dname) {this.dname = dname;}public List<Emp> getMylist() {return mylist;}public void setMylist(List<Emp> mylist) {this.mylist = mylist;}public Map<String, Emp> getMyMap() {return myMap;}public void setMyMap(Map<String, Emp> myMap) {this.myMap = myMap;}
}
Emp.java
package com.stringzhua.springboot_web_demo02.pojo;/*** @Author Stringzhua* @Date 2024/9/18 16:37* description:*/
public class Emp {private int eid;private String ename;private String esex;//emp依赖的dep对象private Dep dept;@Overridepublic String toString() {return "Emp{" +"eid=" + eid +", ename='" + ename + '\'' +", esex='" + esex + '\'' +", dept=" + dept +'}';}public int getEid() {return eid;}public void setEid(int eid) {this.eid = eid;}public String getEname() {return ename;}public void setEname(String ename) {this.ename = ename;}public String getEsex() {return esex;}public void setEsex(String esex) {this.esex = esex;}public Dep getDept() {return dept;}public void setDept(Dep dept) {this.dept = dept;}
}
配置类同上,templates下创建两个页面
one.html
<!DOCTYPE html>
<html lang="cn" xmlns:th="http://www.thymeleaf.org">
<head><title>Title</title>
</head>
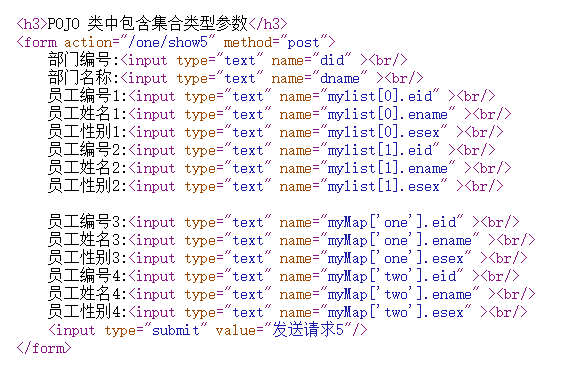
<body><h1>springMVC控制器方法参数作用:接受用户请求中的数据</h1><hr/><h3>基本类型和 String 类型作为参数</h3><a href="/one/show1?msg1=9527">发送请求1</a><a href="/one/show2?msg1=jdk&msg2=9527">发送请求2</a><h3>POJO 类型作为参数</h3><a href="/one/show3?eid=1&ename=郭凡&esex=小奶狗">发送请求3</a><form action="/one/show4" method="post">员工编号:<input type="text" name="eid" ><br/>员工姓名:<input type="text" name="ename" ><br/>员工性别:<input type="text" name="esex" ><br/>部门编号:<input type="text" name="dept.did" ><br/>部门名称:<input type="text" name="dept.dname" ><br/><input type="submit" value="发送请求4"/></form><form action="/one/map" method="post">员工编号:<input type="text" name="eids"><br/>员工姓名:<input type="text" name="enames"><br/>员工性别:<input type="text" name="esexs"><br/><input type="submit" value="发送请求4(map)"/></form><h3>POJO 类中包含集合类型参数</h3><form action="/one/show5" method="post">部门编号:<input type="text" name="did" ><br/>部门名称:<input type="text" name="dname" ><br/>员工编号1:<input type="text" name="mylist[0].eid" ><br/>员工姓名1:<input type="text" name="mylist[0].ename" ><br/>员工性别1:<input type="text" name="mylist[0].esex" ><br/>员工编号2:<input type="text" name="mylist[1].eid" ><br/>员工姓名2:<input type="text" name="mylist[1].ename" ><br/>员工性别2:<input type="text" name="mylist[1].esex" ><br/>员工编号3:<input type="text" name="myMap['one'].eid" ><br/>员工姓名3:<input type="text" name="myMap['one'].ename" ><br/>员工性别3:<input type="text" name="myMap['one'].esex" ><br/>员工编号4:<input type="text" name="myMap['two'].eid" ><br/>员工姓名4:<input type="text" name="myMap['two'].ename" ><br/>员工性别4:<input type="text" name="myMap['two'].esex" ><br/><input type="submit" value="发送请求5"/></form><a href="/one/show6?nums=123&nums=456&nums=789">发送请求6</a><h3>使用 ServletAPI 对象作为方法参数</h3><a href="/one/show7">发送请求7</a></body>
</html>
success.html
<!DOCTYPE html>
<head><meta charset="UTF-8"><title>success</title>
</head>
<body><h1>spring成功页面</h1>
</body>
</html>
基本类型和 String 类型作为参数
OneController
单个参数
package com.stringzhua.springboot_web_demo02.controller;/*** @Author Stringzhua* @Date 2024/9/18 16:27* description:*/import com.stringzhua.springboot_web_demo02.pojo.Dep;
import com.stringzhua.springboot_web_demo02.pojo.Emp;
import org.springframework.stereotype.Controller;
import org.springframework.web.bind.annotation.RequestMapping;
import org.springframework.web.bind.annotation.RequestParam;import javax.servlet.ServletContext;
import javax.servlet.http.HttpServletRequest;
import javax.servlet.http.HttpServletResponse;
import javax.servlet.http.HttpSession;
import java.io.IOException;
import java.io.UnsupportedEncodingException;
import java.util.Arrays;
import java.util.List;
import java.util.Map;/*** springMVC请求参数的绑定* 绑定的机制:SpringMVC 绑定请求参数的过程是通过把表单提交请求参数,作为控制器中方法参数进行绑定的** 一.支持数据类型:*      1.基本类型参数:*                  包括基本类型和 String 类型*      2.POJO类型参数:*                  包括实体类,以及关联的实体类*      3.数组和集合类型参数:*                  包括 List 结构和 Map 结构的集合(包括数组)*      4.使用 ServletAPI 对象作为方法参数*          HttpServletRequest*          HttpServletResponse*          HttpSession*          java.security.Principal*          Locale*          InputStream*          OutputStream*          Reader*          Writer**  二.使用要求*     1.发送请求中携带数据的key与方法参数的name必须一致*     2.数据类型合法** */
@Controller
@RequestMapping("/one")
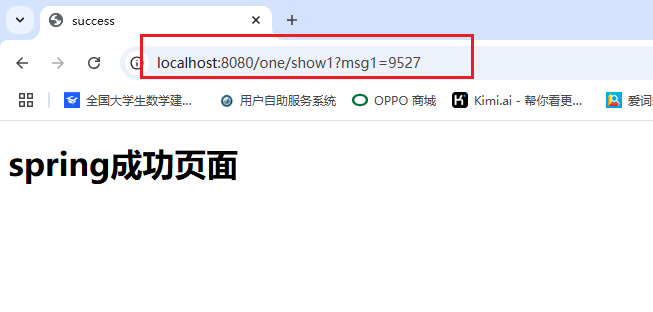
public class OneController {//打开one的html页面@RequestMapping("/show")public String show(){return "one";}/***********************基本类型和 String 类型作为参数*********************************/@RequestMapping("/show1")public String show1(String msg1){System.out.println("接收到用户发送的数据为:" + msg1);return "success";}
}
访问http://localhost:8080/one/show
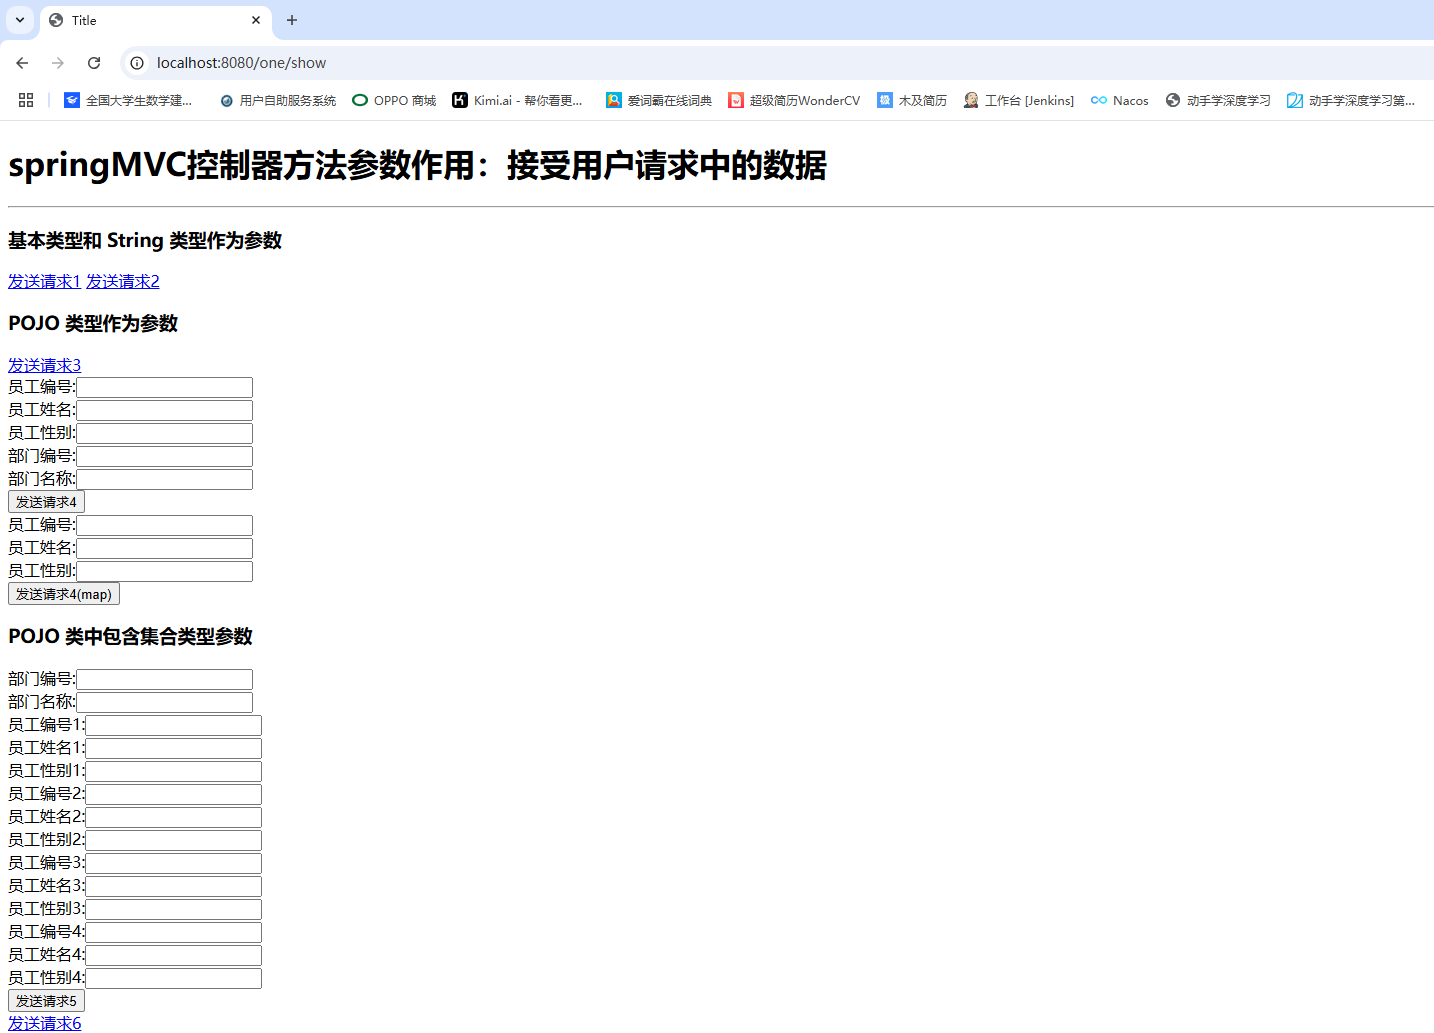
进入主页面,点击发送请求1

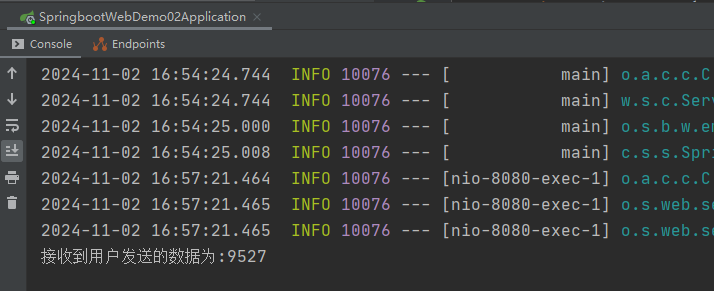
多个参数
@RequestMapping("/show2")public String show2(String msg1,int msg2){System.out.println("接收到用户发送的数据为:" + msg1);System.out.println("接收到用户发送的数据为:" + msg2);return "success";}
进入主页面,点击发送请求2:


POJO类型作为参数
单一对象
/***********************POJO 类型作为参数*********************************///单一对象@RequestMapping("/show3")public String show3(Emp emp){System.out.println("接收到用户发送的数据为:" + emp);return "success";}
进入主页面,点击发送请求3:
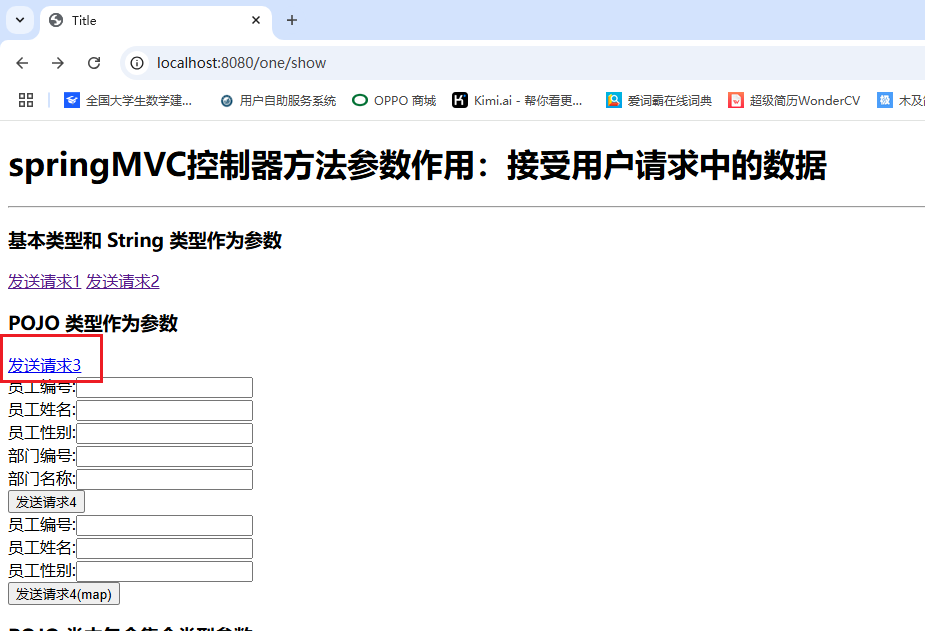

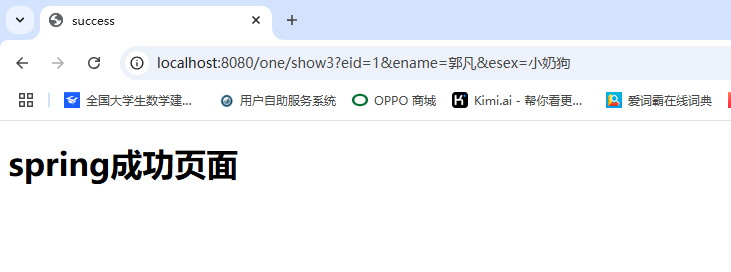

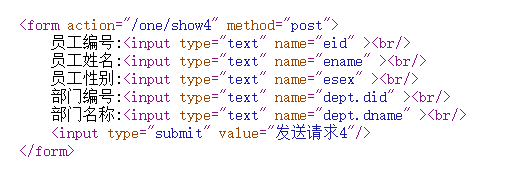
对象嵌套
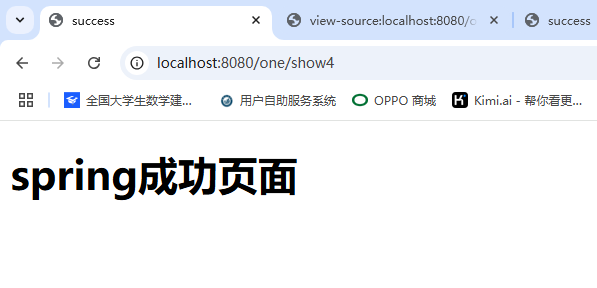
//对象嵌套@RequestMapping("/show4")public String show4(Emp emp){System.out.println("接收到用户发送的数据为:" + emp);return "success";}
进入主页面,填写表单,点击发送请求4:
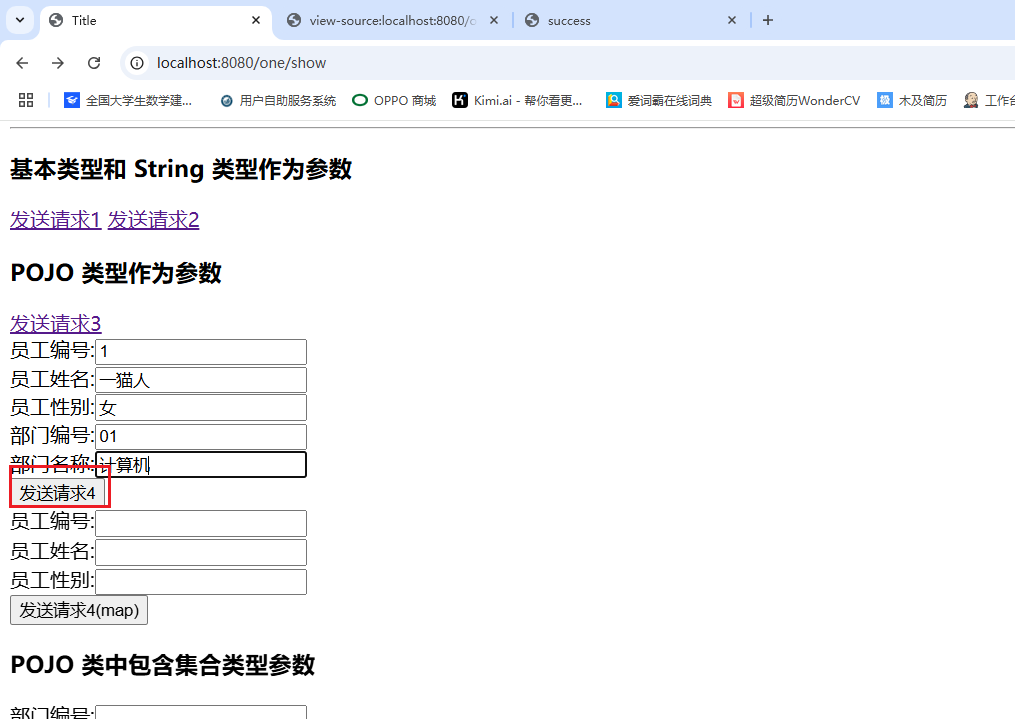

@RequestParam
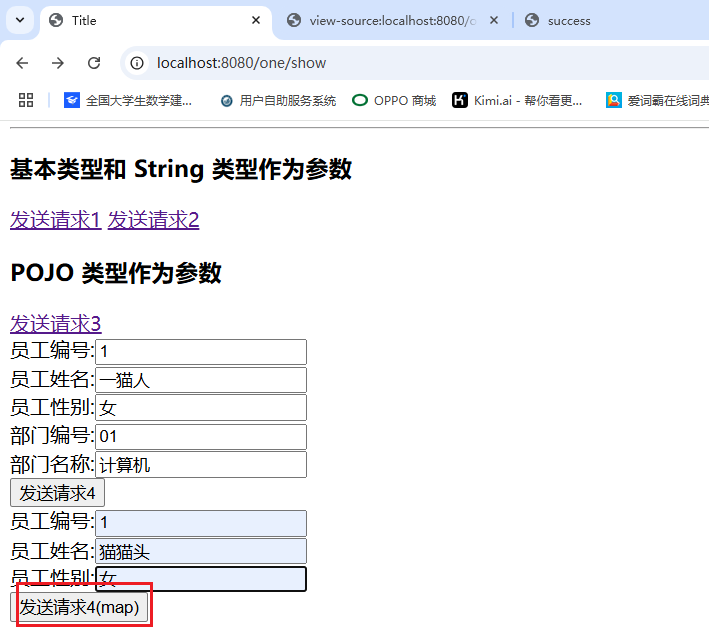
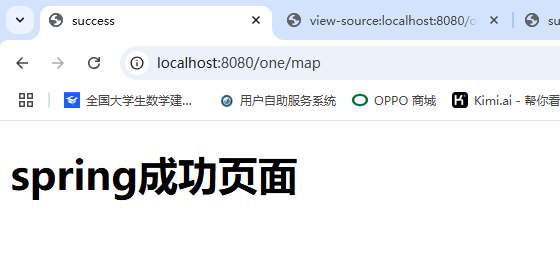
//数组、map集合[list集合不行]@RequestMapping("/map")public String map(@RequestParam Map map){System.out.println(map);return "success";}
进入主界面,填写表单,点击发送请求4(map)


POJO 类中包含集合类型参数
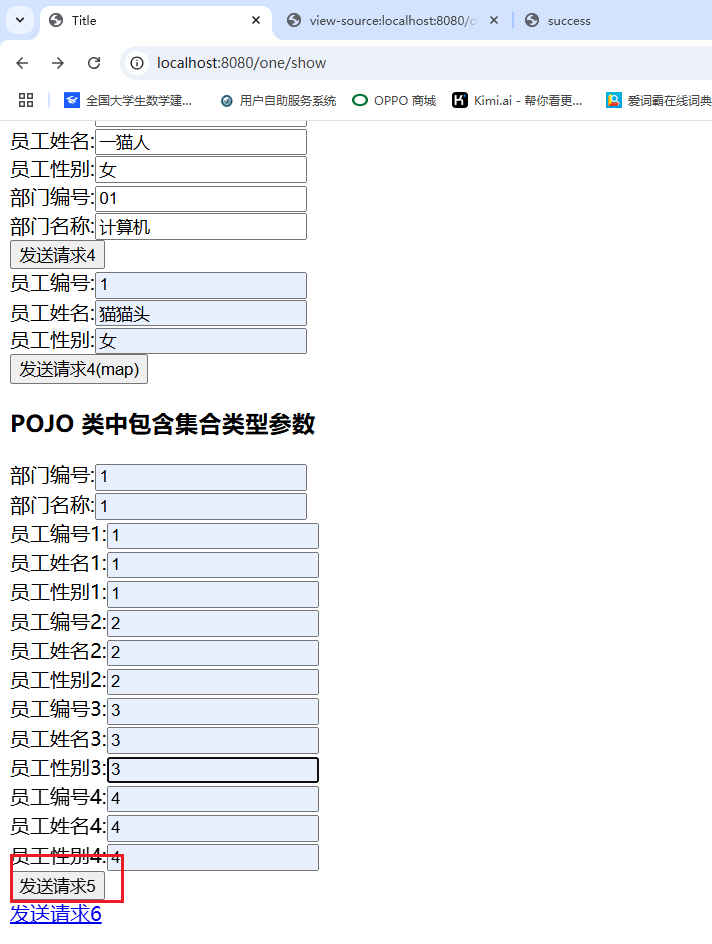
/***********************POJO 类型中包含集合类型的参数*********************************/@RequestMapping("/show5")public String show5(Dep dep){System.out.println("接受到用户发送数据为" + dep);return "success";}
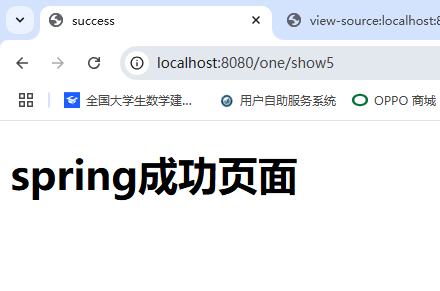
进入主页面,填写表单,点击发送请求5:

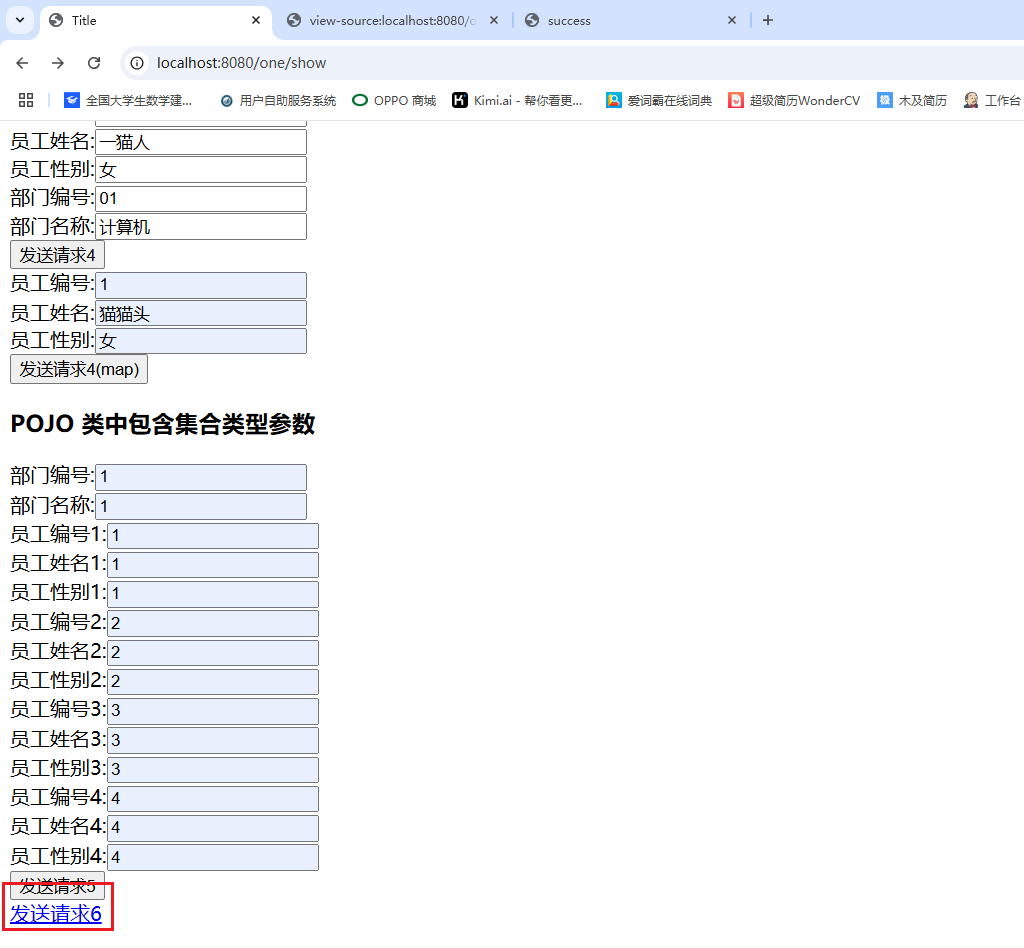
@RequestMapping("/show6")public String show6(int[] nums){System.out.println("接受到用户发送数据为" + Arrays.toString(nums));return "success";}


使用 ServletAPI 对象作为方法参数
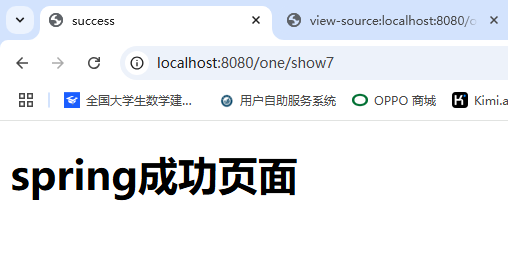
/*********************使用 ServletAPI 对象作为方法参数*********************************/@RequestMapping("/show7")public String show7(HttpServletRequest request, HttpServletResponse response){
//        request.setCharacterEncoding("UTF-8");
//        response.setCharacterEncoding("UTF-8");System.out.println(request);System.out.println(response);request.getParameter("msg1");HttpSession session =     request.getSession();System.out.println(session);session.setAttribute("","");//        try {
//            response.sendRedirect("重定向");
//        } catch (IOException e) {
//            e.printStackTrace();
//        }ServletContext applaction =  session.getServletContext();return "success";}



SpringMVC-常用注解
@RequestParam
作用:
- 把请求中指定名称的参数给控制器中的形参赋值。
- 如果页面标签名称和方法参数名称不一致,可以使用此注解实现
属性:
- name属性:设置参数名称
- defaultValue属性:设置默认值
- required属性:设置是否为必传
测试:
项目结构:

name属性
单个参数
package com.stringzhua.springboot_web_demo03.controller;/*** @Author Stringzhua* @Date 2024/9/18 22:49* description:*/import com.stringzhua.springboot_web_demo03.pojo.Emp;
import org.springframework.stereotype.Controller;
import org.springframework.web.bind.annotation.*;/*** springMVC常用注解** 一.@RequestParam* 作用:* 把请求中指定名称的参数给控制器中的形参赋值。* 如果页面标签名称和方法参数名称不一致,可以使用此注解实现* 属性:* name属性:设置参数名称* defaultValue属性:设置默认值* required属性:设置是否为必传** 二.@RequestBody json* 作用:* 用于获取"请求体"内容。直接使用得到是 key=value&key=value...* 结构的数据,并可以转换为对象* 属性:* required:是否必须有请求体。默认值是:true。**** 三.@PathVaribale* 作用:* 用于绑定 url 中的占位符。例如:请求 url 中 /delete/{id},* 这个{id}就是 url 占位符。url 支持占位符是 spring3.0 之* 后加入的。是 springmvc 支持 rest 风格 URL 的一个重要标志* 属性:* value:用于指定 url 中占位符名称。* required:是否必须提供占位符。** Restful是一种软件架构风格、设计风格,而不是标准,只是提供了一组设计原则和约束条件。* 主要用于客户端和服务器交互类的软件,基于这个风格设计的软件可以更简洁,更有层次,* 更易于实现缓存机制等。** Restful风格的请求是使用“url+请求方式”表示一次请求目的的,HTTP 协议里面四个表示操作方式的动词如下:* GET:用于获取资源* POST:用于新建资源* PUT:用于更新资源* DELETE:用于删除资源* 例如:* /users/1 GET : 得到 id = 1 的 user* /users/1 DELETE: 删除 id = 1 的 user* /users/1/新名/新性 PUT: 更新 id = 1 的 user* /users/新名/新性 POST: 新增 user** */
@Controller
@RequestMapping("/one")
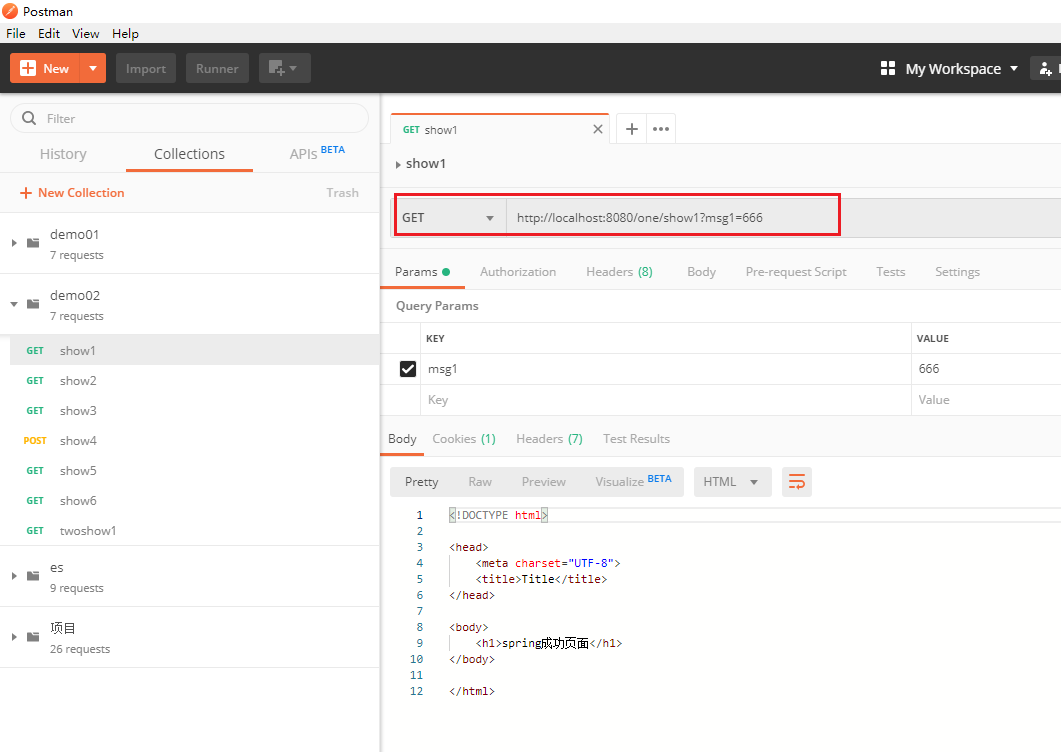
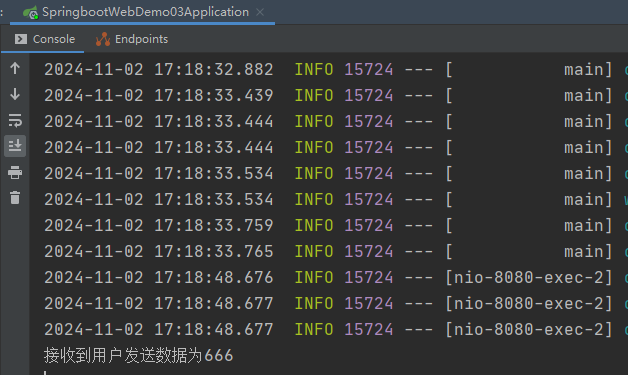
public class OneController {@RequestMapping("/show1")public String show1(@RequestParam(name = "msg1") String msg){System.out.println("接收到用户发送数据为" + msg);return "success";}
}使用postman测试:
es.postman_collection.json
多个参数
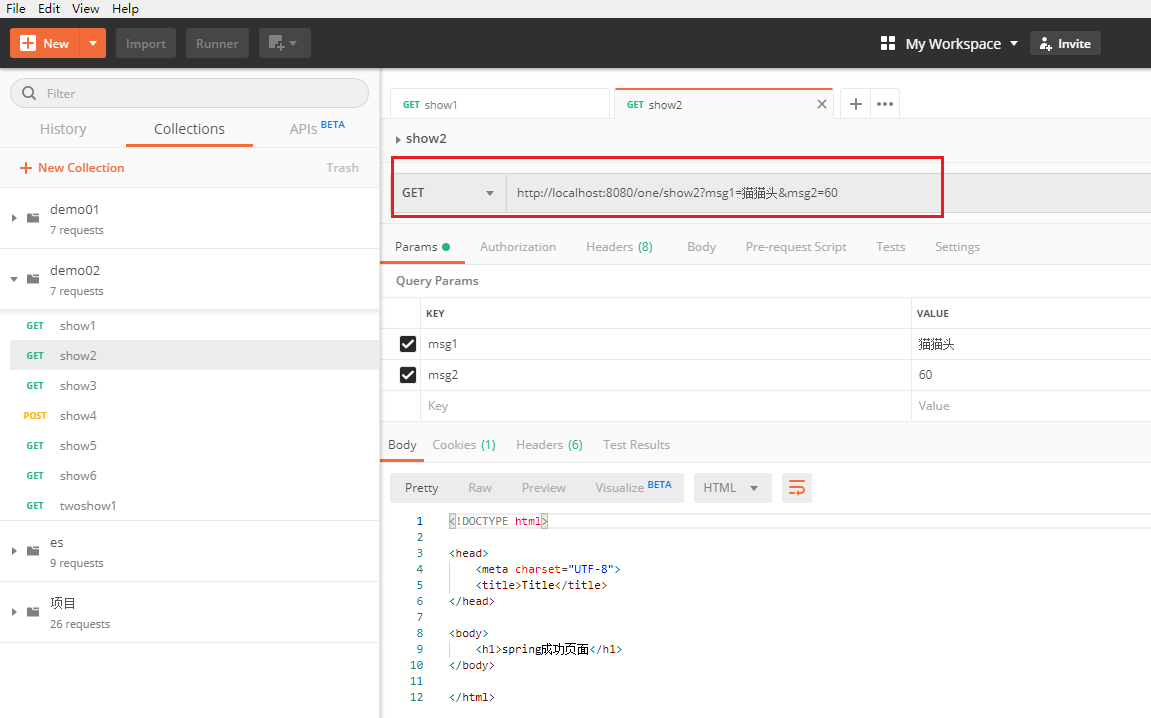
@RequestMapping("/show2")
public String show2(@RequestParam("msg1") String msg,@RequestParam("msg2") String num){System.out.println("接收到用户发送数据为" + msg);System.out.println("接收到用户发送数据为" + num);return "success";
}
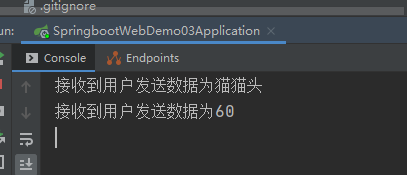
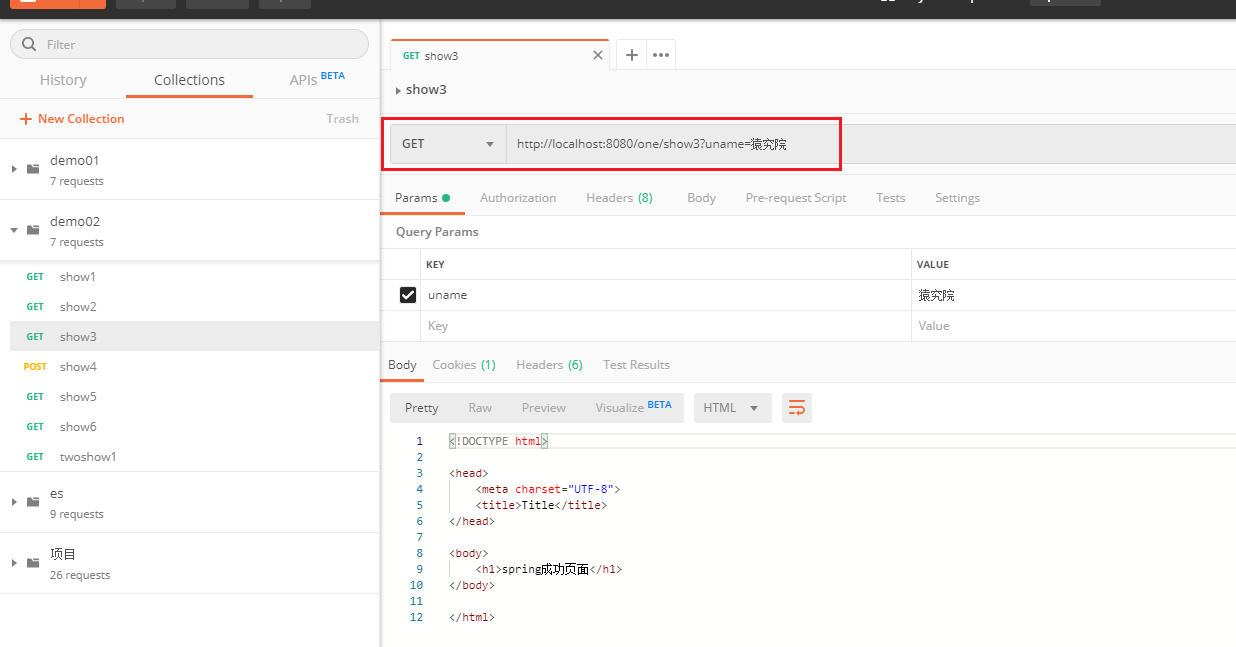
defaultValue属性:设置默认值
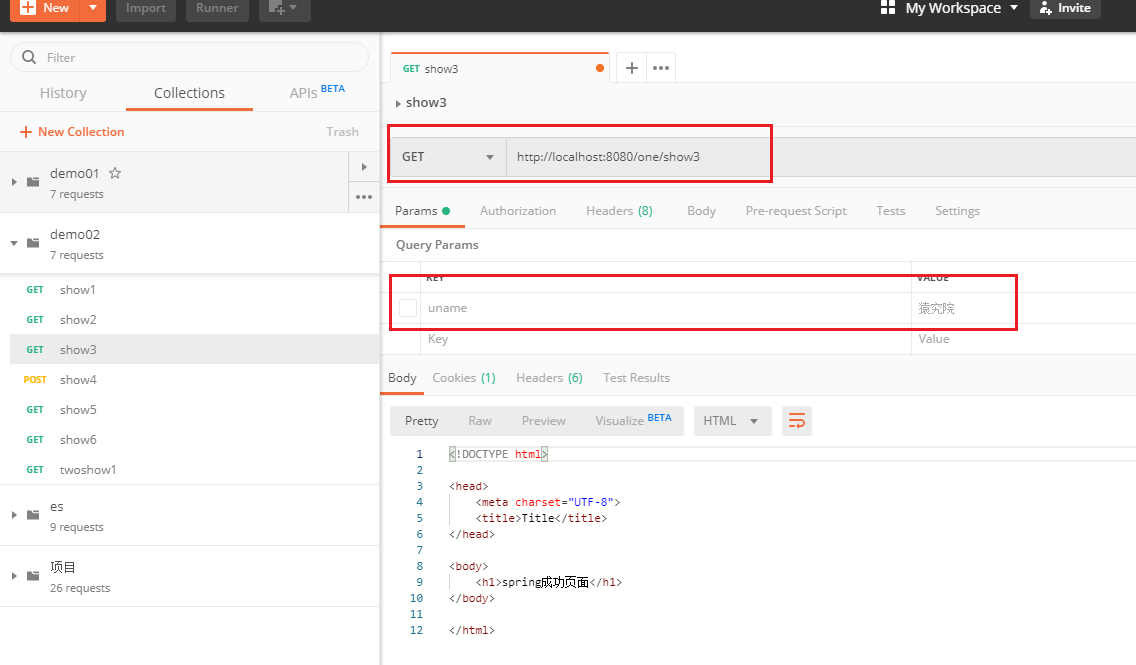
@RequestMapping("/show3")
public String show3(@RequestParam(name = "uname",defaultValue = "暂无用户") String name){System.out.println("用户名"+name);return "success";
}

如果不传参数,测试:

@RequestBody
作用:
- 用于获取"请求体"内容。直接使用得到是 key=value&key=value…
- 结构的数据,并可以转换为对象
属性:
- required:是否必须有请求体。默认值是:true。
测试:
/*** 前后端分离* @RequestBody可以将json ===》 javaBean* 注意:* 1.前端不能使用GET方式提交数据,GET方式无请求体* {* "eid":007,* "ename":"詹姆斯邦德",* "esex":"绅士"* }** * *///RequestBody注解解析json字符串,要求json字段直接使用得到key=value&@RequestMapping("/show4")public String show4(@RequestBody Emp emp){System.out.println(emp);return "success";}


@PathVariable
作用:
- 用于绑定 url 中的占位符。例如:请求 url 中 /delete/{id},
- 这个{id}就是 url 占位符。url 支持占位符是 spring3.0 之后加入的,是 springmvc 支持 rest 风格 URL 的一个重要标志
属性:
value:用于指定 url 中占位符名称。
required:是否必须提供占位符。
测试:
@RequestMapping("/show5/{uname}/{pwd}")
public String show5(@PathVariable("uname")String msg1,@PathVariable("pwd")String msg2){System.out.println(msg1);System.out.println(msg2);return "success";
}

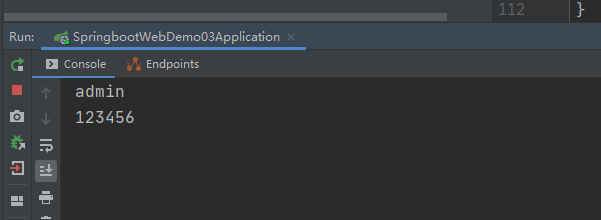
当参数名和字段名相同时,省略@PathVariable()括号中的内容,进行简写
@RequestMapping("/show6/{uname}/{pwd}")
public String show6(@PathVariable String uname,@PathVariable String pwd){System.out.println(uname);System.out.println(pwd);return "success";
}

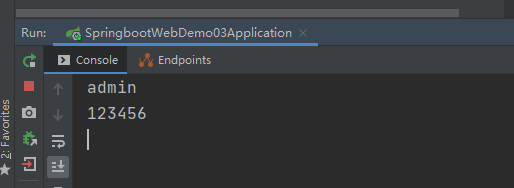
restFul
Restful是一种软件架构风格、设计风格,而不是标准,只是提供了一组设计原则和约束条件。
主要用于客户端和服务器交互类的软件,基于这个风格设计的软件可以更简洁,更有层次,
更易于实现缓存机制等。
Restful风格的请求是使用“url+请求方式”表示一次请求目的的,HTTP 协议里面四个表示操作方式的动词如下:
- GET:用于获取资源
- POST:用于新建资源
- PUT:用于更新资源
- DELETE:用于删除资源
例如:
- /users/1 GET : 得到 id = 1 的 user
- /users/1 DELETE: 删除 id = 1 的 user
- /users/1/新名/新性 PUT: 更新 id = 1 的 user
- /users/新名/新性 POST: 新增 user
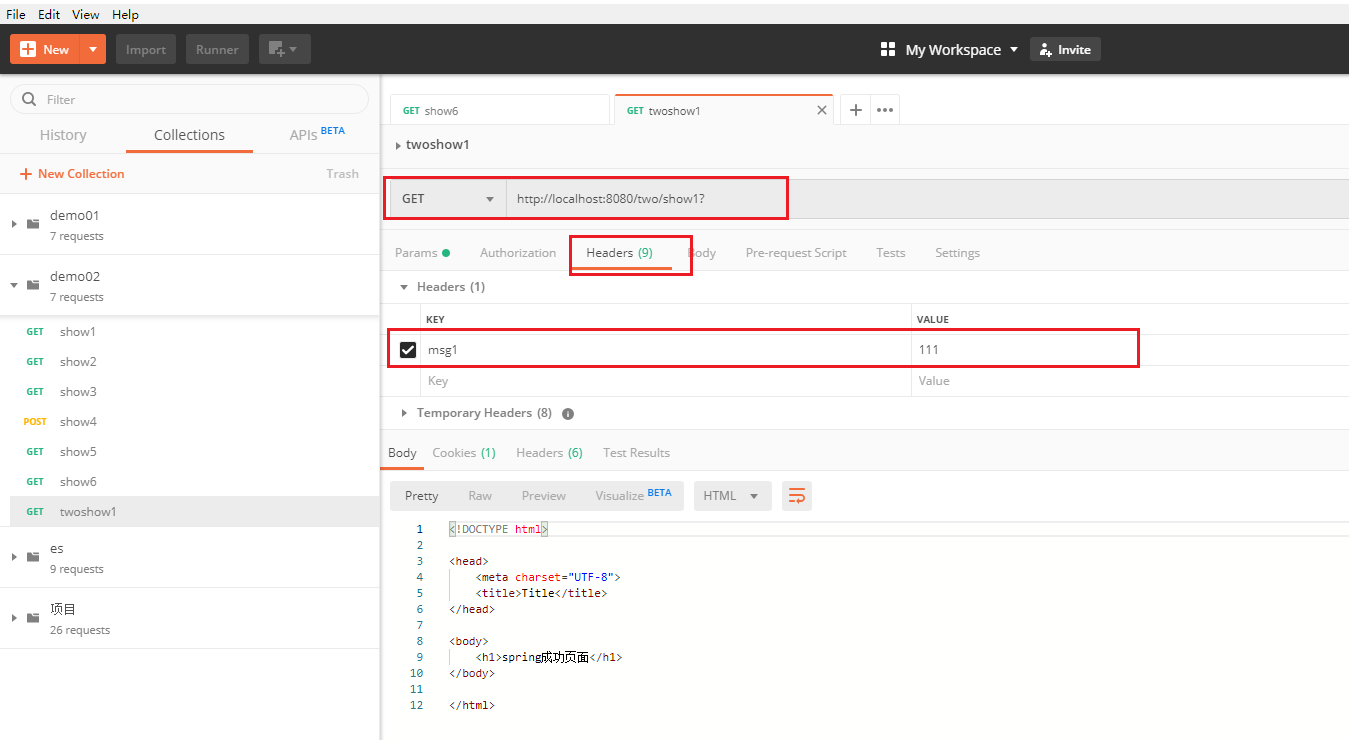
@RequestHeader
**作用:**用于获取请求消息头。
属性:
value:提供消息头名称
required:是否必须有此消息头
测试:
package com.stringzhua.springboot_web_demo03.controller;import org.springframework.stereotype.Controller;
import org.springframework.web.bind.annotation.CookieValue;
import org.springframework.web.bind.annotation.RequestHeader;
import org.springframework.web.bind.annotation.RequestMapping;/*** @Author Stringzhua* @Date 2024/9/19 10:38* description:*/
/**** springMVC常用注解** 四.@RequestHeader*      作用:*          用于获取请求消息头。*      属性:*          value:提供消息头名称*          required:是否必须有此消息头* 五.@CookieValue*      作用:*          用于把指定 cookie 名称的值传入控制器方法参数。*      属性:*          value:指定 cookie 的名称。*          required:是否必须有此 cookie。** */
@Controller
@RequestMapping("/two")
public class TwoController {/*** 获取头信息* @param msg* @return*/@RequestMapping("/show1")public String show1(@RequestHeader(value = "msg1") String msg){System.out.println(msg);return "success";}
}

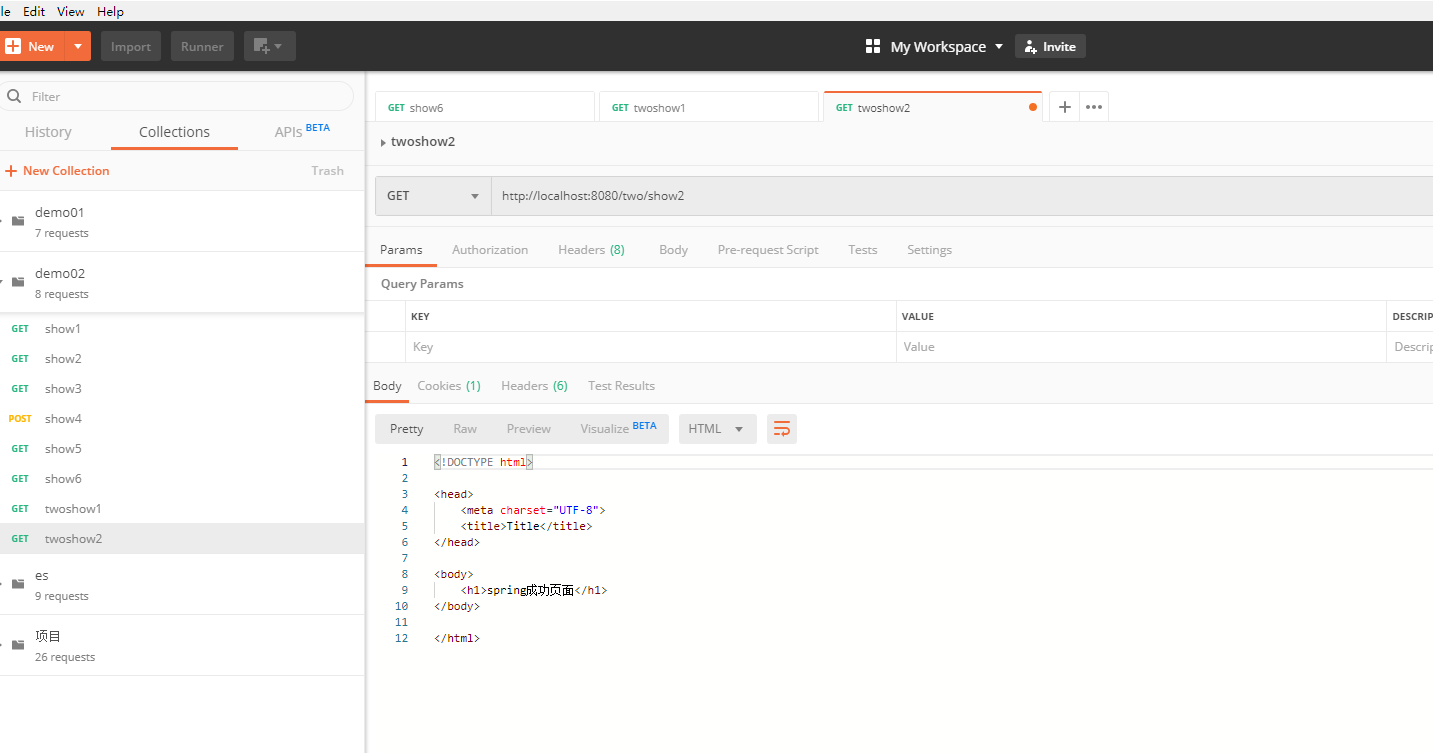
@CookieValue
**作用:**用于把指定 cookie 名称的值传入控制器方法参数。
属性:
value:指定 cookie 的名称。
required:是否必须有此 cookie
测试:
/*** 获取cookie*/
@RequestMapping("/show2")
public String show2(@CookieValue(value = "JSESSIONID",required = false)String jsonid){System.out.println(jsonid);return "success";
}

SpringMVC-数据传递
准备工作:
index.html
<!DOCTYPE html>
<html lang="cn">
<head><title>Title</title>
</head>
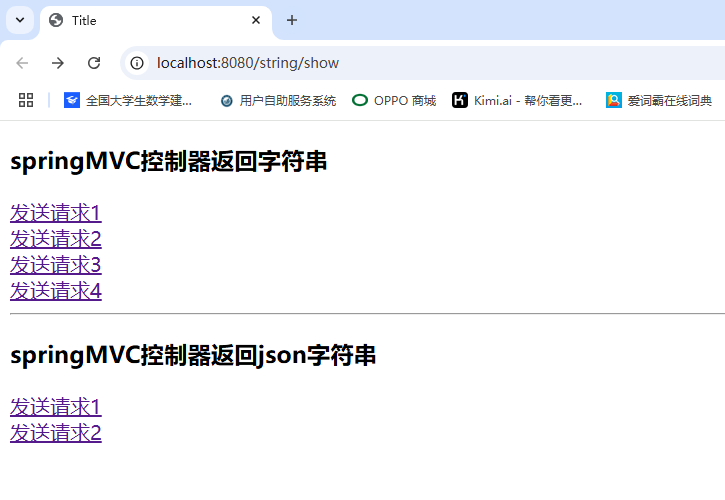
<body><h3>springMVC控制器返回字符串</h3><a href="/string/show1">发送请求1</a><br/><a href="/string/show2">发送请求2</a><br/><a href="/string/show3">发送请求3</a><br/><a href="/string/show4">发送请求4</a><br/><hr/><h3>springMVC控制器返回json字符串</h3><a href="/json/show1">发送请求1</a><br/><a href="/json/show2">发送请求2</a><br/>
</body>
</html>
success_String.html
注意 测试发送请求123时,将span标签删掉 要不然会报错
<!DOCTYPE html>
<html lang="cn">
<head><meta charset="UTF-8"><title>Title</title>
</head>
<body><h1>返回值String成功页面</h1>
<!--        <span>#(session.emp.eid)</span>-->
<!--        <span>#(session.emp.ename)</span>-->
<!--        <span>#(session.emp.esex)</span><br/>-->
</body>
</html>
主页面
字符串
充当视图的逻辑名称,默认页面跳转为请求转发方式
package com.stringzhua.springboot_web_demo04.controller;import com.stringzhua.springboot_web_demo04.pojo.Emp;
import org.springframework.stereotype.Controller;
import org.springframework.web.bind.annotation.RequestMapping;import javax.servlet.http.HttpServletRequest;/*** @Author Stringzhua* @Date 2024/9/19 11:20* description:*/
@Controller
@RequestMapping("/string")
public class StringController {/*** 进入首页*/@RequestMapping("/show")public String show() {return "index";}//请求转发//充当试图的逻辑名称,默认页面跳转为请求转发方式@RequestMapping("/show1")public String show1() {System.out.println("===show1转发...===");return "success_String";}
}
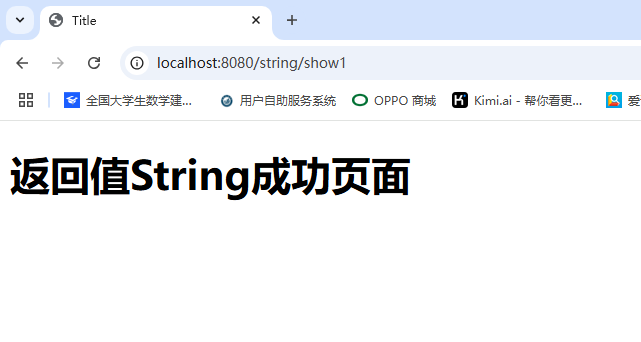
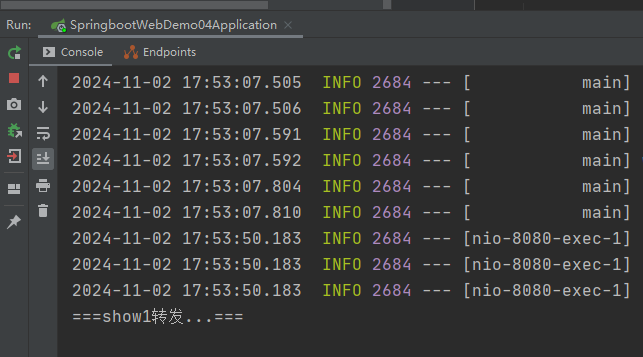
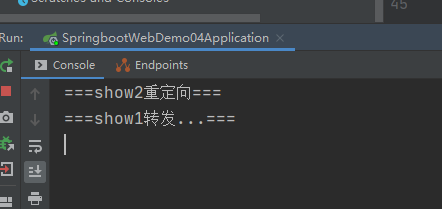
充当一次请求重定向
//作充当一次请求重定向,url地址改变,显示的页面改变
// http://localhost:8080/string/show1
@RequestMapping("/show2")
public String show2() {System.out.println("===show2重定向===");return "redirect:show1";
}

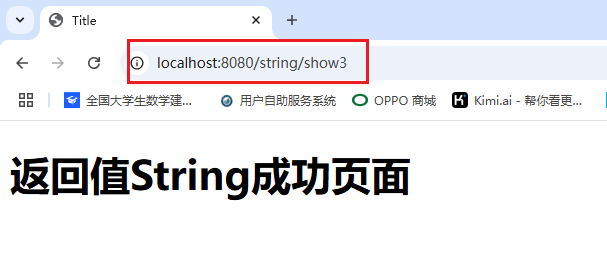
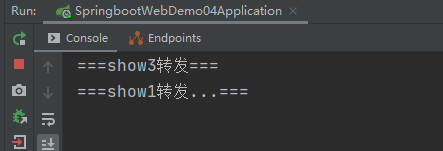
充当一次请求转发
//作充当一次请求转发,url地址不变,但显示的页面改变// http://localhost:8080/string/show3@RequestMapping("/show3")public String show3() {System.out.println("===show3转发===");return "forward:show1";}
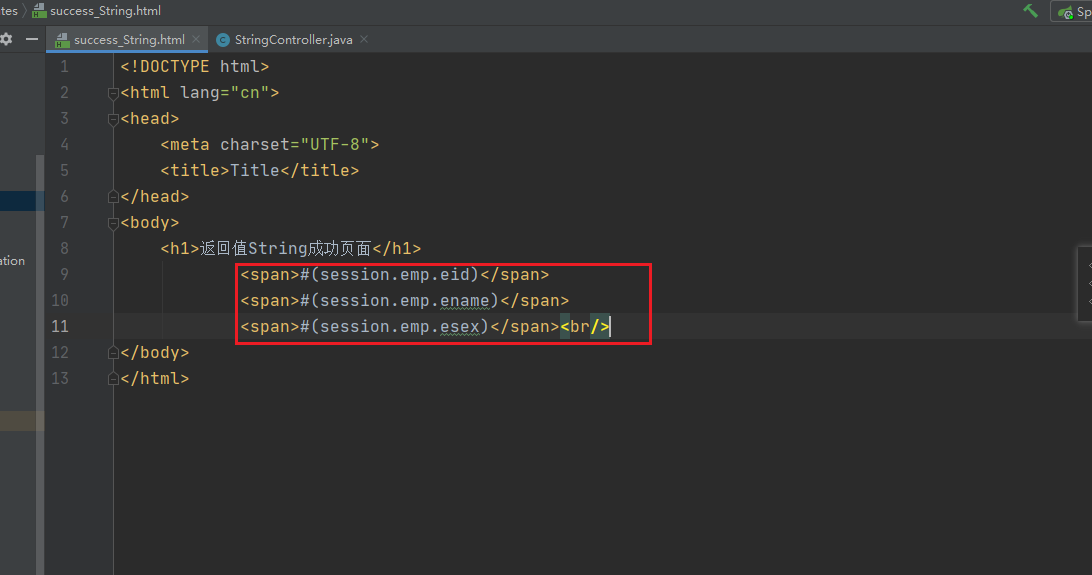
通过session传入数据.
先修改下页面:
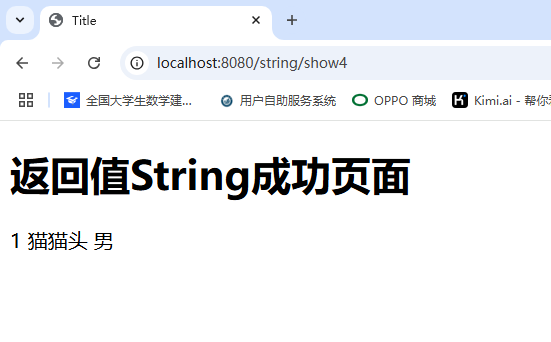
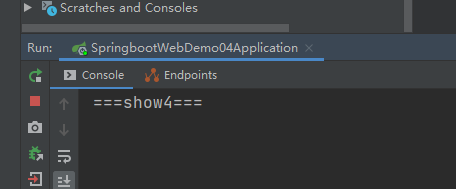
//ServletAPI@RequestMapping("/show4")public String show4(HttpServletRequest request) {System.out.println("===show4===");//模拟查询数据库Emp emp = new Emp(1, "猫猫头", "男");//设置sessionrequest.getSession().setAttribute("emp", emp);return "success_String";}
JSON
package com.stringzhua.springboot_web_demo04.controller;import com.stringzhua.springboot_web_demo04.pojo.Emp;
import org.springframework.stereotype.Controller;
import org.springframework.web.bind.annotation.RequestBody;
import org.springframework.web.bind.annotation.RequestMapping;
import org.springframework.web.bind.annotation.ResponseBody;
import org.springframework.web.bind.annotation.RestController;import java.util.ArrayList;
import java.util.HashMap;
import java.util.List;
import java.util.Map;/*** @Author Stringzhua* @Date 2024/9/19 11:59* description:*//*** @ResponseBody 对象====>json* 位置:1.类* 2.方法* @RequestBody json====>对象* 位置:方法参数* @RestController =  @Controller  +  @ResponseBody*/
//@Controller
//@ResponseBody
@RestController
@RequestMapping("/json")
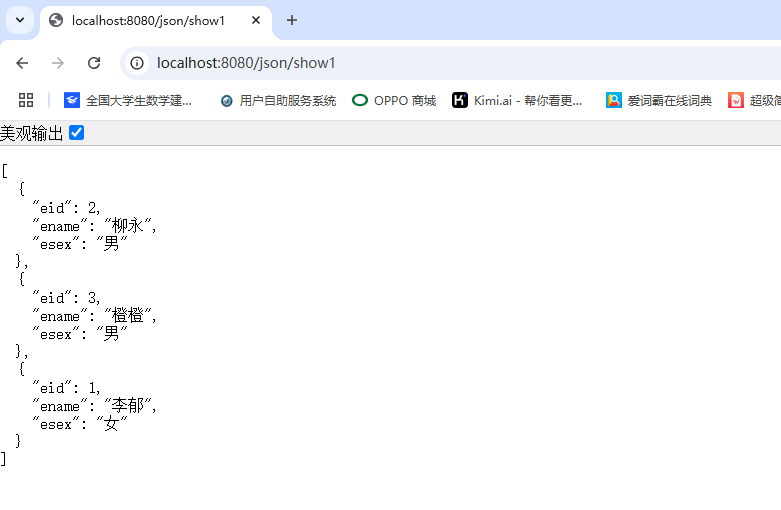
public class JsonController {@RequestMapping("/show1")@ResponseBodypublic List<Emp> show1() {List<Emp> list = new ArrayList<>();Emp emp1 = new Emp(2, "柳永", "男");Emp emp2 = new Emp(3, "橙橙", "男");Emp emp3 = new Emp(1, "李郁", "女");list.add(emp1);list.add(emp2);list.add(emp3);return list;}@RequestMapping("/show2")@ResponseBody//不加ResponseBody注解,就是逻辑地址的页面,加了就是json串,如果返回值是String类型不转,其他的都是json串
//    public String show2(){
//        return "特殊";
//    }
//    public int show2(){
//        return 50;
//    }
//    public Emp show2() {
//        return new Emp(1, "李郁", "女");
//    }public Map<String, Emp> show2() {HashMap<String, Emp> map = new HashMap<>();map.put("1", new Emp(2, "柳永", "男"));map.put("2", new Emp(3, "橙橙", "男"));map.put("3", new Emp(1, "李郁", "女"));return map;}}
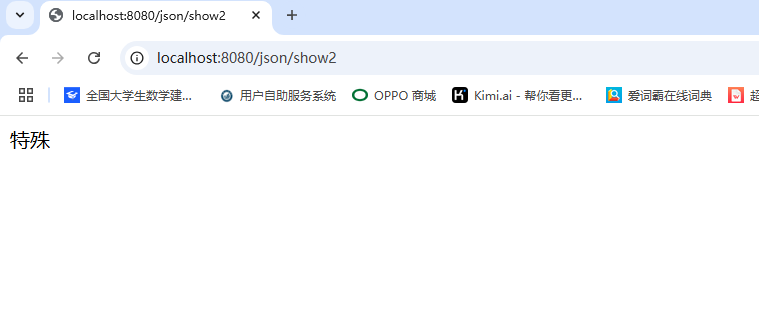
@RequestMapping("/show2")
@ResponseBody//不加ResponseBody注解,就是逻辑地址的页面,加了就是json串,如果返回值是String类型不转,其他的都是json串
public String show2(){return "特殊";
}
SpringMVC-文件上传
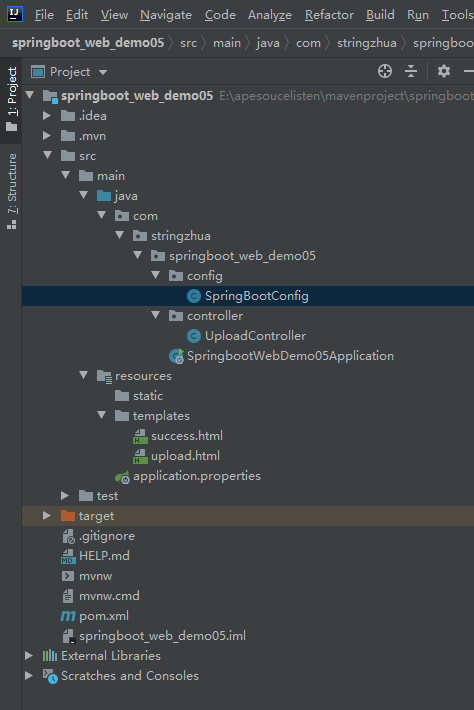
项目结构:
1.导入文件上传的坐标:
<!-- 文件上传-->
<dependency><groupId>commons-io</groupId><artifactId>commons-io</artifactId><version>2.6</version>
</dependency>
<dependency><groupId>commons-fileupload</groupId><artifactId>commons-fileupload</artifactId><version>1.3.3</version>
</dependency>
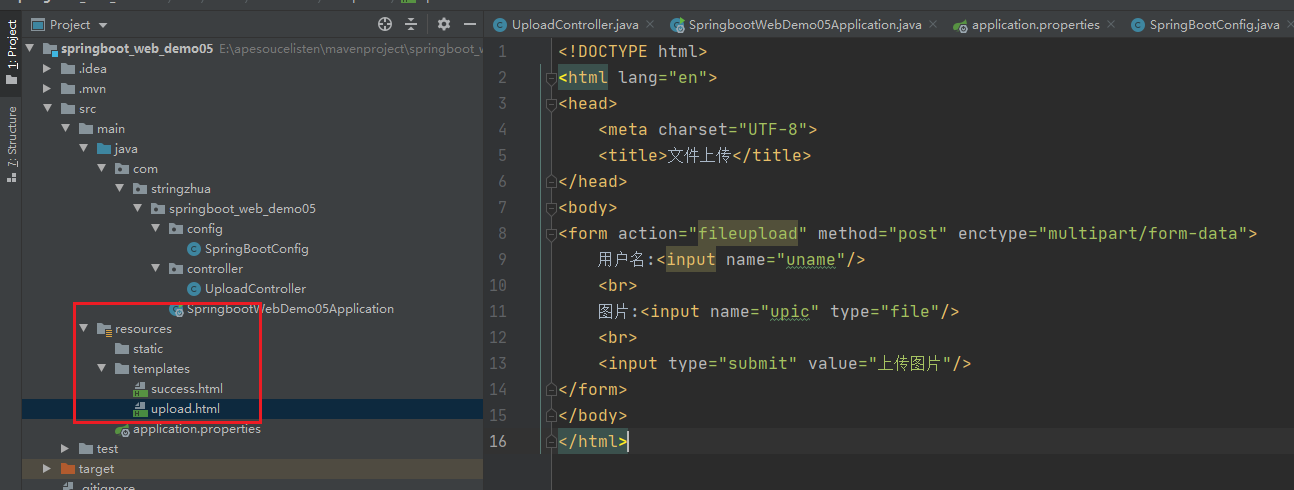
导入前端页面:
success.html
<!DOCTYPE html>
<html lang="en">
<head><meta charset="UTF-8"><title>文件上传</title>
</head>
<body>
上传成功
<span>#(session.picname)</span>
<img src="http://sk1sw9rkd.hn-bkt.clouddn.com/#(session.picname)"/>
<form action="delete" method="post" enctype="multipart/form-data"><button>删除</button>
</form>
</body>
</html>

upload.html
<!DOCTYPE html>
<html lang="en">
<head><meta charset="UTF-8"><title>文件上传</title>
</head>
<body>
<form action="fileupload" method="post" enctype="multipart/form-data">用户名:<input name="uname"/><br>图片:<input name="upic" type="file"/><br><input type="submit" value="上传图片"/>
</form>
</body>
</html>

2.编写Controller层:
@Controller
public class OneController {//进入测试页面@RequestMapping("/show")public String show(){return  "index";}//文件上传@RequestMapping("/fileupload")public String fileload(String uname, MultipartFile upic, HttpServletRequest request){System.out.println("用户名"+uname);System.out.println(upic);System.out.println(upic.getOriginalFilename());System.out.println(upic.getName());return "success_File";}
}
一般将文件upic以流的方式写入当前服务器磁盘(应用服务器)
这里我们使用文件服务器 七牛云
重新修改为七牛云的Controller:
package com.stringzhua.springboot_web_demo05.controller;import com.google.gson.Gson;
import com.qiniu.common.QiniuException;
import com.qiniu.http.Response;
import com.qiniu.storage.BucketManager;
import com.qiniu.storage.Configuration;
import com.qiniu.storage.Region;
import com.qiniu.storage.UploadManager;
import com.qiniu.storage.model.DefaultPutRet;
import com.qiniu.util.Auth;
import org.springframework.stereotype.Controller;
import org.springframework.web.bind.annotation.RequestMapping;
import org.springframework.web.multipart.MultipartFile;import javax.servlet.http.HttpServletRequest;/*** @Author Stringzhua* @Date 2024/9/19 14:14* description:*/
@Controller
public class UploadController {@RequestMapping("upload")public String upload() {return "upload";}//文件上传@RequestMapping("/fileupload")public String fileupload(String uname, MultipartFile upic, HttpServletRequest request) {//获取文件信息System.out.println("用户名" + uname);System.out.println(upic);System.out.println(upic.getOriginalFilename());System.out.println(upic.getName());//将文件保存到磁盘的某处//方式1.将文件upic以流的方式写入当前服务器磁盘(应用服务器)//方式2.文件服务器(七牛云)//构造一个带指定 Region 对象的配置类Configuration cfg = new Configuration(Region.autoRegion());//...其他参数参考类注释UploadManager uploadManager = new UploadManager(cfg);//生成上传凭证,准备开始上传String accessKey = "Farupk0sMM7VMjF3xluaFTjwUQ-DtwA1QW1LOvMH";String secretKey = "kdzeXaRT8uiV2KZfX1YF89vTu11wDeT2fwGqGlBu";String bucket = "stringzhuaworkspace";//默认不指定key的情况下,以文件内容的hash值作为文件名String key = null;String name = null;try {byte[] uploadBytes = upic.getBytes();Auth auth = Auth.create(accessKey, secretKey);String upToken = auth.uploadToken(bucket);try {Response response = uploadManager.put(uploadBytes, key, upToken);//解析上传成功的结果DefaultPutRet putRet = new Gson().fromJson(response.bodyString(), DefaultPutRet.class);System.out.println(putRet.key);//获取文件名System.out.println(putRet.hash);//获取文件hash值name = putRet.key;} catch (QiniuException ex) {Response r = ex.response;System.err.println(r.toString());try {System.err.println(r.bodyString());} catch (QiniuException ex2) {//ignore}}} catch (Exception ex) {//ignore}request.getSession().setAttribute("picname", name);return "success";}//删除文件@RequestMapping("delete")public String delete(String uname, MultipartFile upic, HttpServletRequest request) {//构造一个带指定 Region 对象的配置类Configuration cfg = new Configuration(Region.region0());//...其他参数参考类注释String accessKey = "Farupk0sMM7VMjF3xluaFTjwUQ-DtwA1QW1LOvMH";String secretKey = "kdzeXaRT8uiV2KZfX1YF89vTu11wDeT2fwGqGlBu";String bucket = "stringzhuaworkspace";String key = (String) request.getSession().getAttribute("picname");System.out.println(key);Auth auth = Auth.create(accessKey, secretKey);BucketManager bucketManager = new BucketManager(auth, cfg);try {bucketManager.delete(bucket, key);} catch (QiniuException ex) {//如果遇到异常,说明删除失败System.err.println(ex.code());System.err.println(ex.response.toString());}return "upload";}
}
需要上传自己的密钥 并且新建一个存储空间
注意设置为公开 否则上传失败:

导入七牛云需要的坐标:
<!--        七牛云文件上传需要的坐标-->
<dependency><groupId>com.qiniu</groupId><artifactId>qiniu-java-sdk</artifactId><version>7.2.25</version>
</dependency>
<dependency><groupId>com.squareup.okhttp3</groupId><artifactId>okhttp</artifactId><version>3.14.2</version><scope>compile</scope>
</dependency>
<dependency><groupId>com.google.code.gson</groupId><artifactId>gson</artifactId><version>2.8.5</version><scope>compile</scope>
</dependency>
<dependency><groupId>com.qiniu</groupId><artifactId>happy-dns-java</artifactId><version>0.1.6</version><scope>test</scope>
</dependency>
启动项目,测试上传:
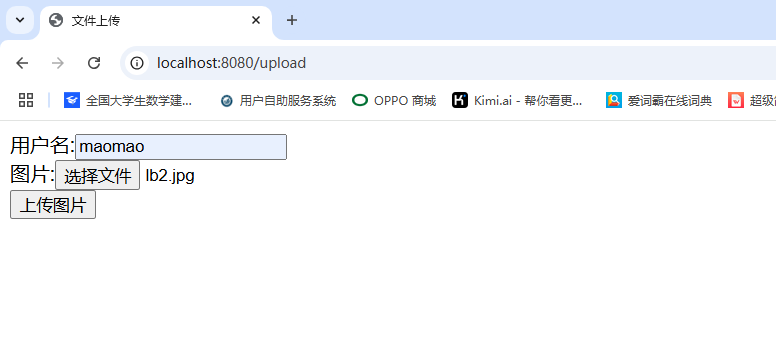
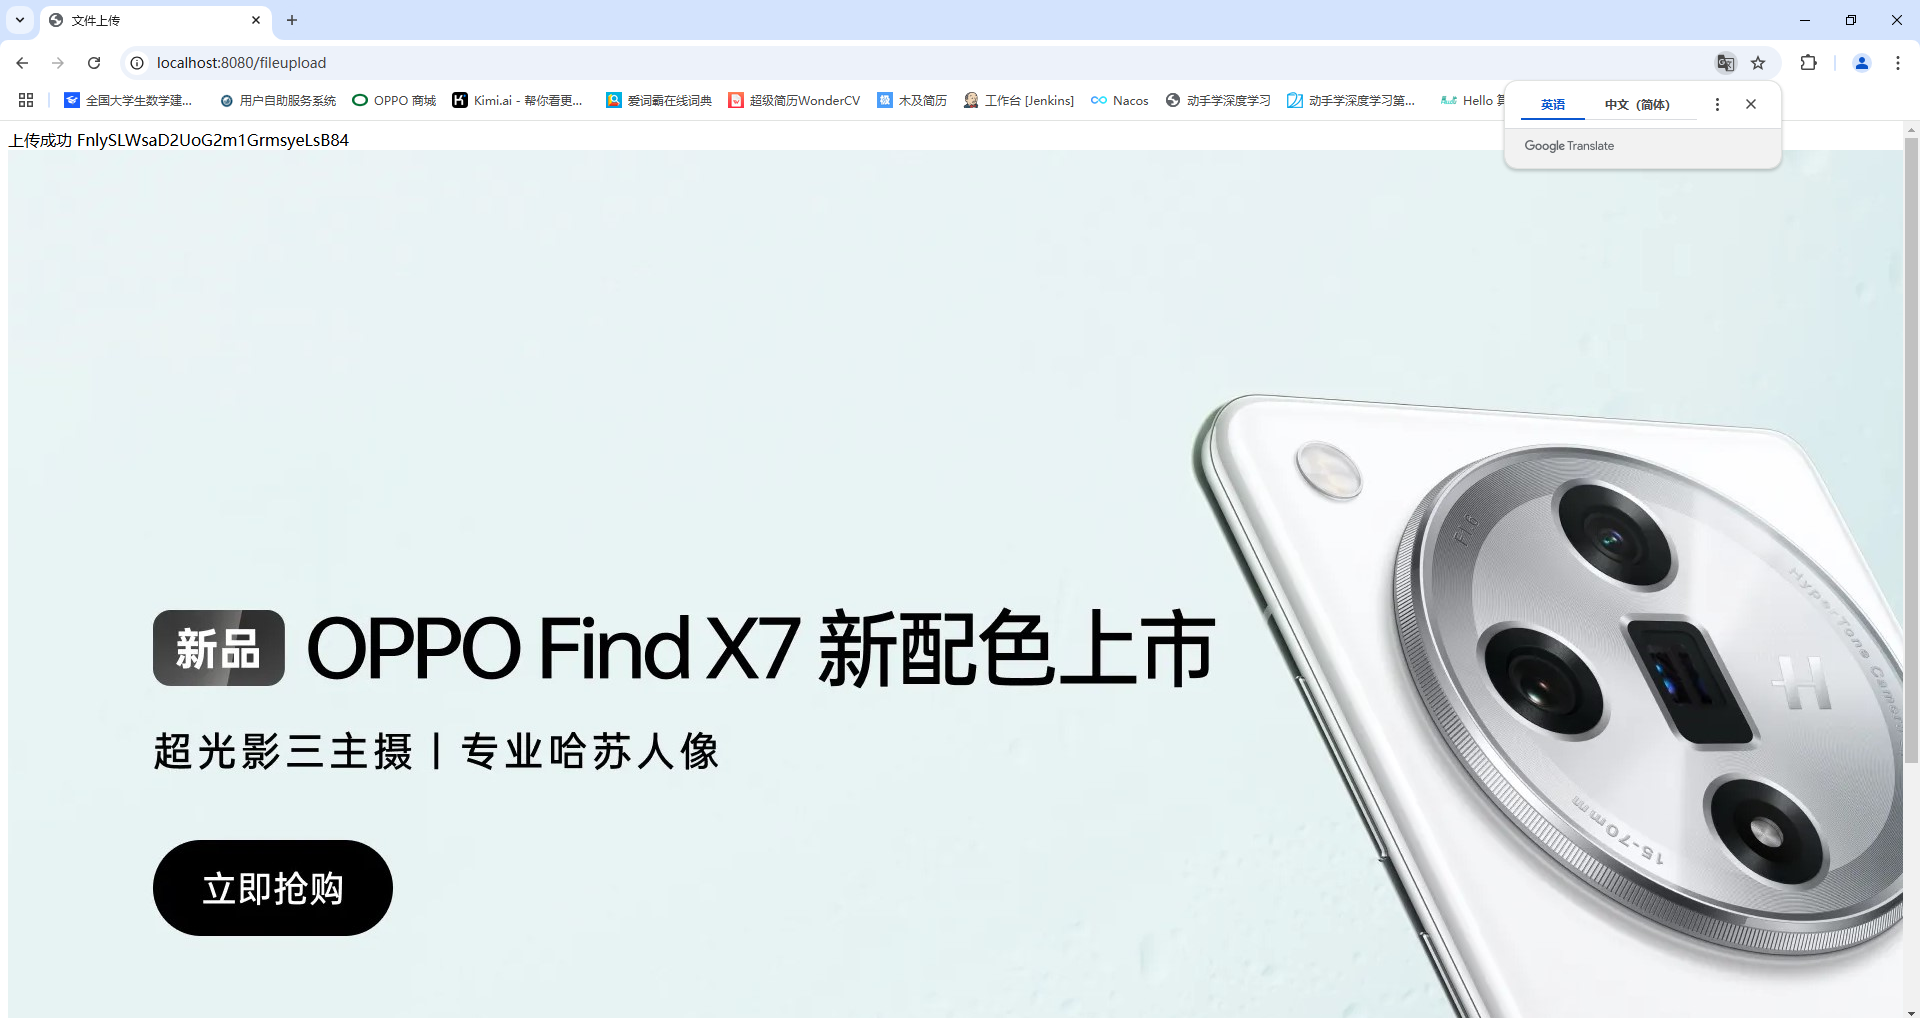

上传成功!

点击删除按钮,删除七牛云上的图片:
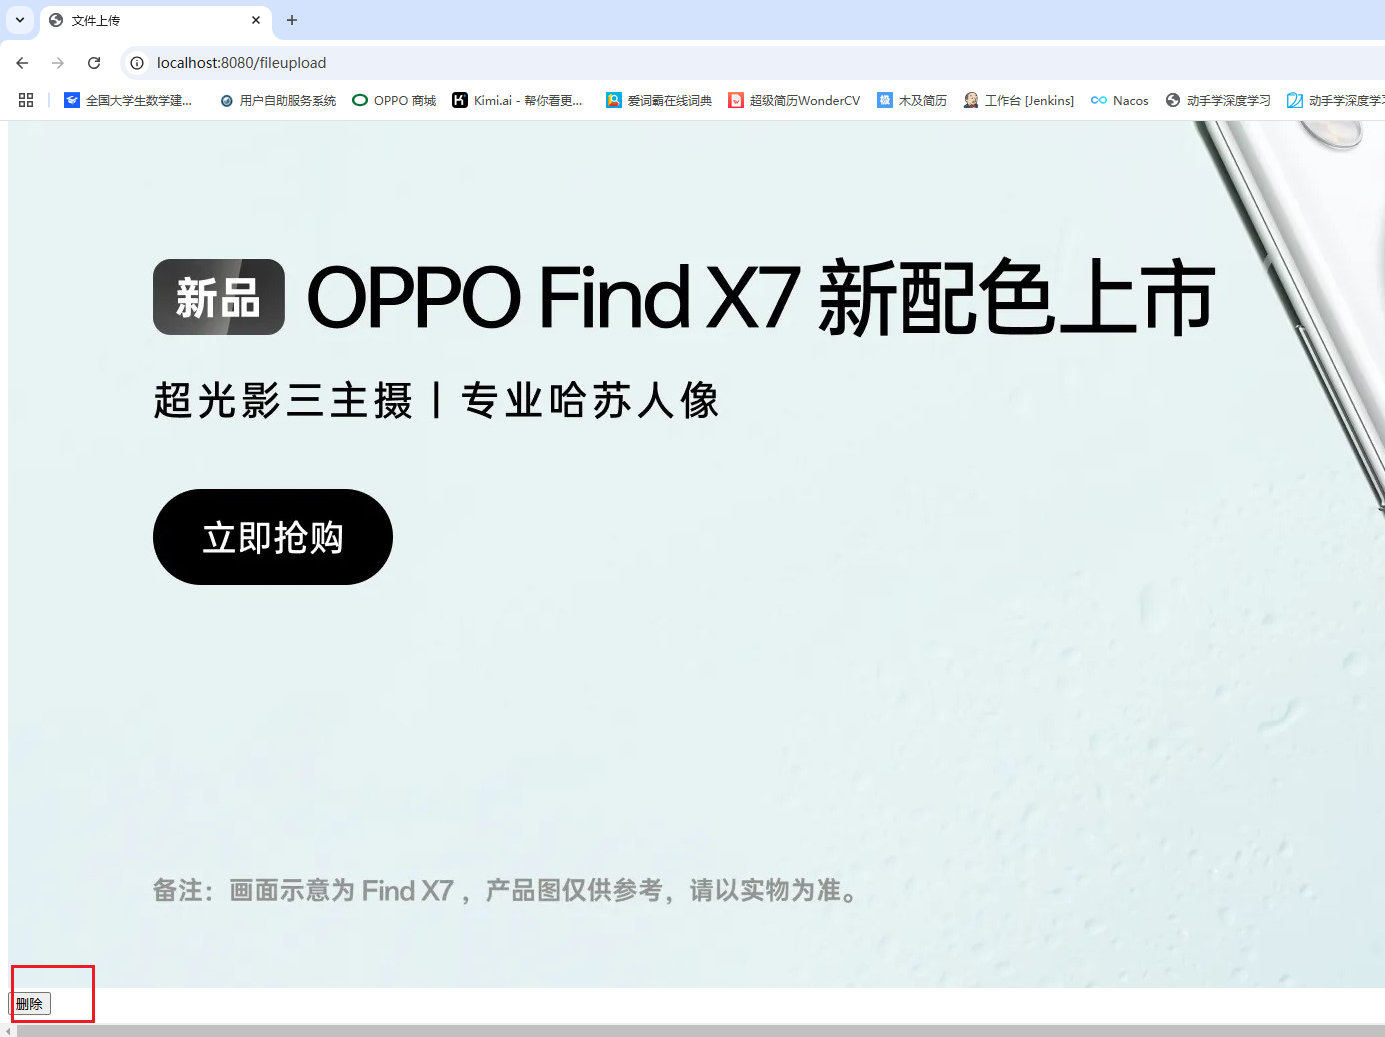


删除成功!
其他的详细操作,请查阅七牛云文档!
https://developer.qiniu.com/kodo/1650/chunked-upload
