文章目录
- 1. **组件的定义**
- **函数组件**
- **类组件**
- 2. **组件的生命周期**
- 3. **状态管理**
- **类组件中的状态管理**
- **函数组件中的状态管理**
- 4. **组件之间的通信**
- **通过 Props 传递数据**
- **上下文(Context)**
- 5. **组件的样式**
- 6. **处理表单**
- 7. **错误边界**
React 组件的核心概念,包括组件的定义、生命周期、状态管理、以及如何进行组件之间的通信。以下是对 React 组件的详细解释:
1. 组件的定义
函数组件
函数组件是最简单的组件类型,它是一个 JavaScript 函数,接受 props 作为参数,并返回一个 React 元素(通常是 JSX)。
示例:
function Welcome(props) {return <h1>Hello, {props.name}!</h1>;
}
使用:
<Welcome name="Alice" />
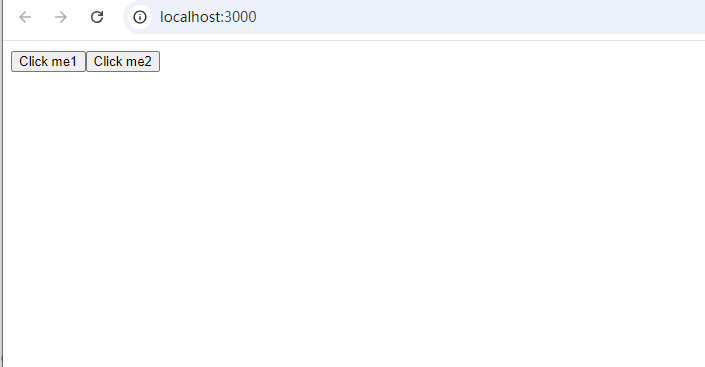
案例:
function Button() {return <button>Click me2</button>;
}function App() {const handleClick = (event) => {console.log(event.target);};return (<div className="App"><button onClick={handleClick}>Click me1</button><Button /></div>)
}

类组件
类组件是一个 ES6 类,继承自 React.Component。它需要实现一个 render 方法,返回一个 React 元素。类组件通常用于需要状态管理和生命周期方法的场景。
示例:
class Welcome extends React.Component {render() {return <h1>Hello, {this.props.name}!</h1>;}
}
使用:
<Welcome name="Alice" />
2. 组件的生命周期
类组件有生命周期方法,这些方法在组件的不同阶段自动调用。常见的生命周期方法包括:
componentDidMount:组件挂载到 DOM 后调用。通常用于数据加载。componentDidUpdate:组件更新后调用。可以用于对组件更新后的处理。componentWillUnmount:组件卸载前调用。用于清理操作,如移除事件监听器。
示例:
class MyComponent extends React.Component {componentDidMount() {console.log('Component did mount!');}componentDidUpdate(prevProps, prevState) {console.log('Component did update!');}componentWillUnmount() {console.log('Component will unmount!');}render() {return <div>My Component</div>;}
}
3. 状态管理
组件可以有自己的状态(state),这是用于存储组件内部数据的对象。状态通常在类组件中通过 this.state 和 this.setState 来管理,而在函数组件中则通过 useState 钩子来管理。
类组件中的状态管理
示例:
class Counter extends React.Component {constructor(props) {super(props);this.state = { count: 0 };}increment = () => {this.setState({ count: this.state.count + 1 });};render() {return (<div><p>Count: {this.state.count}</p><button onClick={this.increment}>Increment</button></div>);}
}
函数组件中的状态管理
示例:
import React, { useState } from 'react';function Counter() {const [count, setCount] = useState(0);const increment = () => {setCount(count + 1);};return (<div><p>Count: {count}</p><button onClick={increment}>Increment</button></div>);
}
4. 组件之间的通信
React 组件之间可以通过 props 和上下文(Context)来进行通信。
通过 Props 传递数据
父组件可以通过 props 将数据传递给子组件。
父组件示例:
function ParentComponent() {return <ChildComponent message="Hello from Parent" />;
}
子组件示例:
function ChildComponent(props) {return <p>{props.message}</p>;
}
上下文(Context)
上下文允许组件通过树状结构传递数据,而不必逐层传递 props。你可以使用 React.createContext 创建上下文,使用 Provider 组件提供数据,使用 Consumer 组件接收数据,或者使用 useContext 钩子在函数组件中使用上下文数据。
上下文创建与使用示例:
// 创建上下文
const MyContext = React.createContext();// 提供上下文
function MyProvider({ children }) {const [value, setValue] = useState('Default Value');return (<MyContext.Provider value={value}>{children}</MyContext.Provider>);
}// 消费上下文
function MyConsumer() {const contextValue = useContext(MyContext);return <p>Context Value: {contextValue}</p>;
}// 使用
function App() {return (<MyProvider><MyConsumer /></MyProvider>);
}
5. 组件的样式
你可以通过几种方式给组件添加样式:
- 内联样式:使用 JavaScript 对象作为
style属性。
示例:
function StyledComponent() {const style = { color: 'blue', fontSize: '20px' };return <div style={style}>This is a styled component</div>;
}
- CSS 类名:使用
className属性来应用 CSS 类。
示例:
// CSS 文件 (styles.css)
.my-style {color: red;font-size: 18px;
}// 组件
function StyledComponent() {return <div className="my-style">This is a styled component</div>;
}
- CSS 模块:使用 CSS 模块来避免样式冲突。
示例:
// CSS 模块 (styles.module.css)
.myStyle {color: green;font-size: 16px;
}// 组件
import styles from './styles.module.css';function StyledComponent() {return <div className={styles.myStyle}>This is a styled component</div>;
}
6. 处理表单
表单可以使用受控组件来管理输入。受控组件将表单元素的值与组件的状态同步。
示例:
class ControlledForm extends React.Component {constructor(props) {super(props);this.state = { inputValue: '' };}handleChange = (event) => {this.setState({ inputValue: event.target.value });};handleSubmit = (event) => {alert('Submitted value: ' + this.state.inputValue);event.preventDefault();};render() {return (<form onSubmit={this.handleSubmit}><label>Input:<input type="text" value={this.state.inputValue} onChange={this.handleChange} /></label><button type="submit">Submit</button></form>);}
}
7. 错误边界
错误边界是 React 16 引入的一个特性,用于捕获子组件树中的 JavaScript 错误,并展示备用 UI。
示例:
class ErrorBoundary extends React.Component {constructor(props) {super(props);this.state = { hasError: false };}static getDerivedStateFromError() {return { hasError: true };}componentDidCatch(error, info) {console.error('Error caught by Error Boundary:', error, info);}render() {if (this.state.hasError) {return <h1>Something went wrong.</h1>;}return this.props.children;}
}// 使用 Error Boundary
function App() {return (<ErrorBoundary><SomeComponent /></ErrorBoundary>);
}
您好,我是肥晨。
欢迎关注我获取前端学习资源,日常分享技术变革,生存法则;行业内幕,洞察先机。
