一、部署es
1.下载安装
#下载安装
https://artifacts.elastic.co/downloads/elasticsearch/elasticsearch-8.13.2-linux-x86_64.tar.gz
#解压
[root@es software]# tar xf  elasticsearch-8.13.2-linux-x86_64.tar.gz
#创建运行elasticsearch服务用户并修改权限
[root@es software]# useradd liux
[root@es software]# chown liux:liux /data/software/elasticsearch-8.13.2 -R
2.修改文件描述符
最大及进程数量打开上限 (不修改启动会报错)
 [root@es ~]# cat > /etc/security/limits.d/es.conf <<EOF
*   soft  nofile 65535
*  hard  nofile 131070
*  hard  nproc 8192
EOF
3.修改内核参数
[root@es elasticsearch-8.13.2]$ sysctl -q vm.max_map_count
vm.max_map_count = 65530
[root@es elasticsearch-8.13.2]# cat > /etc/sysctl.d/es.conf <<EOF
vm.max_map_count=262144
EOF
[root@es elasticsearch-8.13.2]# sysctl -f /etc/sysctl.d/es.conf
vm.max_map_count = 262144
4.修改配置文件
[liux@es elasticsearch-8.13.2]$ egrep -v "^#|^$" config/elasticsearch.yml
network.host: 0.0.0.0
discovery.seed_hosts: ["192.168.91.30"]
cluster.initial_master_nodes: ["192.168.91.30"]
xpack.security.enabled: false
5.配置启动文件
[liux@es elasticsearch-8.13.2]$ cat > startES.sh <<EOF
#!/bin/bash
# 设置Elasticsearch的安装目录                                                            ES_HOME="/data/software/elasticsearch-8.13.2"
pid=`ps -ef | grep elasticsearch-8.13.2 | grep -v grep | grep '/data/software/elasticsearch-8.13.2/jdk/bin/ja
va' | awk '{print $2}'`
# 检查Elasticsearch是否已经在运行
if ps -ef | grep elasticsearch | grep -v grep > /dev/null; then                           echo "Elasticsearch is running. Stopping..."kill $pid;                                                                             echo "Elasticsearch stopped."
fi
sleep 5s
# 使用nohup重新启动Elasticsearch
nohup "$ES_HOME/bin/elasticsearch" -d > "$ES_HOME/es.log" 2>&1 &
echo "Elasticsearch is starting in the background..."
EOF[liux@es elasticsearch-8.13.2]$ sh startES.sh
6.如下所示代表安装成功
[liux@es elasticsearch-8.13.2]$ curl http://192.168.91.30:9200
{"name" : "es","cluster_name" : "elasticsearch","cluster_uuid" : "f337MT9oRvmL16xom5muBQ","version" : {"number" : "8.13.2","build_flavor" : "default","build_type" : "tar","build_hash" : "16cc90cd2d08a3147ce02b07e50894bc060a4cbf","build_date" : "2024-04-05T14:45:26.420424304Z","build_snapshot" : false,"lucene_version" : "9.10.0","minimum_wire_compatibility_version" : "7.17.0","minimum_index_compatibility_version" : "7.0.0"},"tagline" : "You Know, for Search"
}
7.Elasticsearch生成 TLS 证书
#生成 CA 证书
[root@es elasticsearch-8.13.2]# bin/elasticsearch-certutil ca --pem --out config/certs/ca.zip
[root@es elasticsearch-8.13.2]# unzip config/certs/ca.zip -d config/certs/
# 生成节点证书(包含 SAN)
[root@es elasticsearch-8.13.2]# bin/elasticsearch-certutil cert --pem \--ca-cert config/certs/ca/ca.crt \--ca-key config/certs/ca/ca.key \--name "es" \--dns localhost,es,127.0.0.1 \--ip 192.168.91.30 \--out config/certs/es-node.zip
[root@es elasticsearch-8.13.2]# unzip config/certs/es-node.zip -d config/certs/
8.修改elasticsearch配置文件
[root@es elasticsearch-8.13.2]# cat config/elasticsearch.yml
# 集群和节点名称
cluster.name: my-es
node.name: es-node
# 网络绑定
network.host: 0.0.0.0
http.port: 9200
# 安全配置
xpack.security.enabled: true
#配置 HTTP 层 TLS(HTTPS)
xpack.security.http.ssl:enabled: truekey: certs/es/es.keycertificate: certs/es/es.crtcertificate_authorities: certs/ca/ca.crtverification_mode: full
#配置 Transport 层 TLS(节点间通信)
xpack.security.transport.ssl:enabled: truekey: certs/es/es.keycertificate: certs/es/es.crtcertificate_authorities: certs/ca/ca.crtverification_mode: full
# 初始主节点
cluster.initial_master_nodes: ["192.168.91.30"]
9.设置文件权限
[root@es elasticsearch-8.13.2]# chown -R liux:liux /data/software/elasticsearch-8.13.2
[root@es elasticsearch-8.13.2]# chmod 600 /data/software/elasticsearch-8.13.2/config/certs/**/*.key
[root@es elasticsearch-8.13.2]# chmod 644 /data/software/elasticsearch-8.13.2/config/certs/**/*.crt
10.启动(以非root账号)
[liux@es elasticsearch-8.13.2]$ ./startES.sh11.为内用用户设置密码
[root@es elasticsearch-8.13.2]# ./bin/elasticsearch-reset-password -u elastic
This tool will reset the password of the [elastic] user to an autogenerated value.
The password will be printed in the console.
Please confirm that you would like to continue [y/N]y
Password for the [elastic] user successfully reset.
New value: CxL+02hUBIERrlwaXefD
12.验证 HTTPS 访问
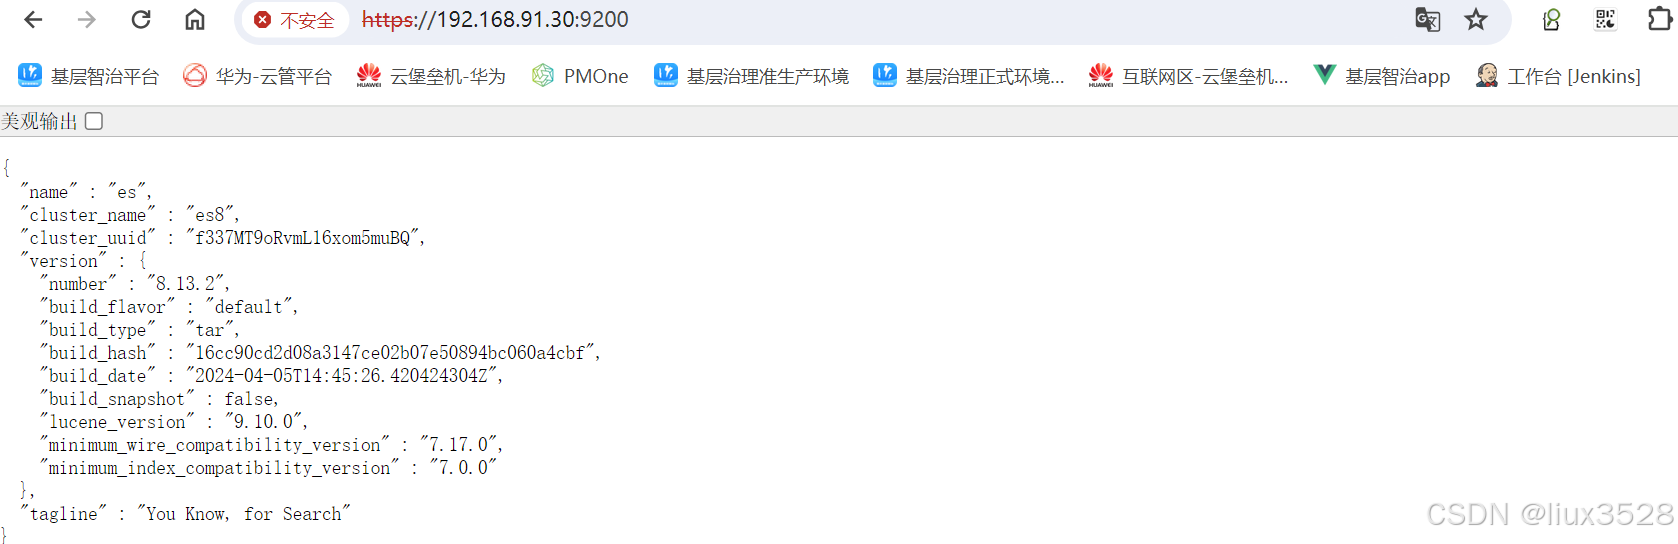
使用 curl 或浏览器验证 HTTPS 是否生效
[liux@es elasticsearch-8.13.2]$ curl -k -u elastic:qgXT6yy*Vmj8FQhO2ein https://192.168.91.30:9200
{"name" : "es","cluster_name" : "es8","cluster_uuid" : "f337MT9oRvmL16xom5muBQ","version" : {"number" : "8.13.2","build_flavor" : "default","build_type" : "tar","build_hash" : "16cc90cd2d08a3147ce02b07e50894bc060a4cbf","build_date" : "2024-04-05T14:45:26.420424304Z","build_snapshot" : false,"lucene_version" : "9.10.0","minimum_wire_compatibility_version" : "7.17.0","minimum_index_compatibility_version" : "7.0.0"},"tagline" : "You Know, for Search"
}
13.注意事项
验证模式
verification_mode: certificate:仅验证证书有效性(开发环境适用)。
verification_mode: full:严格验证证书和主机名(生产环境必须)。
防火墙和网络
确保防火墙开放端口 9200(HTTPS)和 9300(节点间通信)。
集群配置
多节点集群需确保所有节点使用相同的 CA 证书,并在配置中指定 discovery.seed_hosts。
二、部署kibana
1.下载安装
https://artifacts.elastic.co/downloads/kibana/kibana-8.13.2-x86_64.rpm
[root@es software]# rpm -ivh kibana-8.13.2-x86_64.rpm
2.设置kibana用户密码
[root@es elasticsearch-8.13.2]# ./bin/elasticsearch-reset-password -u kibana_system
This tool will reset the password of the [kibana_system] user to an autogenerated value.
The password will be printed in the console.
Please confirm that you would like to continue [y/N]y
Password for the [kibana_system] user successfully reset.
New value: qqjW5tkngBhbWuEydDGW
3.修改kibana配置文件
[root@es kibana]# cat kibana.yml
server.port: 5601
server.host: "192.168.91.30"
server.publicBaseUrl: "http://192.168.91.30:5601"
# Elasticsearch 安全连接
elasticsearch.hosts: ["https://192.168.91.30:9200"]
elasticsearch.ssl.certificateAuthorities: ["/data/software/elasticsearch-8.13.2/config/certs/ca/ca.crt"]
elasticsearch.ssl.verificationMode: full
elasticsearch.username: "kibana_system"
elasticsearch.password: "*q-Bc0=m5d*Ev-AcGShm"
# 启用 Kibana 安全
#用于加密和解密敏感数据的密钥
xpack.encryptedSavedObjects.encryptionKey: "1f57078d76aa5c992171a342d7a64d33e56f3a1b832967160bcc568ae43dcf8d"# 如果二进制安装可用  ./bin/kibana-encryption-keys generate生成上面32位的随机字符串
# 也可以用openssl rand -hex 32 生成
4.设置文件权限
[root@es kibana]# chown -R kibana:kibana /etc/kibana# 确保 Kibana 可读 CA 证书
[root@es kibana]# chmod 644 /data/software/elasticsearch-8.13.2/config/certs/ca/ca.crt
5.启动
[root@es software]# systemctl enable --now kibana
[root@es software]# systemctl status kibana
[root@es kibana]# cat /usr/lib/systemd/system/kibana.service
[Unit]
Description=Kibana
Documentation=https://www.elastic.co
Wants=network-online.target
After=network-online.target
[Service]
Type=simple
User=kibana
Group=kibana
PrivateTmp=true
Environment=KBN_HOME=/usr/share/kibana
Environment=KBN_PATH_CONF=/etc/kibana
EnvironmentFile=-/etc/default/kibana
EnvironmentFile=-/etc/sysconfig/kibana
ExecStart=/usr/share/kibana/bin/kibana
Restart=on-failure
RestartSec=3
StartLimitBurst=3
StartLimitInterval=60
WorkingDirectory=/usr/share/kibana
StandardOutput=journal
StandardError=inherit
[Install]
WantedBy=multi-user.target#页面访问
http://192.168.91.30:5601
三、部署filebeat
1.下载filebeat镜像
[root@node-1 ~]# docker pull docker.elastic.co/beats/filebeat:8.13.22.编写RBAC文件
[root@master-1 logs]# vim filebeat-sa.yaml
#创建filebeat-sa的服务账号
apiVersion: v1
kind: ServiceAccount
metadata:name: filebeat-sanamespace: kube-systemlabels:k8s-app: filebeat
---
#集群级权限(ClusterRole)
apiVersion: rbac.authorization.k8s.io/v1
kind: ClusterRole
metadata:name: filebeatlabels:k8s-app: filebeat
rules:
- apiGroups: [""] # "" indicates the core API groupresources: ["namespaces","pods","nodes"]  #用于自动发现容器verbs: ["get","watch","list"]
- apiGroups: ["apps"]  #用于关联 Pod 与 ReplicaSetresources:- replicasetsverbs: ["get", "list", "watch"]---
#集群级权限(ClusterRoleBinding)
#将角色与服务账号绑定
apiVersion: rbac.authorization.k8s.io/v1
kind: ClusterRoleBinding
metadata:name: filebeat
subjects:
- kind: ServiceAccountname: filebeat-sanamespace: kube-system
roleRef:kind: ClusterRolename: filebeatapiGroup: rbac.authorization.k8s.io---
#访问 kubeadm-config 的权限(Role + RoleBinding)
#读取 kube-system 命名空间中名为 kubeadm-config 的 ConfigMap(用于获取集群配置信息)
#如需要获取data.kubernetes.container.name
apiVersion: rbac.authorization.k8s.io/v1
kind: Role
metadata:name: filebeat-kubeadm-confignamespace: kube-systemlabels:k8s-app: filebeat
rules:- apiGroups: [""]resources:- configmapsresourceNames:- kubeadm-configverbs: ["get"]---
apiVersion: rbac.authorization.k8s.io/v1
kind: RoleBinding
metadata:name: filebeat-kubeadm-confignamespace: kube-system
subjects:- kind: ServiceAccountname: filebeat-sanamespace: kube-system
roleRef:kind: Rolename: filebeat-kubeadm-configapiGroup: rbac.authorization.k8s.io[root@master-1 logs]# kubectl apply -f filebeat-sa.yaml
3.编写filebeat-config资源
[root@master-1 logs]# vim filebeat-config.yaml
apiVersion: v1
kind: ConfigMap
metadata:name: filebeat-confignamespace: kube-systemlabels:k8s-app: filebeat
data:filebeat.yml: |-# To enable hints based autodiscover, remove `filebeat.inputs` configuration and uncomment this:filebeat.autodiscover:providers:- type: kubernetesnode: ${NODE_NAME}hints.enabled: trueconditions:equals:data.kubernetes.container.name: "nginx" # 关键条件字段,只收集容器为nginx日志hints.default_config:type: containerpaths:- /var/log/containers/*${data.kubernetes.container.id}.logsymlinks: trueprocessors:- add_host_metadata:output.elasticsearch:hosts: ['${ELASTICSEARCH_HOST:elasticsearch}:${ELASTICSEARCH_PORT:9200}']username: ${ELASTICSEARCH_USERNAME}password: ${ELASTICSEARCH_PASSWORD}# 定义索引名称格式:nginx-logs-当前日期index: "nginx-logs-%{+yyyy.MM.dd}"setup.ilm.enabled: false  # 禁用索引生命周期管理setup.template.enabled: false  # 禁用默认索引模板,开启该选项日志默认会收集到以filebeat+版本号的 数据流模板中cloud.id: ""   # 清空云ID配置cloud.auth: ""[root@master-1 logs]# kubectl apply -f filebeat-config.yaml
4.编写filebeat的DaemonSet资源
[root@master-1 logs]# vim filebeat-ds.yaml
apiVersion: apps/v1
kind: DaemonSet
metadata:name: filebeatnamespace: kube-systemlabels:k8s-app: filebeat
spec:selector:matchLabels:k8s-app: filebeattemplate:metadata:labels:k8s-app: filebeatspec:serviceAccountName: filebeat-sa   #指定 Pod 使用的服务账户terminationGracePeriodSeconds: 30hostNetwork: true   #使用主机网络dnsPolicy: ClusterFirstWithHostNet  #DNS 解析策略(优先集群 DNS,兼容宿主机网络)containers:- name: filebeatimage: docker.elastic.co/beats/filebeat:8.13.2args: ["-c", "/etc/filebeat.yml","-e","--path.data", "/usr/share/filebeat/data/pod-$(HOSTNAME)"]env:- name: HOSTNAMEvalueFrom:fieldRef:fieldPath: metadata.name  # 注入Pod名称作为唯一标识- name: ELASTICSEARCH_HOSTvalue: 192.168.91.30- name: ELASTICSEARCH_PORTvalue: "9200"- name: ELASTICSEARCH_USERNAMEvalue: elastic- name: ELASTICSEARCH_PASSWORDvalue: "CxL+02hUBIERrlwaXefD"- name: ELASTIC_CLOUD_IDvalue:- name: ELASTIC_CLOUD_AUTHvalue:- name: NODE_NAMEvalueFrom:fieldRef:fieldPath: spec.nodeName#安全上下文securityContext:runAsUser: 0  # 以 root 用户运行(需访问宿主机日志文件,但存在安全风险)# If using Red Hat OpenShift uncomment this:#privileged: true  # 在 OpenShift 中可能需要开启特权模式#资源限制resources:limits:memory: 200Mi  # 内存上限为 200MiBrequests:cpu: 100mmemory: 100Mi#容器内挂载路径volumeMounts:- name: configmountPath: /etc/filebeat.ymlreadOnly: truesubPath: filebeat.yml- name: datamountPath: /usr/share/filebeat/data- name: varlogcontainersmountPath: /var/log/containersreadOnly: true- name: varlogpodsmountPath: /var/log/podsreadOnly: true- name: varlibdockercontainersmountPath: /var/lib/docker/containersreadOnly: true#定义存储卷来源volumes:- name: configconfigMap:defaultMode: 0640name: filebeat-config- name: varlogcontainershostPath:path: /var/log/containers- name: varlogpodshostPath:path: /var/log/pods- name: varlibdockercontainershostPath:path: /var/lib/docker/containers# data folder stores a registry of read status for all files, so we don't send everything again on a Filebeat pod restart- name: datahostPath:# When filebeat runs as non-root user, this directory needs to be writable by group (g+w).path: /var/lib/filebeat-datatype: DirectoryOrCreate[root@master-1 logs]# kubectl apply -f filebeat-ds.yaml
5.配置 Filebeat 使用 TLS 连接es
注:es如果没有开启tls认证,该步骤可以忽略
#1. 通过secret存储es证书
[root@master-1 logs]# kubectl create secret generic es-ca-cert -n kube-system --from-file=ca.crt=/root/ca.crt#2.在Filebeat 的 Deployment/DaemonSet 中挂载证书filebeat-ds.yaml
volumeMounts:
- name: es-ca-certmountPath: /etc/filebeat/certsreadOnly: truevolumes:
- name: es-ca-certsecret:secretName: es-ca-cert
#3.配置 Filebeat 的 filebeat-config.yml
#修改 Filebeat 的 Elasticsearch 输出配置,启用 TLS 并指定 CA 证书路径#hosts需要改为httpshosts: ['${ELASTICSEARCH_HOST:elasticsearch}:${ELASTICSEARCH_PORT:9200}']username: ${ELASTICSEARCH_USERNAME}password: ${ELASTICSEARCH_PASSWORD}# 禁用默认数据流,使用自定义索引#data_stream.enabled: false# 定义索引名称格式:nginx-logs-当前日期index: "nginx-logs-%{+yyyy.MM.dd}"ssl:enabled: truecertificate_authorities: ["/etc/filebeat/certs/ca.crt"] # 挂载的 CA 证书路径verification_mode: "full" # 严格验证证书(生产环境推荐)6.使用Secret 存储es用户密码(更安全)
#1. 使用kubectl命令创建secret
[root@master-1 logs]# kubectl create secret generic es-credentials -n kube-system \--from-literal=username=elastic \--from-literal=password=CxL+02hUBIERrlwaXefD
#也可通过yaml方式创建
[root@master-1 logs]# kubectl apply -f es-credentials.yaml
apiVersion: v1
kind: Secret
metadata:name: es-credentialsnamespace: kube-system
type: Opaque
data:password: Q3hMKzAyaFVCSUVScmx3YVhlZkQ=   # echo -n "CxL+02hUBIERrlwaXefD" | base64username: ZWxhc3RpYw==                   # echo -n "elastic" | base64#2.将secret通过环境变量注入pod中
# 示例:Filebeat DaemonSet 配置片段
spec:template:spec:containers:- name: filebeatenv:- name: ELASTICSEARCH_USERNAMEvalueFrom:secretKeyRef:name: es-credentialskey: username- name: ELASTICSEARCH_PASSWORDvalueFrom:secretKeyRef:name: es-credentialskey: password
#3.filebeat-config从环境变量中获取
output.elasticsearch:hosts: ["https://es:9200"]protocol: "https"username: ${ELASTICSEARCH_USERNAME}  # 从环境变量读取password: ${ELASTICSEARCH_PASSWORD}  # 从环境变量读取
7.汇总版本(tls+secret)
#kubectl apply -f filebeat-config.yaml
apiVersion: v1
kind: ConfigMap
metadata:name: filebeat-confignamespace: kube-systemlabels:k8s-app: filebeat
data:filebeat.yml: |-# To enable hints based autodiscover, remove `filebeat.inputs` configuration and uncomment this:filebeat.autodiscover:providers:- type: kubernetesnode: ${NODE_NAME}hints.enabled: trueconditions:equals:data.kubernetes.container.name: "nginx"  # 关键条件字段hints.default_config:type: containerpaths:- /var/log/containers/*${data.kubernetes.container.id}.logsymlinks: trueprocessors:- add_host_metadata:output.elasticsearch:hosts: ['${ELASTICSEARCH_HOST:elasticsearch}:${ELASTICSEARCH_PORT:9200}']username: ${ELASTICSEARCH_USERNAME}password: ${ELASTICSEARCH_PASSWORD}# 禁用默认数据流,使用自定义索引#data_stream.enabled: false# 定义索引名称格式:nginx-logs-当前日期index: "nginx-logs-%{+yyyy.MM.dd}"ssl:enabled: truecertificate_authorities: ["/etc/filebeat/certs/ca.crt"]  # 挂载的 CA 证书路径verification_mode: "full"            # 严格验证证书(生产环境推荐)setup.ilm.enabled: false  # 禁用索引生命周期管理setup.template.enabled: false  # 禁用默认索引模板cloud.id: ""   # 清空云ID配置cloud.auth: ""
---
#kubectl apply -f filebeat-ds.yaml
apiVersion: apps/v1
kind: DaemonSet
metadata:name: filebeatnamespace: kube-systemlabels:k8s-app: filebeat
spec:selector:matchLabels:k8s-app: filebeattemplate:metadata:labels:k8s-app: filebeatspec:serviceAccountName: filebeat-saterminationGracePeriodSeconds: 30hostNetwork: truednsPolicy: ClusterFirstWithHostNetcontainers:- name: filebeatimage: docker.elastic.co/beats/filebeat:8.13.2args: ["-c", "/etc/filebeat.yml","-e","--path.data", "/usr/share/filebeat/data/pod-$(HOSTNAME)"]env:- name: HOSTNAMEvalueFrom:fieldRef:fieldPath: metadata.name  # 注入Pod名称作为唯一标识- name: ELASTICSEARCH_USERNAMEvalueFrom:secretKeyRef:name: es-credentialskey: username- name: ELASTICSEARCH_PASSWORDvalueFrom:secretKeyRef:name: es-credentialskey: password- name: ELASTICSEARCH_HOSTvalue: "https://192.168.91.30"- name: ELASTICSEARCH_PORTvalue: "9200"# - name: ELASTICSEARCH_USERNAME#   value: elastic# - name: ELASTICSEARCH_PASSWORD#   value: "CxL+02hUBIERrlwaXefD"- name: ELASTIC_CLOUD_IDvalue:- name: ELASTIC_CLOUD_AUTHvalue:- name: NODE_NAMEvalueFrom:fieldRef:fieldPath: spec.nodeNamesecurityContext:runAsUser: 0# If using Red Hat OpenShift uncomment this:#privileged: trueresources:limits:memory: 200Mirequests:cpu: 100mmemory: 100MivolumeMounts:- name: configmountPath: /etc/filebeat.ymlreadOnly: truesubPath: filebeat.yml- name: datamountPath: /usr/share/filebeat/data- name: varlogcontainersmountPath: /var/log/containersreadOnly: true- name: varlogpodsmountPath: /var/log/podsreadOnly: true- name: varlibdockercontainersmountPath: /var/lib/docker/containersreadOnly: true- name: es-ca-certmountPath: /etc/filebeat/certsreadOnly: truevolumes:- name: configconfigMap:defaultMode: 0640name: filebeat-config- name: varlogcontainershostPath:path: /var/log/containers- name: varlogpodshostPath:path: /var/log/pods- name: varlibdockercontainershostPath:path: /var/lib/docker/containers- name: es-ca-certsecret:secretName: es-ca-cert# data folder stores a registry of read status for all files, so we don't send everything again on a Filebeat pod restart- name: datahostPath:# When filebeat runs as non-root user, this directory needs to be writable by group (g+w).path: /var/lib/filebeat-datatype: DirectoryOrCreate
---
#filebeat-sa.yaml
apiVersion: rbac.authorization.k8s.io/v1
kind: ClusterRoleBinding
metadata:name: filebeat
subjects:
- kind: ServiceAccountname: filebeat-sanamespace: kube-system
roleRef:kind: ClusterRolename: filebeatapiGroup: rbac.authorization.k8s.io
---
apiVersion: rbac.authorization.k8s.io/v1
kind: RoleBinding
metadata:name: filebeat-kubeadm-confignamespace: kube-system
subjects:- kind: ServiceAccountname: filebeat-sanamespace: kube-system
roleRef:kind: Rolename: filebeat-kubeadm-configapiGroup: rbac.authorization.k8s.io
---
apiVersion: rbac.authorization.k8s.io/v1
kind: ClusterRole
metadata:name: filebeatlabels:k8s-app: filebeat
rules:
- apiGroups: [""] # "" indicates the core API groupresources:- namespaces- pods- nodesverbs:- get- watch- list
- apiGroups: ["apps"]resources:- replicasetsverbs: ["get", "list", "watch"]
---
apiVersion: rbac.authorization.k8s.io/v1
kind: Role
metadata:name: filebeat-kubeadm-confignamespace: kube-systemlabels:k8s-app: filebeat
rules:- apiGroups: [""]resources:- configmapsresourceNames:- kubeadm-configverbs: ["get"]
---
apiVersion: v1
kind: ServiceAccount
metadata:name: filebeat-sanamespace: kube-systemlabels:k8s-app: filebeat
8.测试结果以及排查问题
[root@master-1 logs]# kubectl apply -f filebeat-sa.yaml
[root@master-1 logs]# kubectl apply -f filebeat-config.yaml
[root@master-1 logs]# kubectl apply -f filebeat-ds.yaml
#以下表示部署成功
[root@master-1 logs]# kubectl get pods -A -o wide
NAMESPACE     NAME     READY   STATUS    RESTARTS        AGE     IP              NODE     NOMINATED NODE   READINESS GATES
kube-system   filebeat-49g94                            1/1     Running   0               16m     192.168.91.22   node-2   <none>           <none>
kube-system   filebeat-rgf4f                            1/1     Running   0               16m     192.168.91.21   node-1   <none>           <none>#kibana中查看索引Stack Management-->Index Management
nginx-logs#查看filebeat日志
[root@master-1 logs]# kubectl logs -f filebeat-49g94  -n kube-system #调试 Filebeat,输出更详细的日志,帮助排查问题
[root@master-1 logs]# kubectl exec -it filebeat-49g94  -n kube-system -- filebeat -e -d "*" -c /etc/filebeat.yml# 遇到被锁的情况 进入Filebeat Pod手动删除锁文件
[root@master-1 logs]# kubectl exec -it filebeat-49g94  -n kube-system  -- rm -f /usr/share/filebeat/data/filebeat.lock#查看es连通性
[root@master-1 logs]# kubectl exec -it filebeat-49g94 -n kube-system -- curl -u elastic:CxL+02hUBIERrlwaXefD http://192.168.91.30:9200
EFK 日志系统为 Kubernetes 提供了从日志收集、存储到分析的全链路能力,生产环境中需重点关注 持久化存储、资源配额 和 安全配置(如 TLS 加密、RBAC 权限)。