大型项目里经常使用CMake,我在Windows平台上开发,使用的代码编辑器是VSCode,我使用的是mingw的编译器,以前使用的是一个脚本来进行编译:
run.bat
cmake -G "MinGW Makefiles" ..
mingw32-make
VSCode可以方便地进行断点调试,怎么和CMake结合在一起使用呢,为此我查了一些资料(放在文末),需要配置一些json文件,这里给出我的配置:
首先是安装的编译器和插件:Mingw7.3.0, 以及VSCode的插件
还需要配置三个json文件:
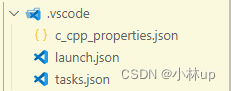
c_cpp_properties.json,这可以通过Ctrl+Shift+P打开,在里面很方便地定义我们编译器的路径

{"configurations": [{"name": "Win32","includePath": ["${workspaceFolder}/**"],"defines": ["_DEBUG","UNICODE","_UNICODE"],"compilerPath": "F:\\mingw64-13.2.0\\mingw64\\bin\\gcc.exe",//这里修改为你的mingw的gcc的路径,如果是C++改为g++的路径"configurationProvider": "vector-of-bool.cmake-tools",// 注意添加这一句"cStandard": "c11","cppStandard": "gnu++14","intelliSenseMode": "windows-gcc-x64"}],"version": 4
}
launch.json可以自己新建一个把下面的文件修改一下
{// 使用 IntelliSense 了解相关属性。 // 悬停以查看现有属性的描述。// 欲了解更多信息,请访问: https://go.microsoft.com/fwlink/?linkid=830387"version": "0.2.0","configurations": [{"name": "(gdb) Launch","type": "cppdbg","request": "launch","program": "${workspaceFolder}/build/leptjson_test.exe",//这里改为你的可执行文件的路径"args": [],"stopAtEntry": false,"cwd": "${workspaceFolder}","environment": [],"externalConsole": true,"MIMode": "gdb","miDebuggerPath": "gdb", // 需要添加这一行,不然无法调试,改为gdb"setupCommands": [{"description": "Enable pretty-printing for gdb","text": "-enable-pretty-printing","ignoreFailures": true}],// 此处配置为debug前需要执行的任务,是task.json里面的"label""preLaunchTask": "Build"}]
}
tasks.json:这里起始就是执行之前的bat文件里的内容,同样可以自己新建一个把下面的文件修改一下
{"version": "2.0.0","options": {"cwd": "${workspaceFolder}/build"//指定在build目录下执行tasks},"tasks": [{"type": "shell","label": "cmake","command": "cmake","args": ["-G","\"MinGW Makefiles\"",".."]},{"label": "make","group": {"kind": "build","isDefault": true},"command": "mingw32-make.exe","args": []},{"label": "Build", // launch.json里面的preLaunchTask"dependsOn": ["cmake","make"]}],
}
OK可以添加断点按F5像以前一样调试了:

相关参考:
- 利用VScode和cmake编译构建C++工程代码
- https://blog.csdn.net/CSDN_XCS/article/details/99941795
- vs code艰难配置c++的cmake调试(launch.json与task.json写法)
- VSCode Debugging