步骤
1-安装java,mysql,nginx环境
服务器先安装宝塔
yum install -y wget && wget -O install.sh https://download.bt.cn/install/install_lts.sh && bash install.sh ed8484bec
java
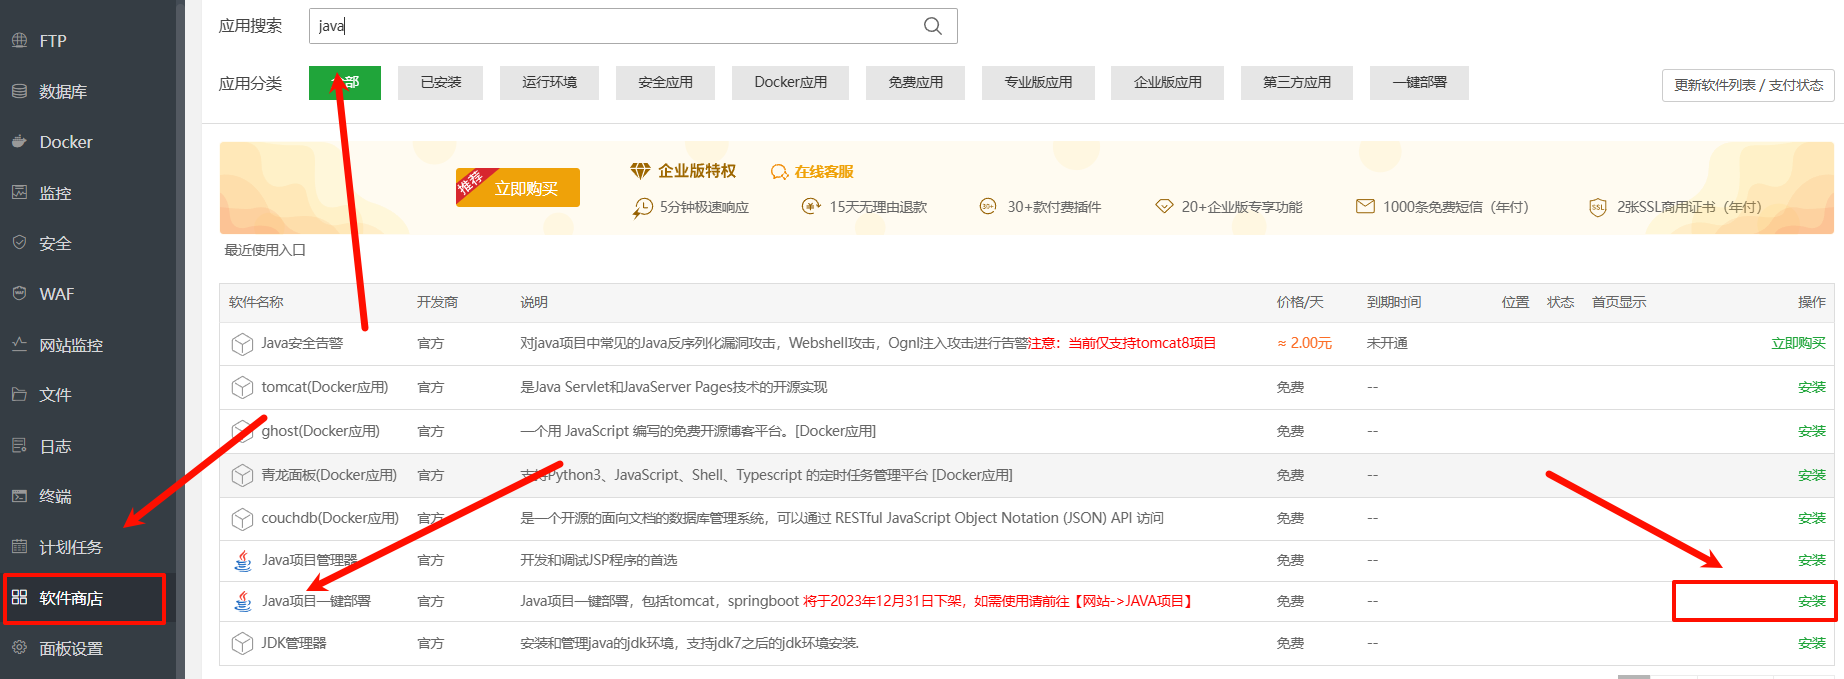

安装tomcat服务器

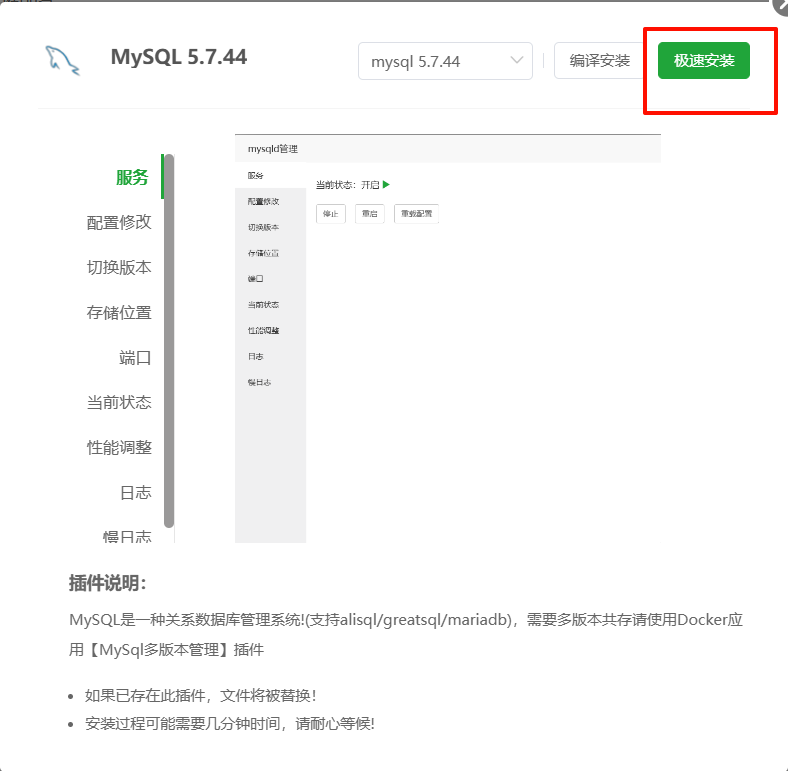
mysql
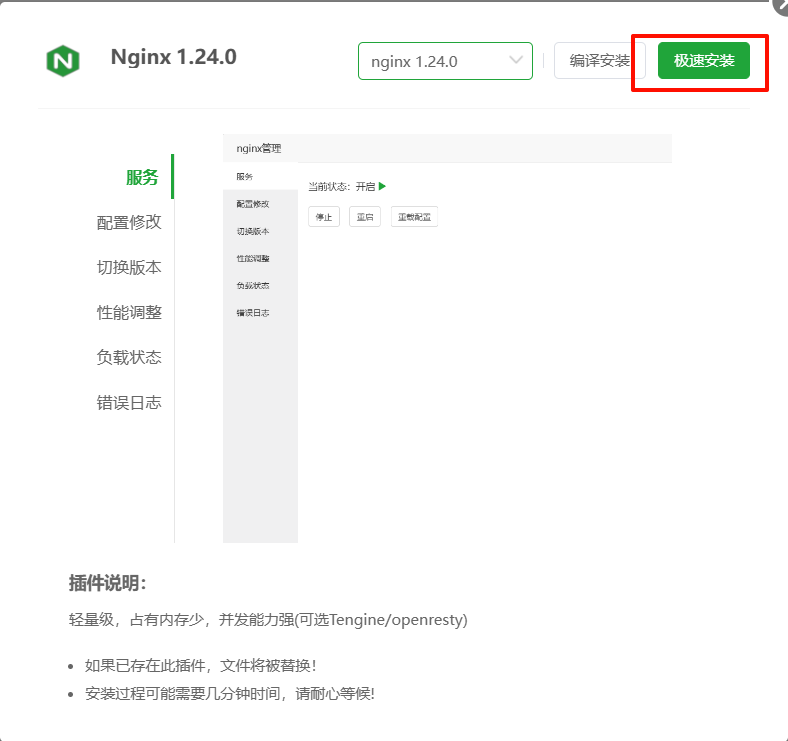
nginx
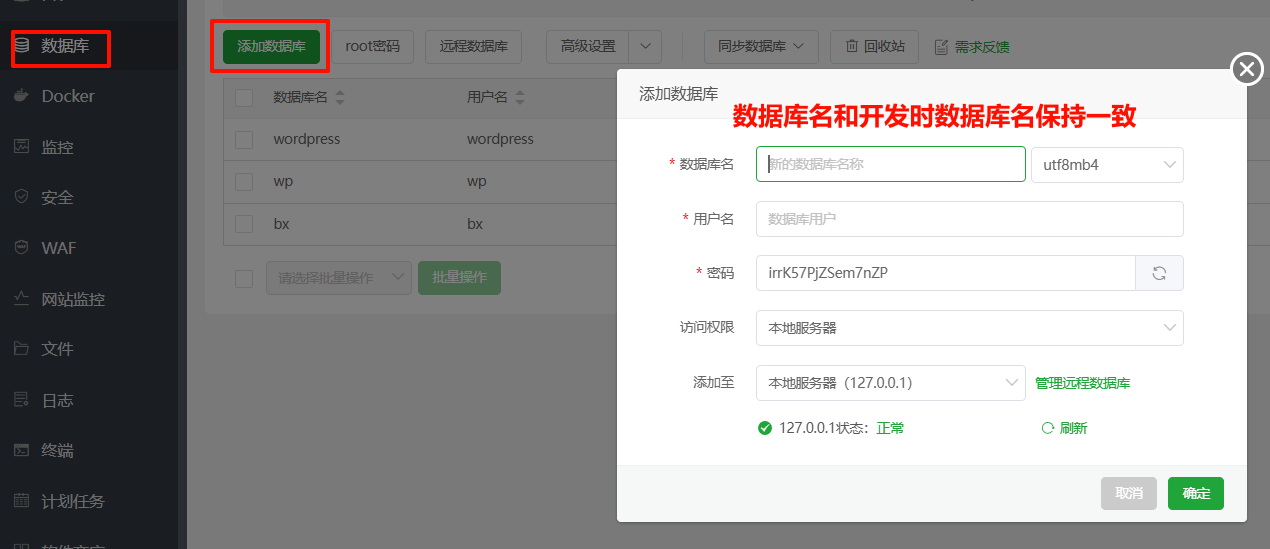
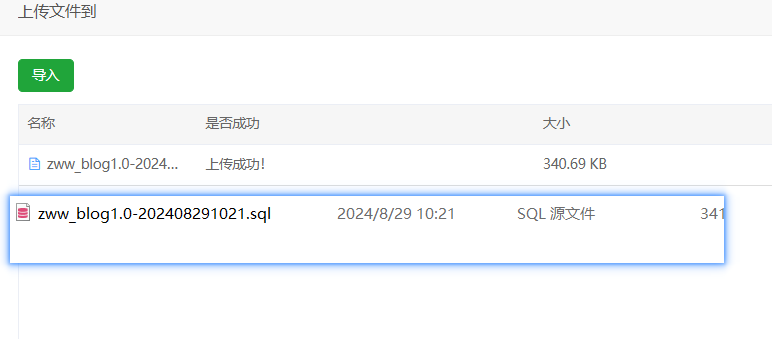
2-数据库导入
用户名密码和java application 配置文件保持一致


3-打包前后端项目,配置nginx
前端
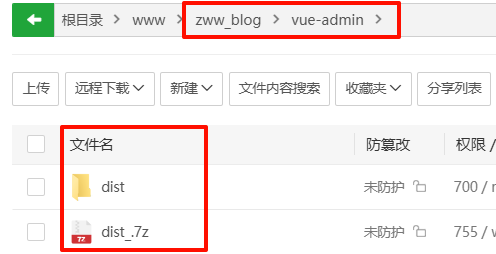
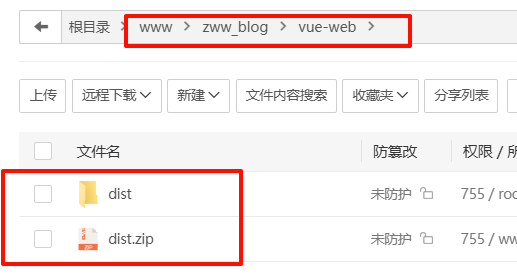
在www目录下新建公共目录,传入打包好的前端项目
前端路径指向
运行环境变量.env.production
# just a flag
ENV = 'production'# base apiVUE_APP_BASE_API = '/apis'
VUE_APP_SERVER_PATH= "http://127.0.0.1:8088"
由于部署环境下没有proxy代理服务器,因此得设置BASE_API给NGINX作为标识转发
这里的BASE_API在后续的request作为基础前缀,发送请求,然后Nginx搞一个代理服务器接口/apis转发到后端
request.js
const service = axios.create({baseURL: process.env.VUE_APP_BASE_API,// url = base url + request urls// withCredentials: true, // send cookies when cross-domain requeststimeout: 15000 // request timeout
})
vue.config.js
使用本地代理服务器api标识搭配VUE_APP_SERVER_PATH后端ip地址
proxy: {[process.env.VUE_APP_BASE_API]: {target: process.env.VUE_APP_SERVER_PATH,// websocket支持ws: true,changeOrigin: true,pathRewrite: {['^' + process.env.VUE_APP_BASE_API]: ''}}},
服务器配置redis
如果项目中没用到redis可以直接跳到后面
py3安装(慢的一批无语了)
wget http://cdn.npm.taobao.org/dist/python/3.6.5/Python-3.6.5.tgz && tar -zxvf Python-3.6.5.tgz && cd Python-3.6.5/ && ./configure --prefix=/usr/local/python3 --with-ssl && make && make install && ln -s /usr/local/python3/bin/python3 /usr/bin/python3 ln -s /usr/local/python3/bin/pip3 /usr/bin/pip3
获取资源——解压——安装指定目录——编译安装——软连接bin命令位置
安装gcc软件包(由gcc make install安装)
yum install gcc-c++
下载安装redis
Index of /releases/ (redis.io)
选择想要的版本,右键复制链接 到linux里wget获取到该包(如果太慢就下完丢虚拟机里)
wget https://download.redis.io/releases/redis-7.0.5.tar.gz
解压到用户目录
mkdir /usr/local/redis && tar -zvxf redis-7.0.5.tar.gz -C /usr/local/redis
执行make,并install安装(也是嘎嘎慢)
make… 注意看这里cd进入的为你下载对应版本解压后的redis,这段别照cv了
cd /usr/local/redis/redis-7.0.5/ && make
成功效果
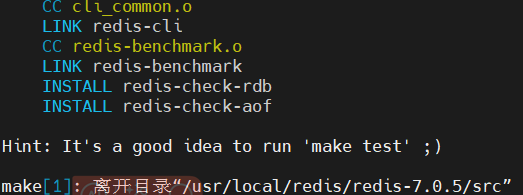
install…
make PREFIX=/usr/local/redis install
查看版本,验证安装结果
/usr/local/redis/bin/redis-cli -v
启动redis
/usr/local/redis/bin/redis-server
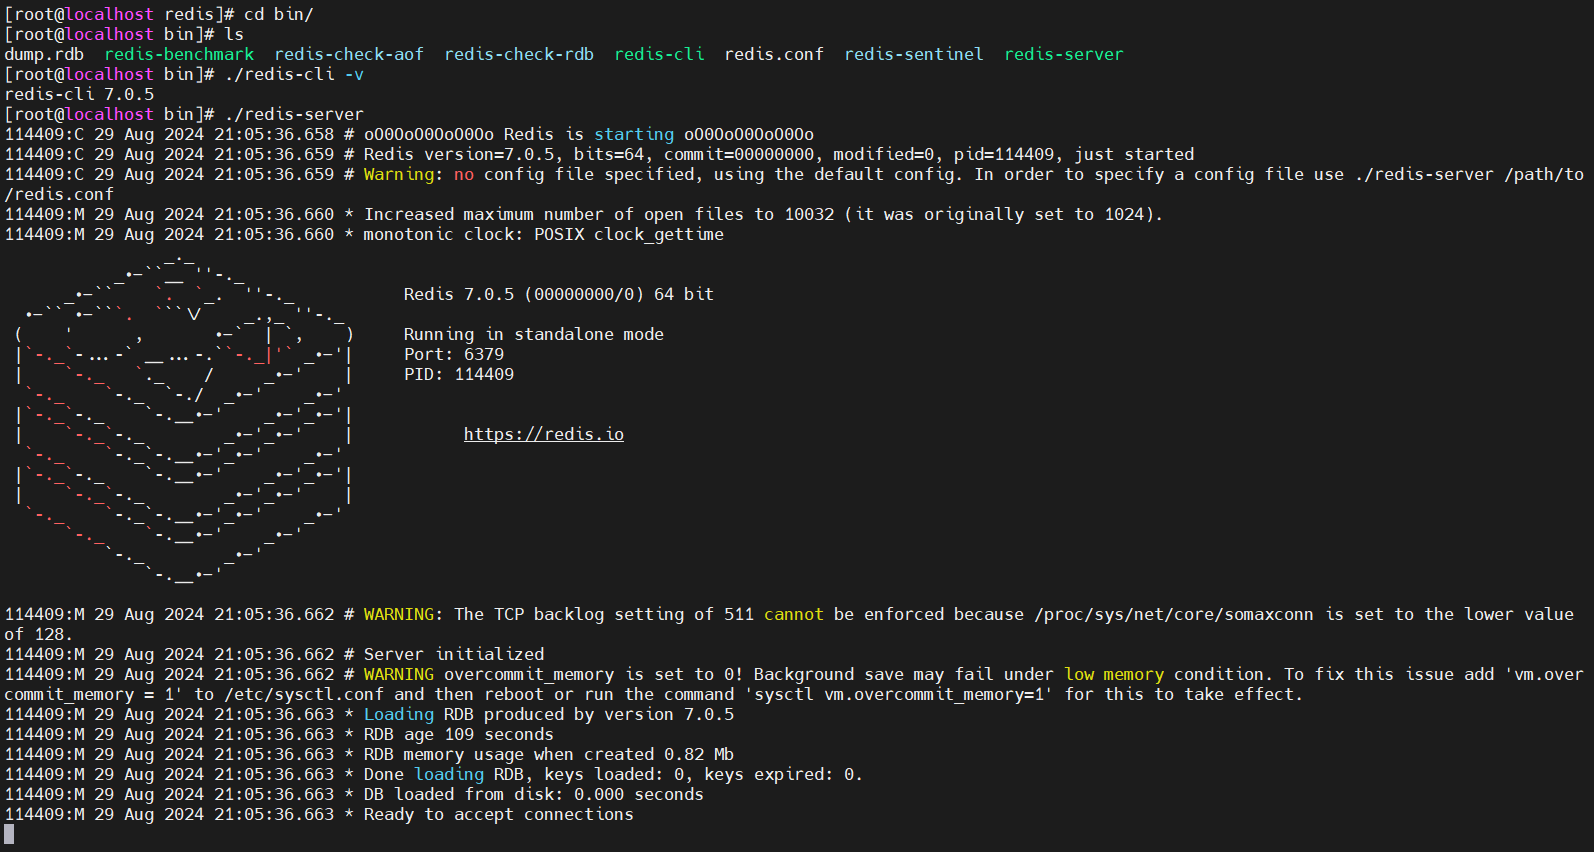
有个鸡肋的地方,如果想要生效配置文件得
/usr/local/redis/bin/redis-server /配置文件路径..
修改启动方式为守护式进程,后台运行…
vi redis.conf
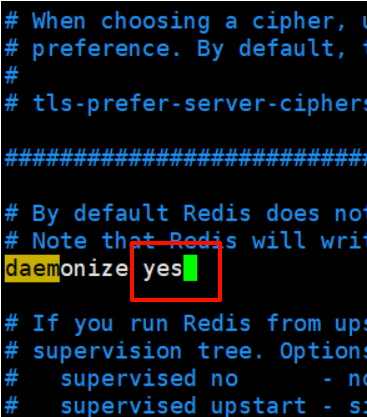
远程连接

查看运行状况
ps -ef|grep redis

redis客户端
/usr/local/redis/bin/redis-cli
关闭redis
找到nestat/ps 。。。 进程号
kill -9 进程号
软连接创建快捷方式
ln -s /usr/local/redis/bin/redis-server ./
ln: 创建链接的命令。-s: 表示创建一个软链接(符号链接)。/usr/redis: 这是你要链接的目标路径。/root/redis: 这是你希望创建的软链接的路径。
后端
添加打包依赖
 <build><plugins><plugin><groupId>org.springframework.boot</groupId><artifactId>spring-boot-maven-plugin</artifactId><configuration>
<!--                指定Spring Boot应用程序的主类--><mainClass>com.zww.ZwwAdminApplication</mainClass>
<!--                    插件执行是否跳过,如为true,则不会执行maven插件,repackage,run等...-->
<!--                    及其所有依赖同时也会被跳过,当前项目启动报错,缺失xxx...依赖--><skip>false</skip></configuration>
<!--                maven插件目标,在构建过程中执行repackage目标,打成jar/war包-->
<!--                执行的操作有 编译,运行,打包--><executions><execution><id>repackage</id><goals><goal>repackage</goal></goals></execution></executions></plugin></plugins></build>
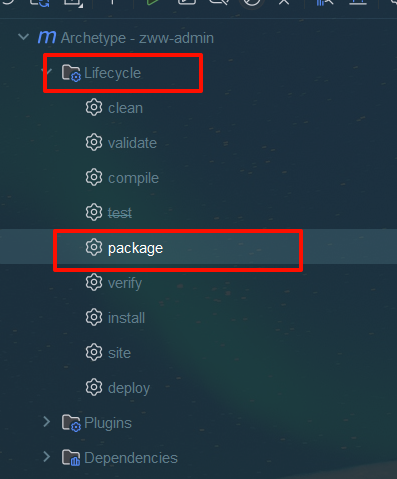
application一起带过去,如果application配置文件相同就端口不一致后续使用命令行参数–server.port=8888就不用分目录了


启动jar包
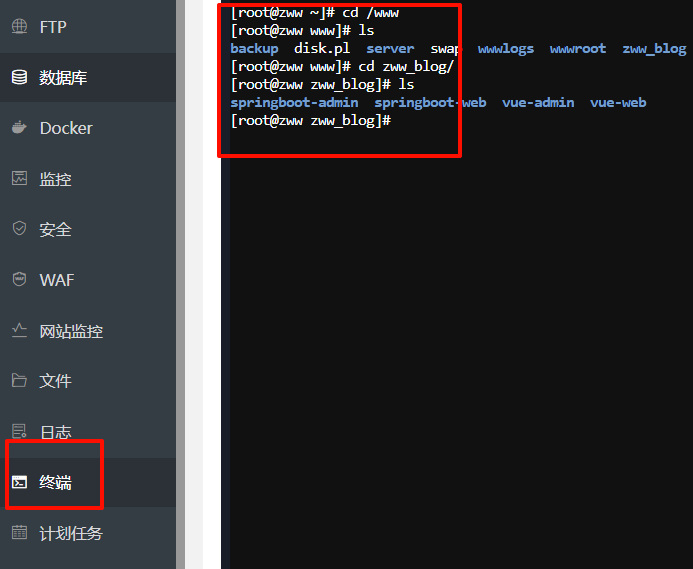
cd /www/【你的文件目录】/前后台后端目录
nohup java -jar jar包名 --server.port=端口号 > admin/blog/_server.log 2>&1 &
echo 'start success'nohup java -jar zww-admin-0.0.1-SNAPSHOT.jar --server.port=8088  > admin.log 2>&1 &
echo 'start success'nohup java -jar zww-blog-0.0.1-SNAPSHOT.jar --server.port=7777 > blog.log 2>&1 &
echo 'start success'
2024.9.3更正:如果这一步java运行不了,有可能是你在idea编译时使用高版本,运行就不能用jdk1.8了,自行前往官网下载最新的tar包解压并修改/etc/profile PATH=java文件夹路径:$PATH然后source /etc/profile,并查看java -version检查是否安装成功,此时便可以成功运行jar包
> server.log: 这部分将标准输出重定向到server.log,即丢弃所有标准输出,不会显示在终端上。(也就是你在idea上报错的所有信息都跑到这个文件上了,要看可以vi看或者cat或者tail -f 文件名实时追踪)2>&1: 这部分将标准错误输出(文件描述符 2)重定向到标准输出(文件描述符 1),也就是同样丢弃,不会显示在终端上。&: 这个符号表示将整个命令放入后台运行。
实时查看后台
tail -f server.log
查看启动状况
ps -ef | grep zww-admin-0.0.1-SNAPSHOT.jar

nginx配置文件
cat /www/server/nginx/conf/nginx.conf
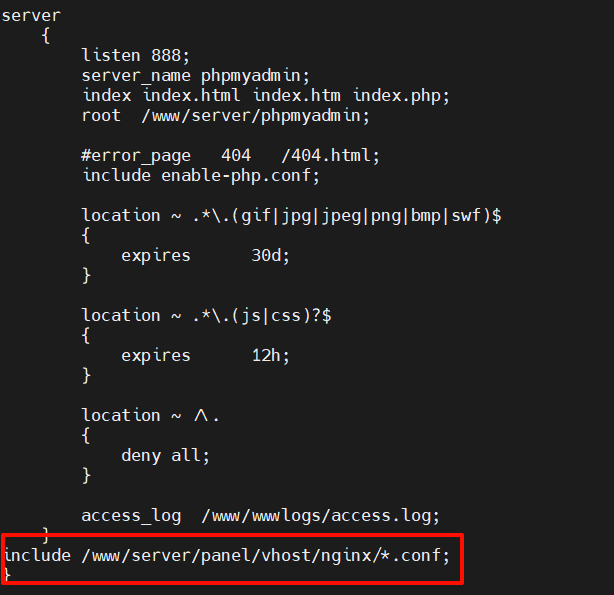
类似于vue组件,相当于app组件vhost下所有conf结尾的包含在主配置文件里
创建博客配置文件
有两种方法,第一种不行则尝试第二种,个人使用第二种成功访问
第一种
vi /www/server/panel/vhost/nginx/zww_blog.conf
设置api转发代理到后端请求 一个前台后端,一个后台后端
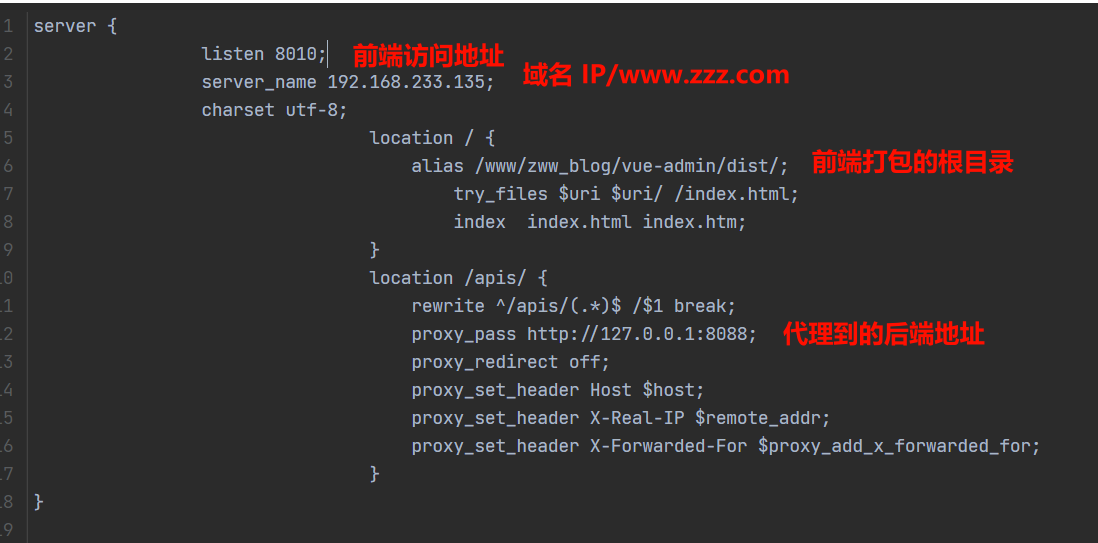
server {listen 8010;server_name 192.168.233.135;charset utf-8;location / {alias /www/zww_blog/vue-admin/dist/;try_files $uri $uri/ /index.html;index  index.html index.htm;}location /apis/ {rewrite ^/apis/(.*)$ /$1 break;proxy_pass http://127.0.0.1:8088;proxy_redirect off;proxy_set_header Host $host;proxy_set_header X-Real-IP $remote_addr;proxy_set_header X-Forwarded-For $proxy_add_x_forwarded_for;}
}server {listen 8011;server_name 192.168.233.135;charset utf-8;location / {alias /www/zww_blog/vue-blog/dist/;try_files $uri $uri/ /index.html;index  index.html index.htm;}location /apis/ {rewrite ^/apis/(.*)$ /$1 break;proxy_pass http://127.0.0.1:7777;proxy_redirect off;proxy_set_header Host $host;proxy_set_header X-Real-IP $remote_addr;proxy_set_header X-Forwarded-For $proxy_add_x_forwarded_for;}}
第二种
以上配置无效则让宝塔给我们生成配置文件,方法如下
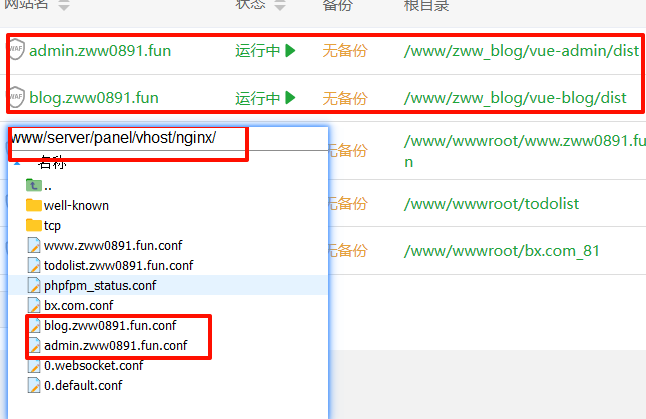
TIP:如果下面配置你访问不了前端页面那就使用宝塔自带的建站,会自动生成nginx配置文件,然后同样在/www/server/panel/vhost/nginx/下找到你的站点conf配置文件,加入后端代理即可,具体截图如下
- 创建站点
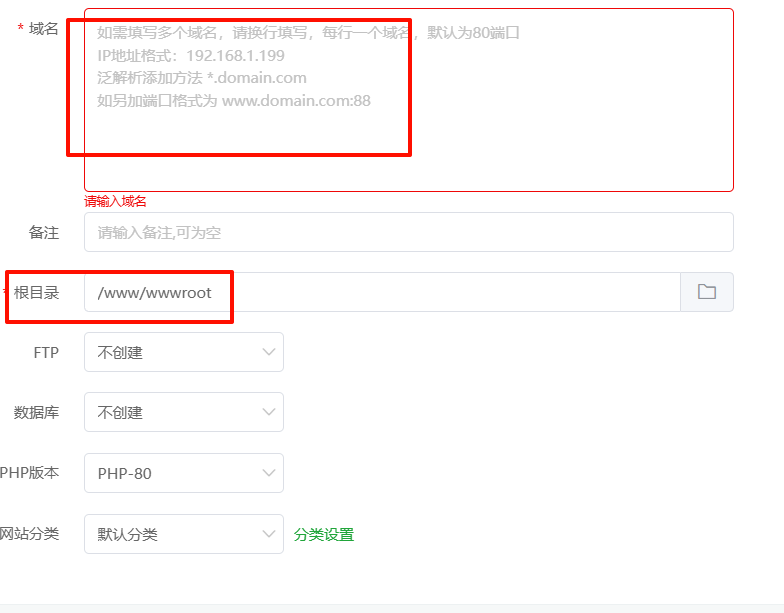
- 在/www/server/panel/vhost/nginx找到对应的配置文件加入代理服务器配置location /apis…
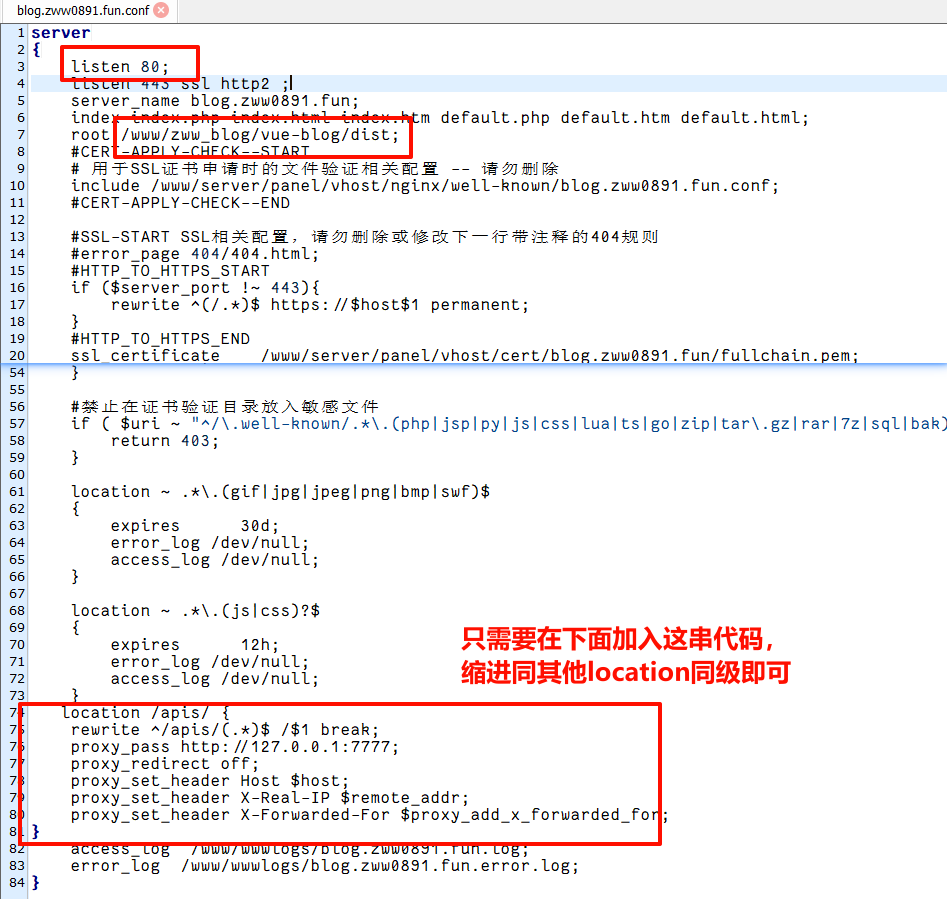
location /apis/ {rewrite ^/apis/(.*)$ /$1 break;proxy_pass http://127.0.0.1:8088;proxy_redirect off;proxy_set_header Host $host;proxy_set_header X-Real-IP $remote_addr;proxy_set_header X-Forwarded-For $proxy_add_x_forwarded_for;}
重启服务
/www/server/nginx/sbin/nginx -s reload
然后访问测试
