
🌈个人主页:前端青山
🔥系列专栏:组件封装篇
🔖人终将被年少不可得之物困其一生
依旧青山,本期给大家带来组件封装篇专栏内容:Vue 3集成海康Web插件实现视频监控
引言
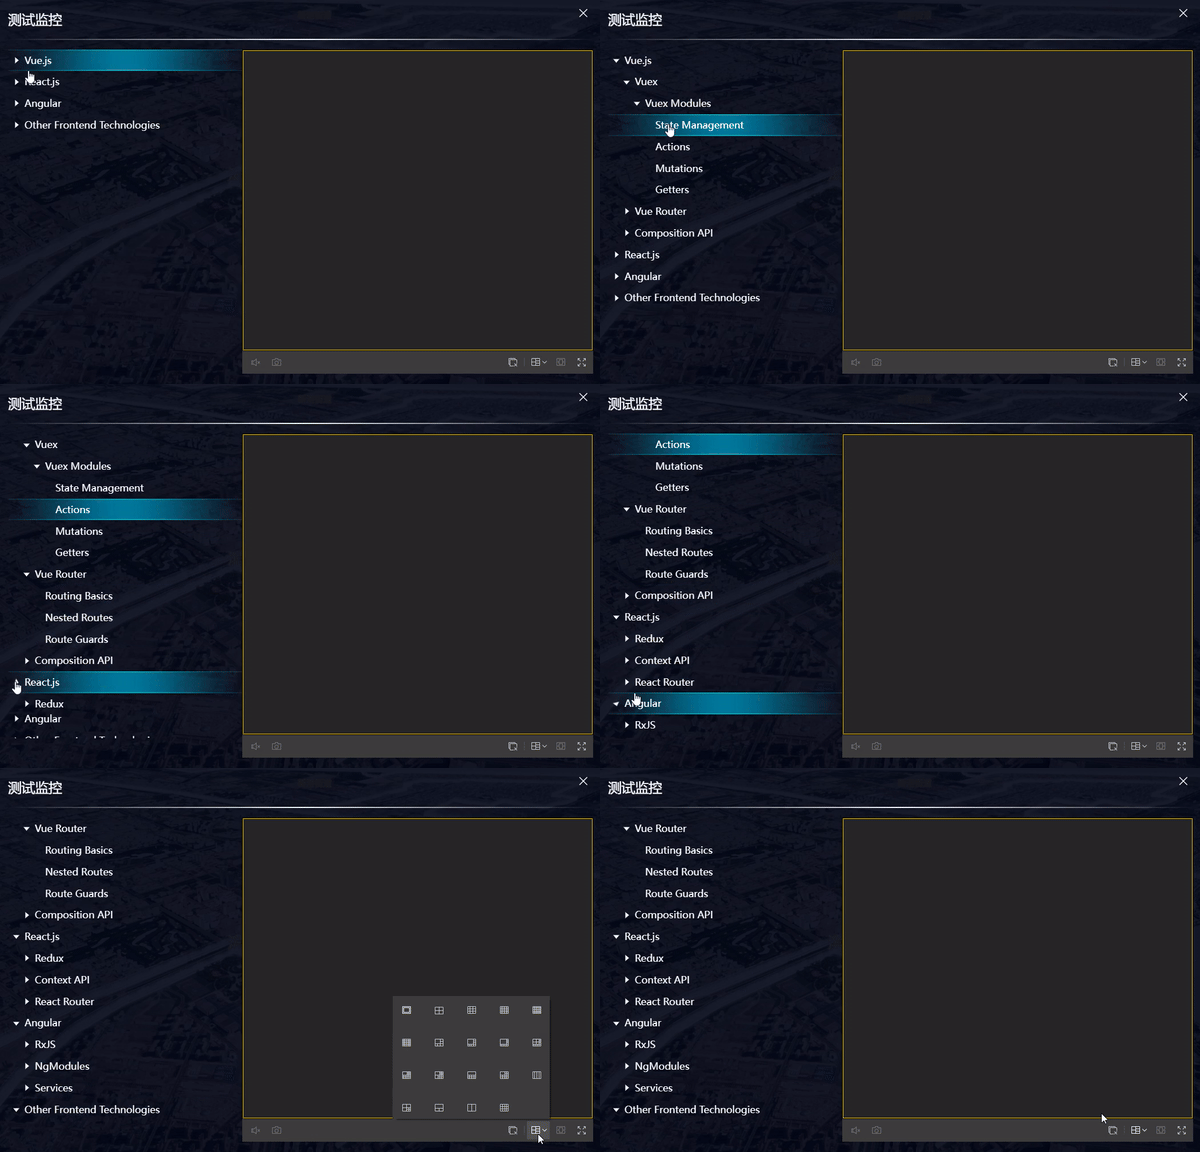
最近在项目中使用了 Vue 3 结合海康Web插件来实现视频监控功能,过程中遇到了一些挑战和解决方案。为了帮助开发小伙伴们更好地理解和应用这一技术栈,特此分享一下我们的经验和代码实现。
目录
项目背景
准备工作
1. 官网下载
2.安装插件
3.插件js文件引入vue项目
子组件结构
1. 模板部分
2. 脚本部分
2.1 导入依赖
2.2 定义属性和事件
2.3 定义变量
2.4 RSA加密
2.5 初始化插件
2.6 获取公钥
2.7 初始化视频播放
2.8 播放视频
2.9 隐藏和显示窗口
2.10 监听窗口关闭和调整大小
2.11 处理节点点击事件
2.12 暴露方法
3. 样式部分
父组件调用
1. 模板部分
2. 脚本部分
3. 样式部分
项目背景
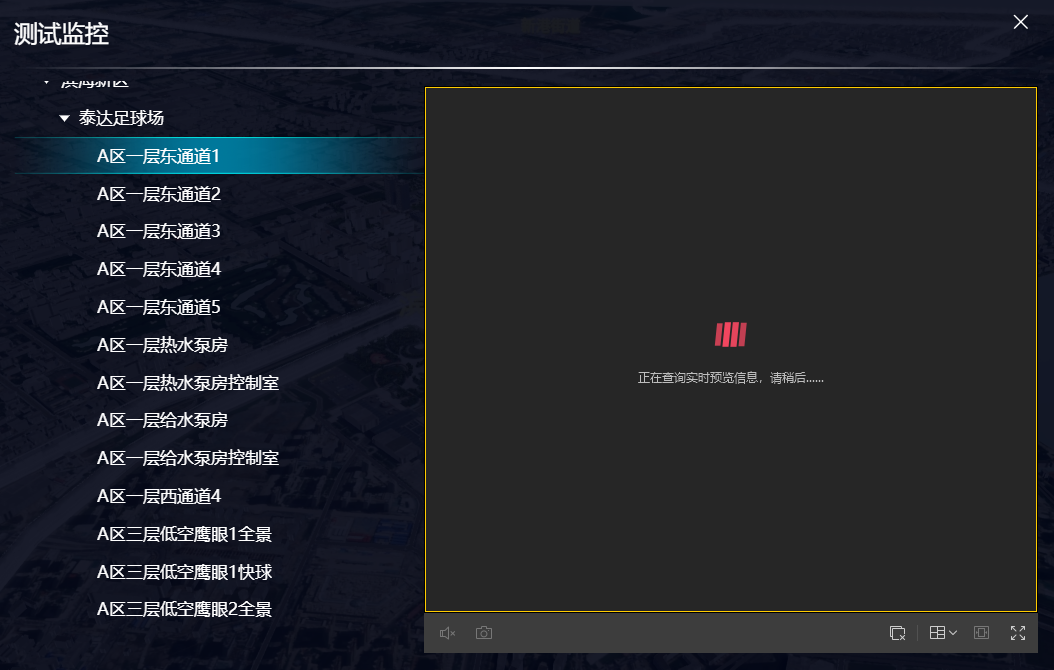
在当前的项目中,我们需要实现一个视频监控系统,能够展示多个监控点的实时视频流,并支持用户通过树形结构选择不同的监控点。为了实现这一需求,我们选择了 Vue 3 作为前端框架,并集成了海康Web插件来处理视频流的播放和管理。
准备工作
1. 官网下载
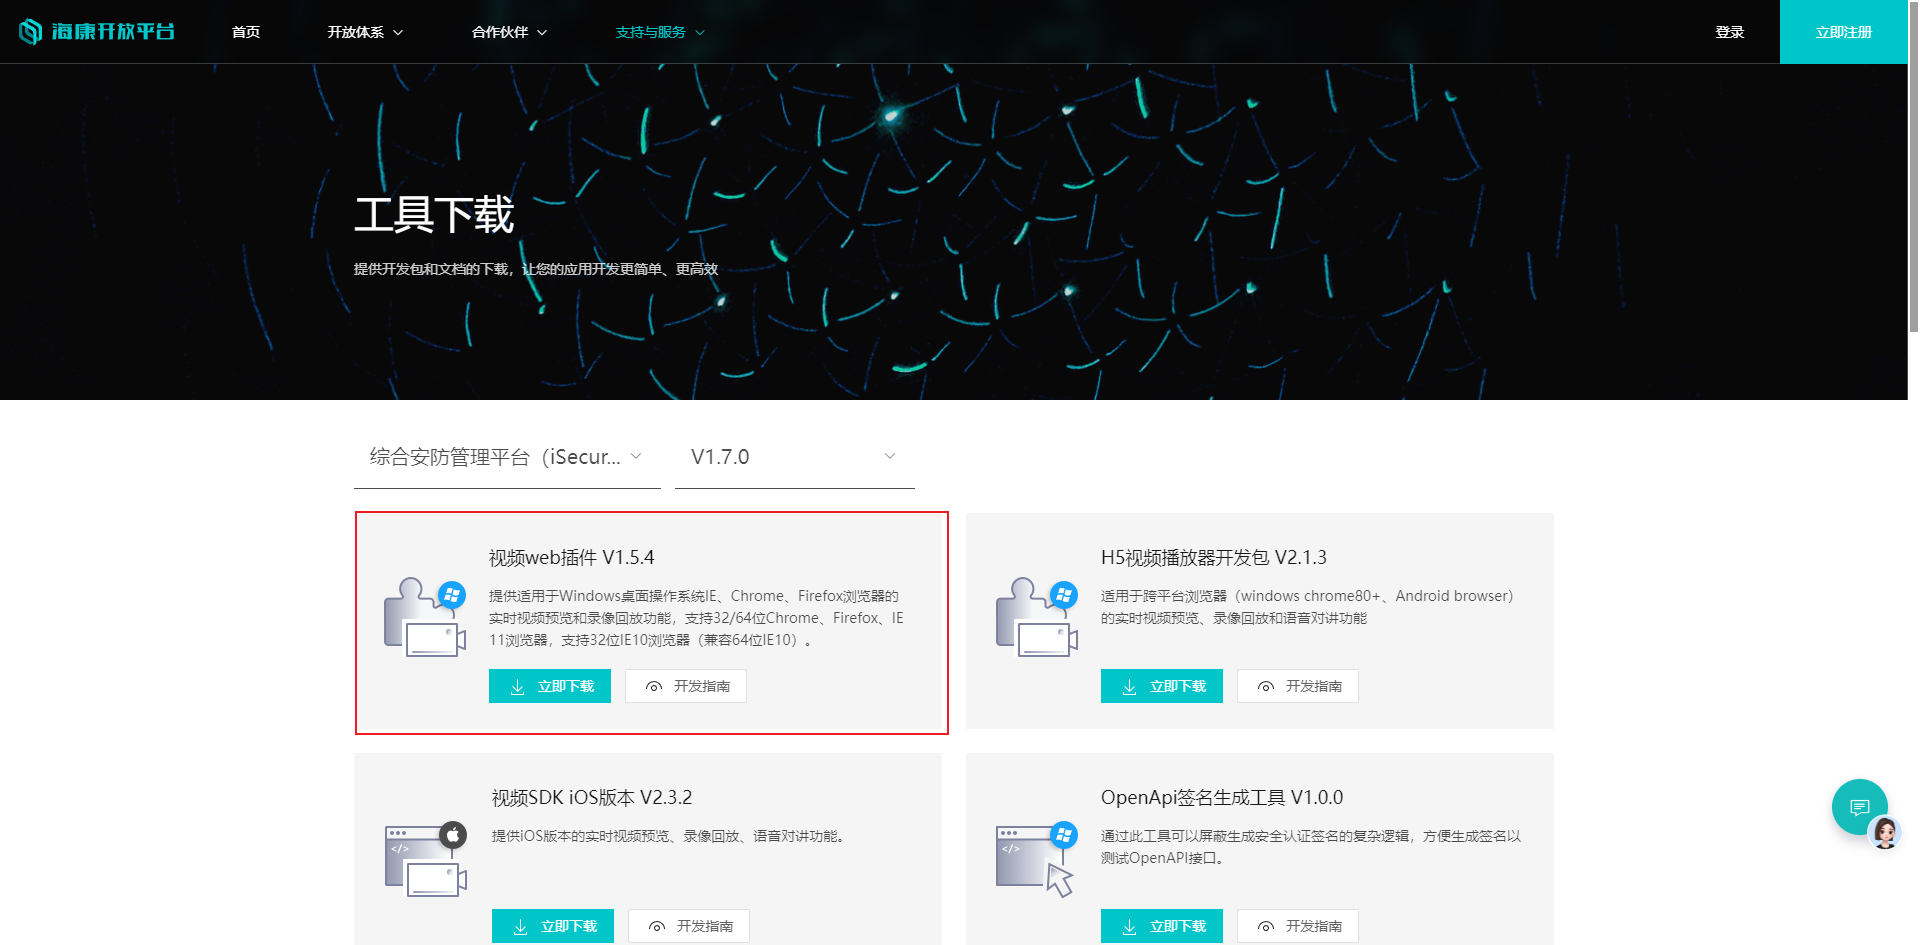
在官网海康开放平台下载视频web插件
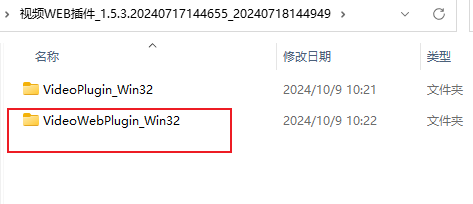
2.安装插件
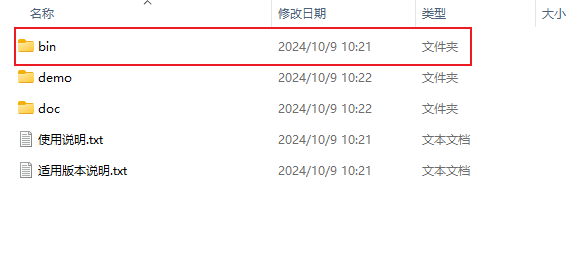

3.插件js文件引入vue项目
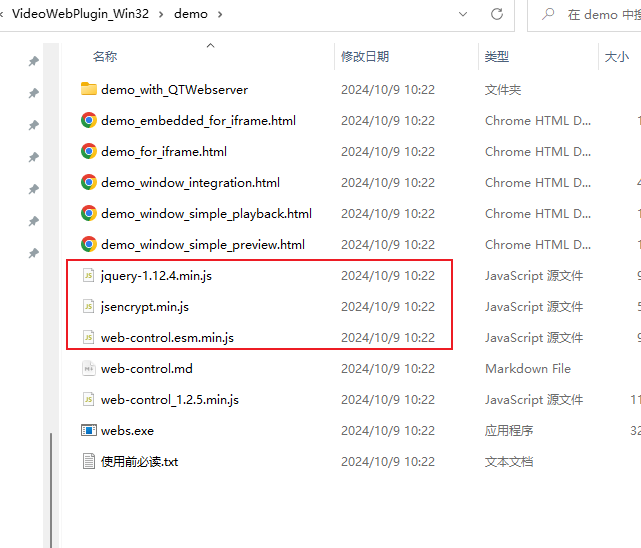
将这3个js文件引入vue项目中的public文件夹下新建文件夹放入
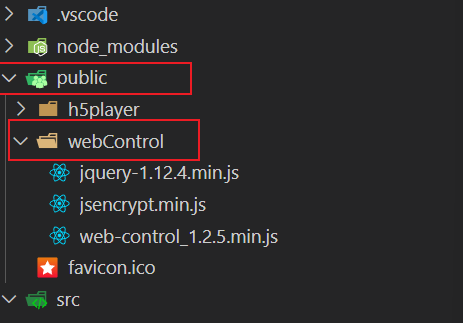
然后在index.html文件中根路径引入配置文件
<!DOCTYPE html>
<html lang="en"><head><meta charset="UTF-8"><link rel="icon" href="/favicon.ico"><meta name="viewport" content="width=device-width, initial-scale=1.0"><title>前端青山</title></head><body><div id="screen"></div><!-- 连接内网部署离线天地图 --><script src="/h5player/h5player.min.js"></script><script src="/webControl/jquery-1.12.4.min.js"></script><script src="/webControl/jsencrypt.min.js"></script><script src="/webControl/web-control_1.2.5.min.js"></script><script type="module" src="/src/main.ts"></script><script src="/src/utils/d3/d3.js" charset="utf-8"></script><script src="/src/utils/d3/D3SvgOverlay.js"></script></body>
</html>最后我们开始构建本次所需要调用的组件封装功能
子组件结构
1. 模板部分
<template><div class="play_windows" v-loading="loading" element-loading-background="rgba(122, 122, 122, 0.8)"><div class="tree-form"><el-treeref="tree":data="dataTree":props="defaultProps":highlight-current="true"@node-click="pitchOns"><template #default="{ node, data }"><span class="custom-tree-node">{{ data.name }}</span></template></el-tree></div><div class="videosp" ref="videosp"><div id='corpvideo' ref="corpvideo"></div></div></div>
</template>-
<div class="play_windows">: 主容器,包含视频树形结构和视频播放区域。 -
<el-tree>: Element Plus 的树形组件,用于展示视频监控点的层级结构。 -
<div class="videosp">: 视频播放区域,包含一个id为corpvideo的div,用于嵌入海康Web插件。
2. 脚本部分
2.1 导入依赖
<script setup lang="ts">
import { ref, onMounted, nextTick, defineProps, defineExpose, defineEmits, watch, onBeforeUnmount } from 'vue';
import { ElMessage } from 'element-plus'
import { videoallList } from '@/api/screenVideo/index'
import { getGetByCode } from "@/api/videoSurveillance/index";-
ref: Vue 3 的响应式变量。 -
onMounted: 生命周期钩子,组件挂载后执行。 -
nextTick: 在 DOM 更新后执行。 -
defineProps: 定义组件接收的属性。 -
defineEmits: 定义组件触发的事件。 -
watch: 监听数据变化。 -
onBeforeUnmount: 组件卸载前执行。
2.2 定义属性和事件
const emit = defineEmits(["handleSpjkPOIClick"]);
const props = defineProps({playURL: String, // 视频urlsplitNum: Number, // 分屏播放,默认最大分屏4*4dataTree: Object, // 树 数据defaultProps: Object
});-
props: 定义组件接收的属性,包括playURL、splitNum、dataTree和defaultProps。 -
emit: 定义组件触发的事件,如handleSpjkPOIClick。
2.3 定义变量
let dataTree = ref<any>(props.dataTree);
let defaultProps = ref<any>(props.defaultProps);
let loading = ref<Boolean>(false);
const corpvideo = ref<any>();
const videosp = ref<any>(null);
let width: any = 0;
let height: any = 0;
let oWebControl: any = null;
let initCount: any = 0;
let pubKey: any = '';-
dataTree: 树形结构的数据。 -
defaultProps: 树形组件的默认属性。 -
loading: 加载状态。 -
corpvideo: 视频播放容器的引用。 -
videosp: 视频播放区域的引用。 -
width和height: 视频播放区域的宽度和高度。 -
oWebControl: 海康Web插件的实例。 -
initCount: 初始化计数器。 -
pubKey: RSA公钥。
2.4 RSA加密
const setEncrypt = (value: any) => {let encrypt = new JSEncrypt();encrypt.setPublicKey(pubKey);return encrypt.encrypt(value);
}-
setEncrypt: 使用 JSEncrypt 库进行 RSA 加密。
2.5 初始化插件
const initPlugin = () => {nextTick(() => {width = videosp.value.offsetWidth;height = videosp.value.offsetHeight;oWebControl = new webControl({szPluginContainer: "corpvideo",iServicePortStart: 15900,iServicePortEnd: 15900,szClassId: "23BF3B0A-2C56-4D97-9C03-0CB103AA8F11",cbConnectSuccess: function () {oWebControl.JS_StartService("window", {dllPath: "./VideoPluginConnect.dll"}).then(function () {oWebControl.JS_CreateWnd("corpvideo", width, height).then(function () {init();});}, function () {});},cbConnectError: function () {oWebControl = null;webControl.JS_WakeUp("VideoWebPlugin://");initCount++;if (initCount < 3) {setTimeout(function () {initPlugin();}, 3000);} else {console.log("插件启动失败,请检查插件是否安装!");}},cbConnectClose: function (bNormalClose: any) {oWebControl = null;webControl.JS_WakeUp("VideoWebPlugin://");initCount++;if (initCount < 3) {setTimeout(function () {initPlugin();}, 3000);} else {console.log("插件启动失败,请检查插件是否安装!");}}});});
}-
initPlugin: 创建海康Web插件实例,并设置连接成功、连接失败和连接关闭的回调函数。 -
cbConnectSuccess: 连接成功后启动服务并创建视频播放窗口。 -
cbConnectError: 连接失败后尝试重新连接。 -
cbConnectClose: 连接关闭后尝试重新连接。
2.6 获取公钥
const getPubKey = (callback: any) => {oWebControl.JS_RequestInterface({funcName: "getRSAPubKey",argument: JSON.stringify({keyLength: 1024})}).then((oData: any) => {if (oData.responseMsg.data) {pubKey = oData.responseMsg.data;callback();}});
}-
getPubKey: 请求公钥并调用回调函数。
2.7 初始化视频播放
const init = () => {getPubKey(() => {appkey = "20416898";secret = setEncrypt("vu4BwfNDIWFsaMpfRAa2");ip = "21.72.0.50";playMode = 0;port = 443;snapDir = "D:\\SnapDir";videoDir = "D:\\VideoDir";layout = "1x1";enableHTTPS = 1;encryptedFields = 'secret';showToolbar = 1;showSmart = 1;buttonIDs = "0,16,256,257,258,259,260,512,513,514,515,516,517,768,769";oWebControl.JS_RequestInterface({funcName: "init",argument: JSON.stringify({appkey: appkey,secret: secret,ip: ip,playMode: playMode,port: port,snapDir: snapDir,videoDir: videoDir,layout: layout,enableHTTPS: enableHTTPS,encryptedFields: encryptedFields,showToolbar: showToolbar,showSmart: showSmart,buttonIDs: buttonIDs})}).then((oData: any) => {oWebControl.JS_Resize(width, height);});});
}-
init: 使用公钥加密敏感信息,并请求初始化视频播放。
2.8 播放视频
const JSRequestInterface = (code: any) => {cameraIndexCode = code.replace(/(^\s*)/g, "").replace(/(\s*$)/g, "");oWebControl.JS_RequestInterface({funcName: "startPreview",argument: JSON.stringify({cameraIndexCode: cameraIndexCode,streamMode: streamMode,transMode: transMode,gpuMode: gpuMode,wndId: wndId})});
}-
JSRequestInterface: 请求播放指定监控点的视频。
2.9 隐藏和显示窗口
const JSHideWnd = () => {oWebControl.JS_HideWnd();oWebControl.JS_DestroyWnd().then(function () {}, function () {});
}const JSShowWnd = () => {initPlugin();oWebControl.JS_ShowWnd();
}-
JSHideWnd: 隐藏并销毁视频播放窗口。 -
JSShowWnd: 重新初始化并显示视频播放窗口。
2.10 监听窗口关闭和调整大小
window.addEventListener('unload', JSHideWnd);
const getElementPosition = () => {width = window.innerWidth * 0.3;height = window.innerHeight * 0.56;oWebControl.JS_Resize(width, height);
};
window.addEventListener('resize', getElementPosition);-
window.addEventListener('unload', JSHideWnd): 监听窗口关闭事件,隐藏并销毁视频播放窗口。 -
getElementPosition: 获取窗口大小并调整视频播放窗口的尺寸。 -
window.addEventListener('resize', getElementPosition): 监听窗口调整大小事件,动态调整视频播放窗口的尺寸。
2.11 处理节点点击事件
const pitchOns = (e: any) => {if (!e || !e.self) {if (e.equipmentCoding) {handleAddChild(e);}return;}if (e.children) {emit("handleSpjkPOIClick", e.self.indexCode, '');return;} else {handleAddChild(e);}
}const handleAddChild = (e: any) => {if (!e || !e.self) {if (e.equipmentCoding) {videoUrl(e.equipmentCoding);}return;}if (e.self.indexCode) {let params = {UnitIndexCode: e.self.indexCode,};videoallList(params).then((res: any) => {if (res.data.rows.length == 0) {emit("handleSpjkPOIClick", e.self.indexCode, '');} else {e.children = e.children || [];res.data.rows = res.data.rows.map((child: any) => ({...child,name: child.equipmentName,}));res.data.rows.forEach((child: any) => {e.children.push(child);});(e as any).expanded = true;}});}
}const videoUrl = (equipmentCoding: string) => {let params = {equipmentCoding: equipmentCoding,};JSRequestInterface(equipmentCoding)
}-
pitchOns: 处理树形节点点击事件,根据节点类型调用相应的方法。 -
handleAddChild: 处理节点的子节点加载,请求子节点数据并展开节点。 -
videoUrl: 请求指定监控点的视频URL并播放视频。
2.12 暴露方法
defineExpose({initPlugin,JSHideWnd,JSShowWnd,JSRequestInterface
})-
defineExpose: 暴露组件的方法,供外部调用。
3. 样式部分
<style scoped lang="scss">
// 公共element样式
@import '@/styles/eleCustomize.scss';/* 样式 */
.play_windows {display: flex;width: 100% !important;.tree-form {width: 18vw;height: 28vw;overflow: auto;padding: 0;}
}
.videosp {width: 32vw;height: 60vh !important;#corpvideo {width: 100% !important;height: 100% !important;margin-top: 0.5vh;}#player-container-0 {width: 100% !important;height: 100% !important;}
}/* 屏幕宽度超过1920px时应用 */
@media (min-width: 8000px) {.play_windows {.tree-form {width: 10vw;height: 18vw;}}.videosp {width: 45vw;}
}::v-deep(.el-radio-button__inner) {width: 2vw;height: 1vw;display: flex;justify-content: center;align-items: center;font-size: 0.6vw;
}.video-button {width: 3vw;height: 1vw;display: flex;justify-content: center;align-items: center;font-size: 0.6vw;
}::v-deep(.el-radio-button__inner) {background: transparent !important;color: white !important;border: 0 !important;display: flex;align-items: center;height: 3.5vh !important;color: white !important;margin: 0.2vw;font-size: 1.6vh !important;background: transparent !important;border: 0.1vw solid #009392 !important;border-radius: 0.2vw !important;
}::v-deep(.el-radio-button__original-radio:checked + .el-radio-button__inner) {background: linear-gradient(90deg, rgba(0, 96, 204, 0.2) 0%, rgba(0, 165, 189, 0.6) 100%) !important;color: white !important;border-color: none !important;
}
</style>
子组件 ScreenMonitoring 主要实现了监控点的树形结构展示和视频播放控制。通过 el-tree 组件展示监控点的树形结构,并在节点被点击时调用视频播放插件的初始化和播放方法。子组件提供了 JSRequestInterface 方法请求视频流,initialize 方法初始化视频播放,以及 JSHideWnd 方法停止视频播放,确保视频监控功能的完整性和可控性。
父组件调用
1. 模板部分
<template><screenVideoDialog v-model="dialogVideo" title="公安监控" width="55%"  @close="onCloseDialog" @open="onOpenDialog":draggable="false"><div class="my_dialog_slot" style="height:60vh;" v-if="dialogVideo"><ScreenMonitoring ref="screenmonitoring" :dataTree="dataTree" :defaultProps="defaultProps" @handleSpjkPOIClick="handleSpjkPOIClick"  /></div></screenVideoDialog>
</template>-
<screenVideoDialog>: 这是一个自定义的对话框组件,用于显示视频监控内容。通过v-model绑定dialogVideo变量来控制对话框的显示和隐藏。 -
@close="onCloseDialog": 当对话框关闭时,调用onCloseDialog方法。 -
@open="onOpenDialog": 当对话框打开时,调用onOpenDialog方法。 -
<div class="my_dialog_slot">: 包含ScreenMonitoring子组件的容器,设置高度为60vh,并使用v-if指令确保只有在dialogVideo为true时才渲染。 -
<ScreenMonitoring>: 子组件,用于显示视频监控内容。通过ref绑定screenmonitoring变量,以便在父组件中调用子组件的方法。传递dataTree和defaultProps属性,并监听handleSpjkPOIClick事件。
2. 脚本部分
<script setup lang="ts">
import { ref } from 'vue';
import screenVideoDialog from '@/components/Dialog/screenVideoDialog.vue';
import ScreenMonitoring from '@/components/Dialog/screenMonitoring.vue';const dialogVideo = ref(false);
const dataTree = ref([// 树形结构数据
]);
const defaultProps = ref({children: 'children',label: 'label'
});
const screenmonitoring = ref<InstanceType<typeof ScreenMonitoring> | null>(null);// 处理监控点点击事件
const handleSpjkPOIClick = (poiId: string, coord: string) => {let params = {UnitIndexCode: poiId};screenmonitoring.value?.JSRequestInterface(poiId);// getGetByCodes(params).then(res => {//   setTimeout(() => {//     screenmonitoring.value?.initialize(res.data.urls[0], res.data.urls);//   }, 1000);// });
};// 关闭对话框时停止视频
const onCloseDialog = (e: any) => {screenmonitoring.value?.JSHideWnd();
};// 打开对话框时初始化视频
const onOpenDialog = (e: any) => {screenmonitoring.value?.initPlugin();
};
</script>-
dialogVideo: 一个响应式变量,用于控制对话框的显示和隐藏。 -
dataTree: 树形结构的数据,用于传递给ScreenMonitoring子组件。 -
defaultProps: 树形组件的默认属性,用于传递给ScreenMonitoring子组件。 -
screenmonitoring: 一个响应式变量,用于存储ScreenMonitoring子组件的实例,以便在父组件中调用其方法。 -
handleSpjkPOIClick: 处理监控点点击事件的方法。当用户点击某个监控点时,会调用子组件的JSRequestInterface方法,并传递poiId参数。注释掉的部分是获取视频 URL 的逻辑,可以根据实际需求启用。 -
onCloseDialog: 当对话框关闭时调用的方法。调用子组件的JSHideWnd方法,停止视频播放。 -
onOpenDialog: 当对话框打开时调用的方法。调用子组件的initPlugin方法,初始化视频播放。
3. 样式部分
<style scoped>
.my_dialog_slot {display: flex;justify-content: center;align-items: center;height: 100%;
}
</style>-
.my_dialog_slot: 设置对话框内容的样式,确保内容居中显示。
通过上述代码,我们在父组件中实现了视频监控对话框的显示和隐藏,并在对话框打开和关闭时调用子组件的相应方法,以控制视频的播放和停止。
本文详细介绍了如何使用 Vue 3 框架集成海康Web插件实现视频监控功能。通过定义属性、事件、变量,以及编写初始化、播放视频、处理节点点击事件等方法,我们成功实现了视频监控系统的前端部分。同时,通过样式部分的定制,确保了良好的用户体验。希望本文对读者在开发类似项目时有所帮助。
